

Renovation Contractor Digital Business Card with Calculator: Full Step-by-Step Cowculator Template
In this article, we walk through the full process of building a template for a renovation contractor or a small renovation team: from the profile card with photo and social links to the preliminary renovation calculator, technical formulas, conditional logic, public page, QR code, and deep link.
This is not a full final quote without seeing the property. It is a strong first step: the customer sees who you are, what you do, gets a preliminary budget range, and sends a lead with the most important project details.
- Creating the business card: photo, name, role, contacts, and intro.
- Using a smart image for different property types.
- Core calculator fields.
- A dedicated branch for full renovation.
- A dedicated branch for partial works.
- Technical formulas for budget and timeline.
- Lead form, branding, publishing, QR code, and deep links.
Open the ready-made template
You can test the template in Cowculator right away or request free setup if you want to adapt a similar flow for your own business faster.
Why this format works for renovation services
In renovation, the first question is almost always: “How much will it cost?” But the contractor has not seen the property yet, does not know the real condition of walls, flooring, utilities, demolition needs, or finish details. That means giving one exact number upfront is usually the wrong approach.
A preliminary budget range is much more realistic. That is exactly what this template is designed for: it does not replace an on-site visit, but it helps qualify the lead faster.
As a business card
It includes a photo, name, specialization, location, contacts, social links, and a short presentation of the team.
As a calculator
The customer enters the area, property type, renovation format, property condition, and required work scope.
As lead generation
After the estimate, the user leaves a request, and the team receives a more qualified lead before the first call.
1. Build the core digital business card
We start with the “Business Card” section. At this point, the template is still clean: only the structure and a future place for the contractor photo or team logo.
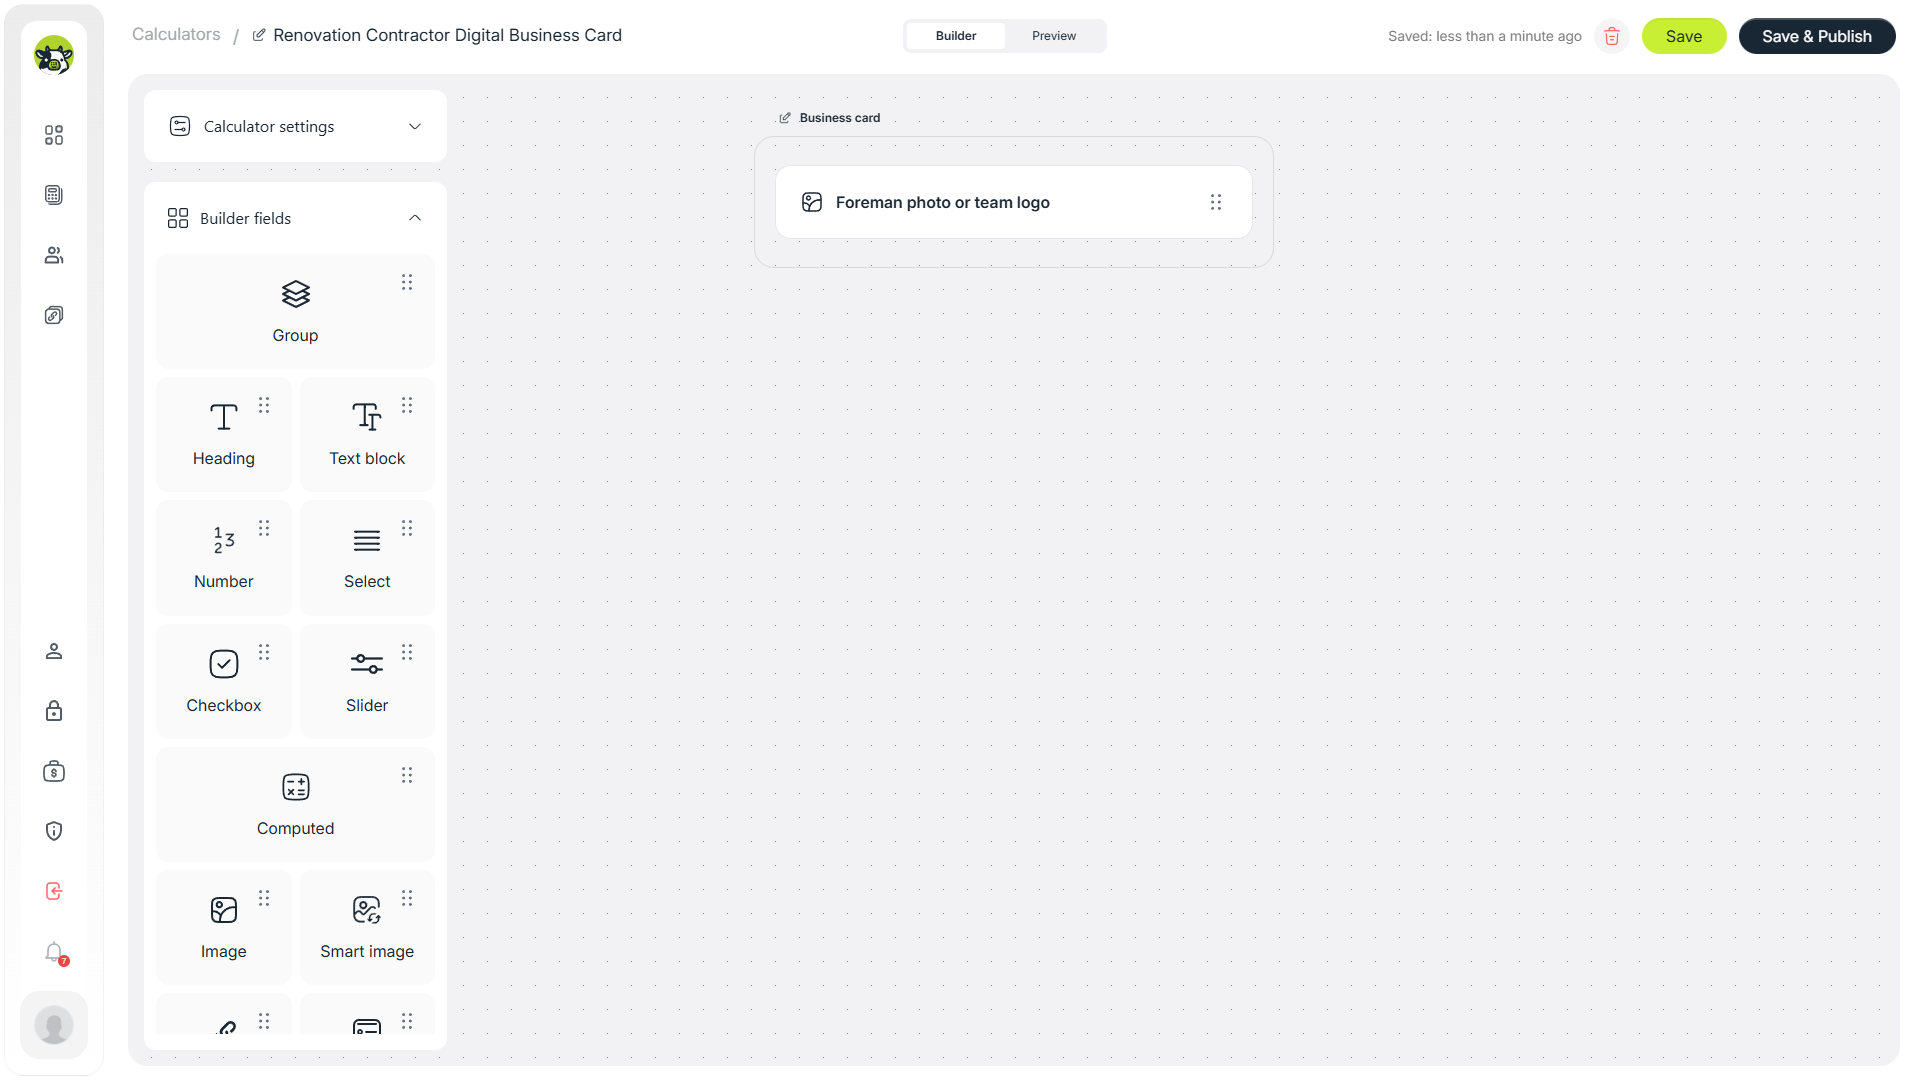
The initial state of the template inside the Cowculator builder.
Then we set the image field. For this kind of use case, a real contractor photo or a recognizable team logo works better than generic stock imagery. It builds trust, especially when the link is shared via messenger.
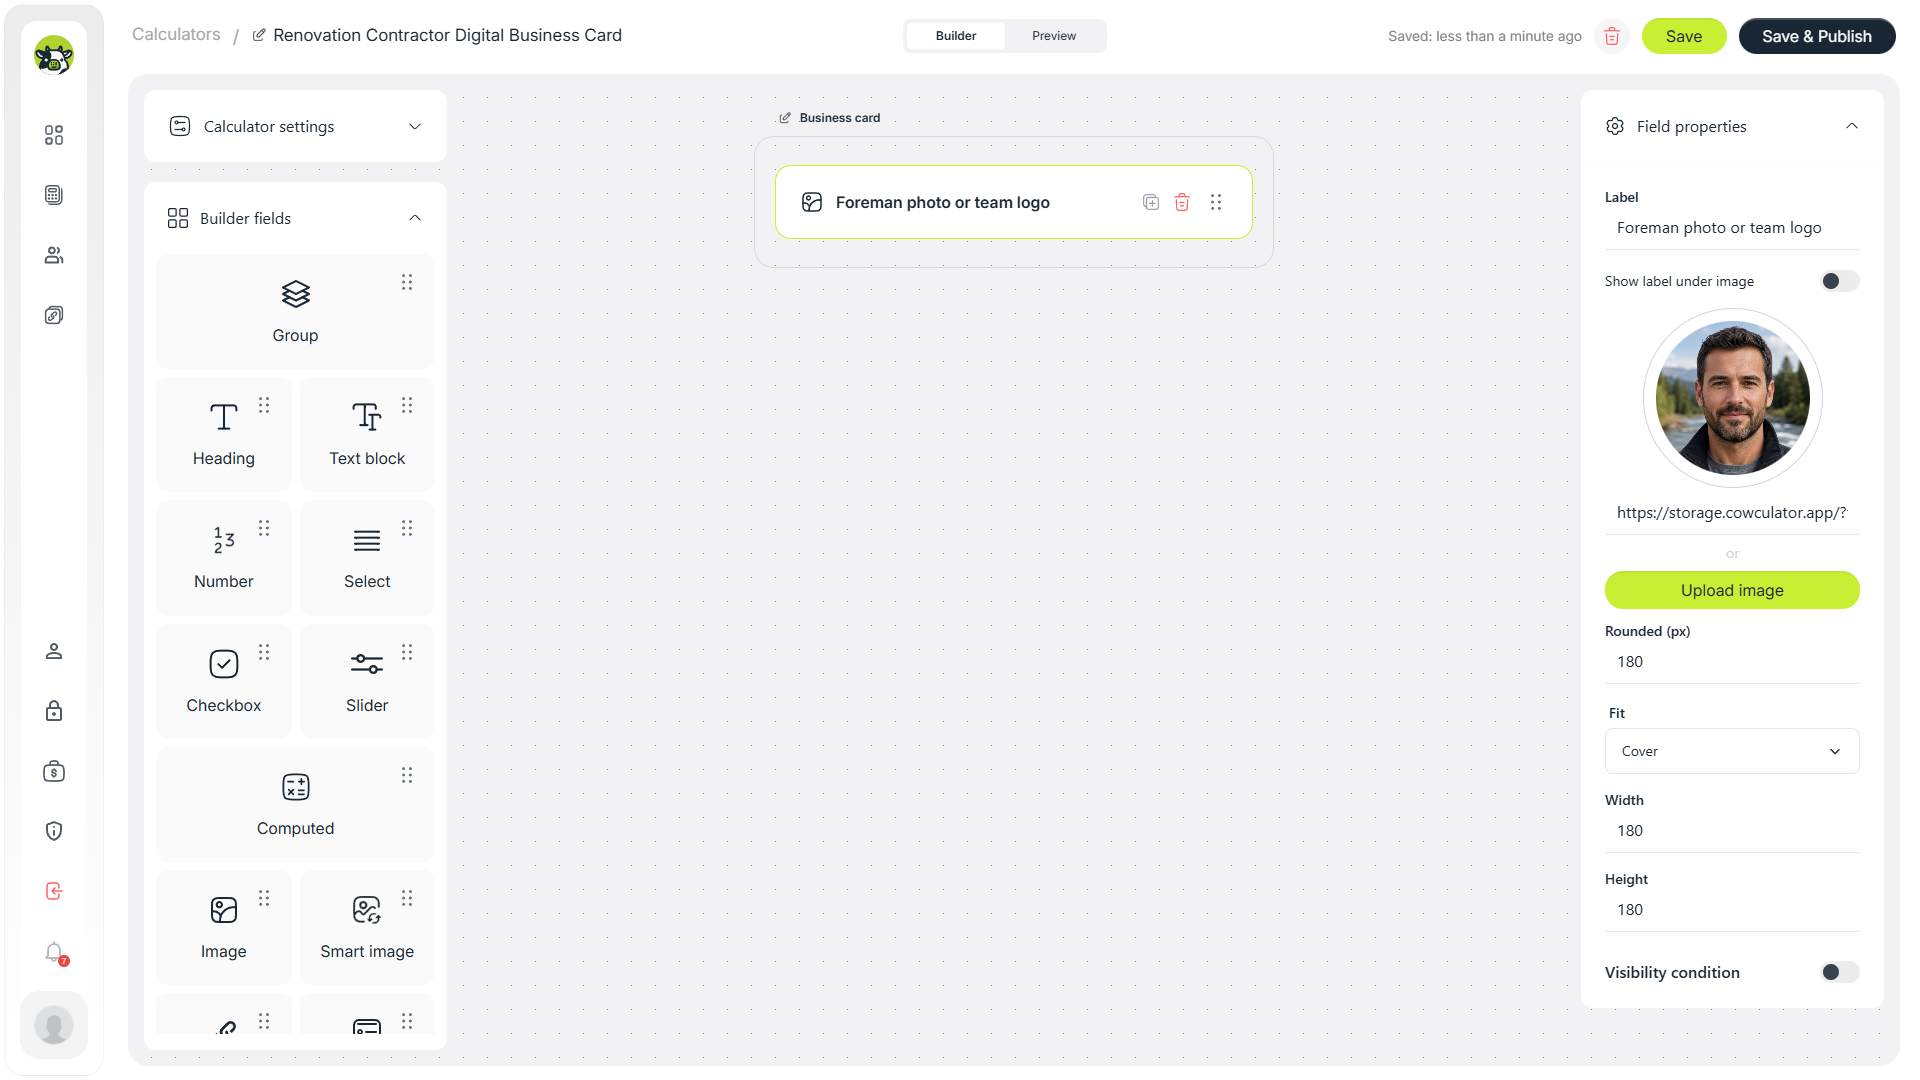
Image settings in the right-side field panel.
After that, we add the name. In the demo it can be something like John Miller, but in a real template this can be the name of the contractor, the team lead, or the renovation business itself.
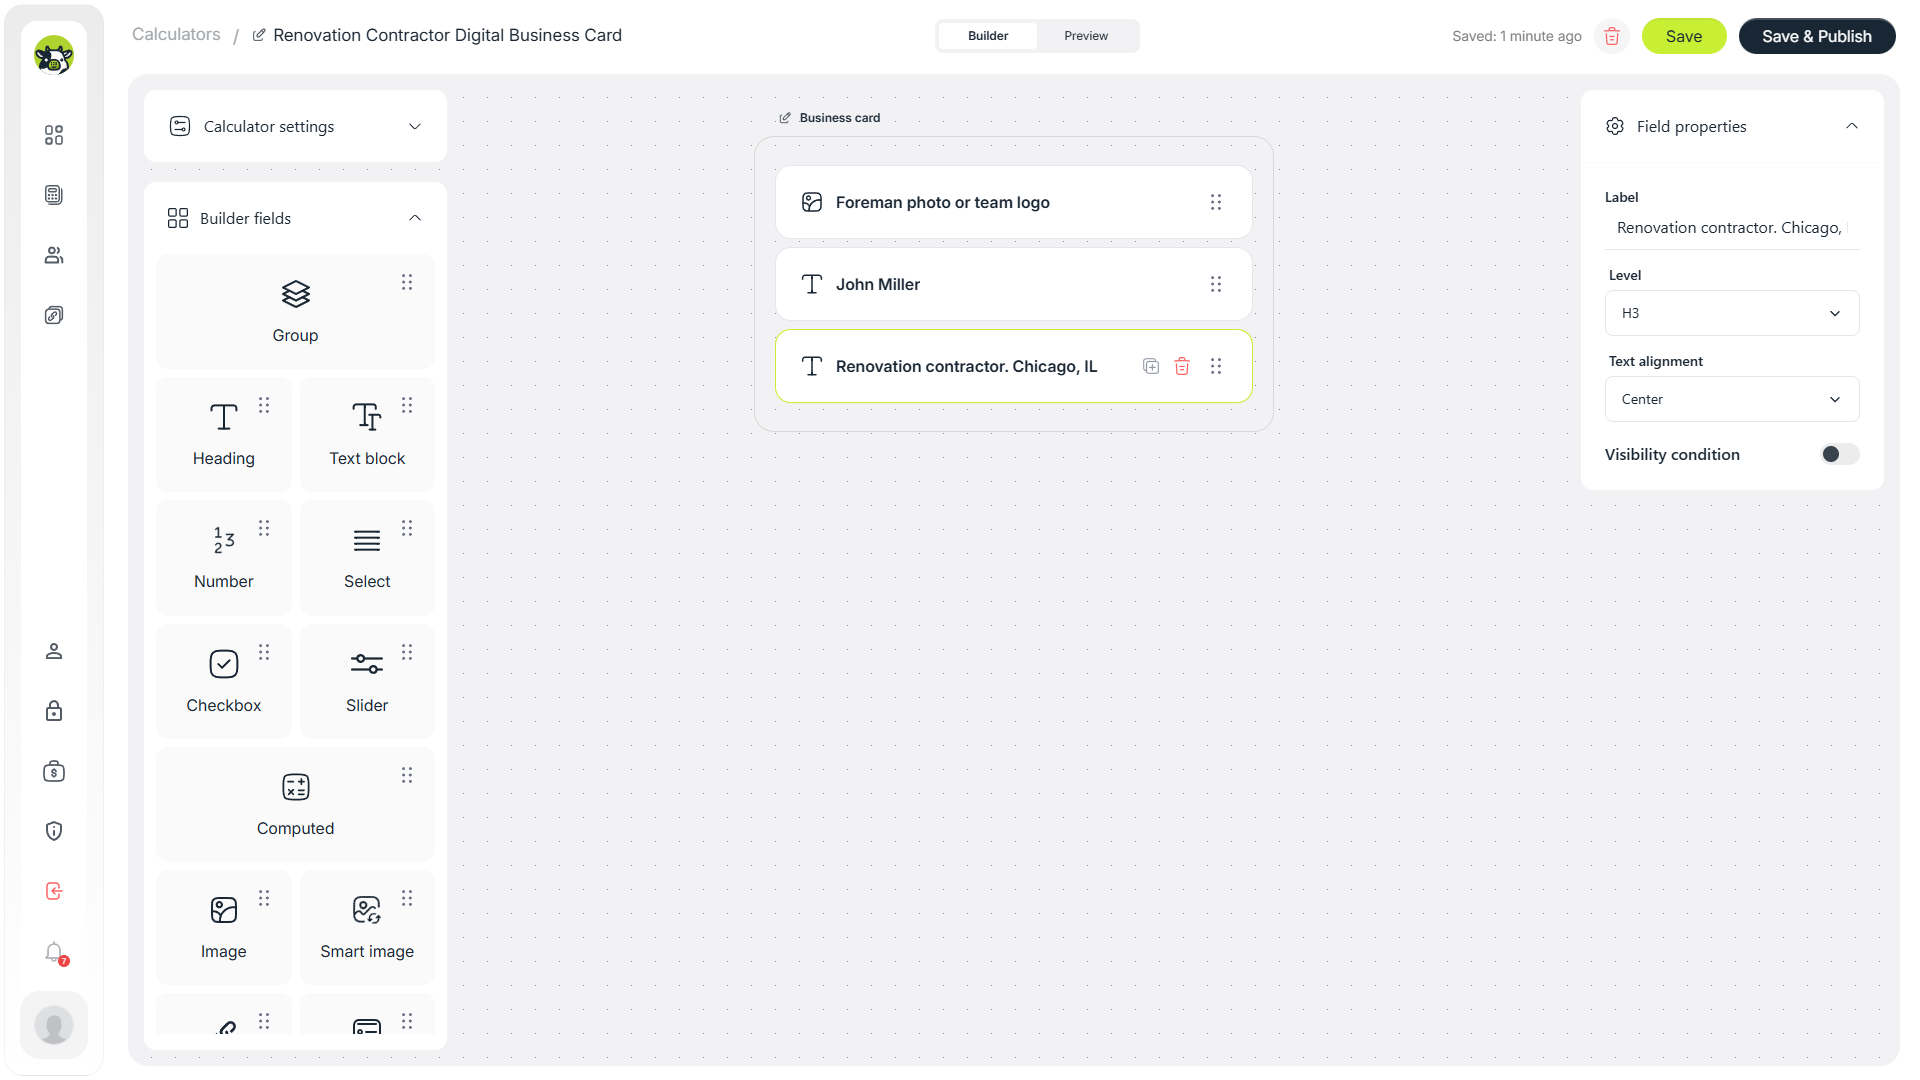
The name field makes the page feel personal instead of generic.
The next line is the role and location. For example: “Renovation contractor. Chicago, IL.” This helps the visitor instantly understand who the service is for and where it is available.
Role and location quickly communicate relevance to the visitor.
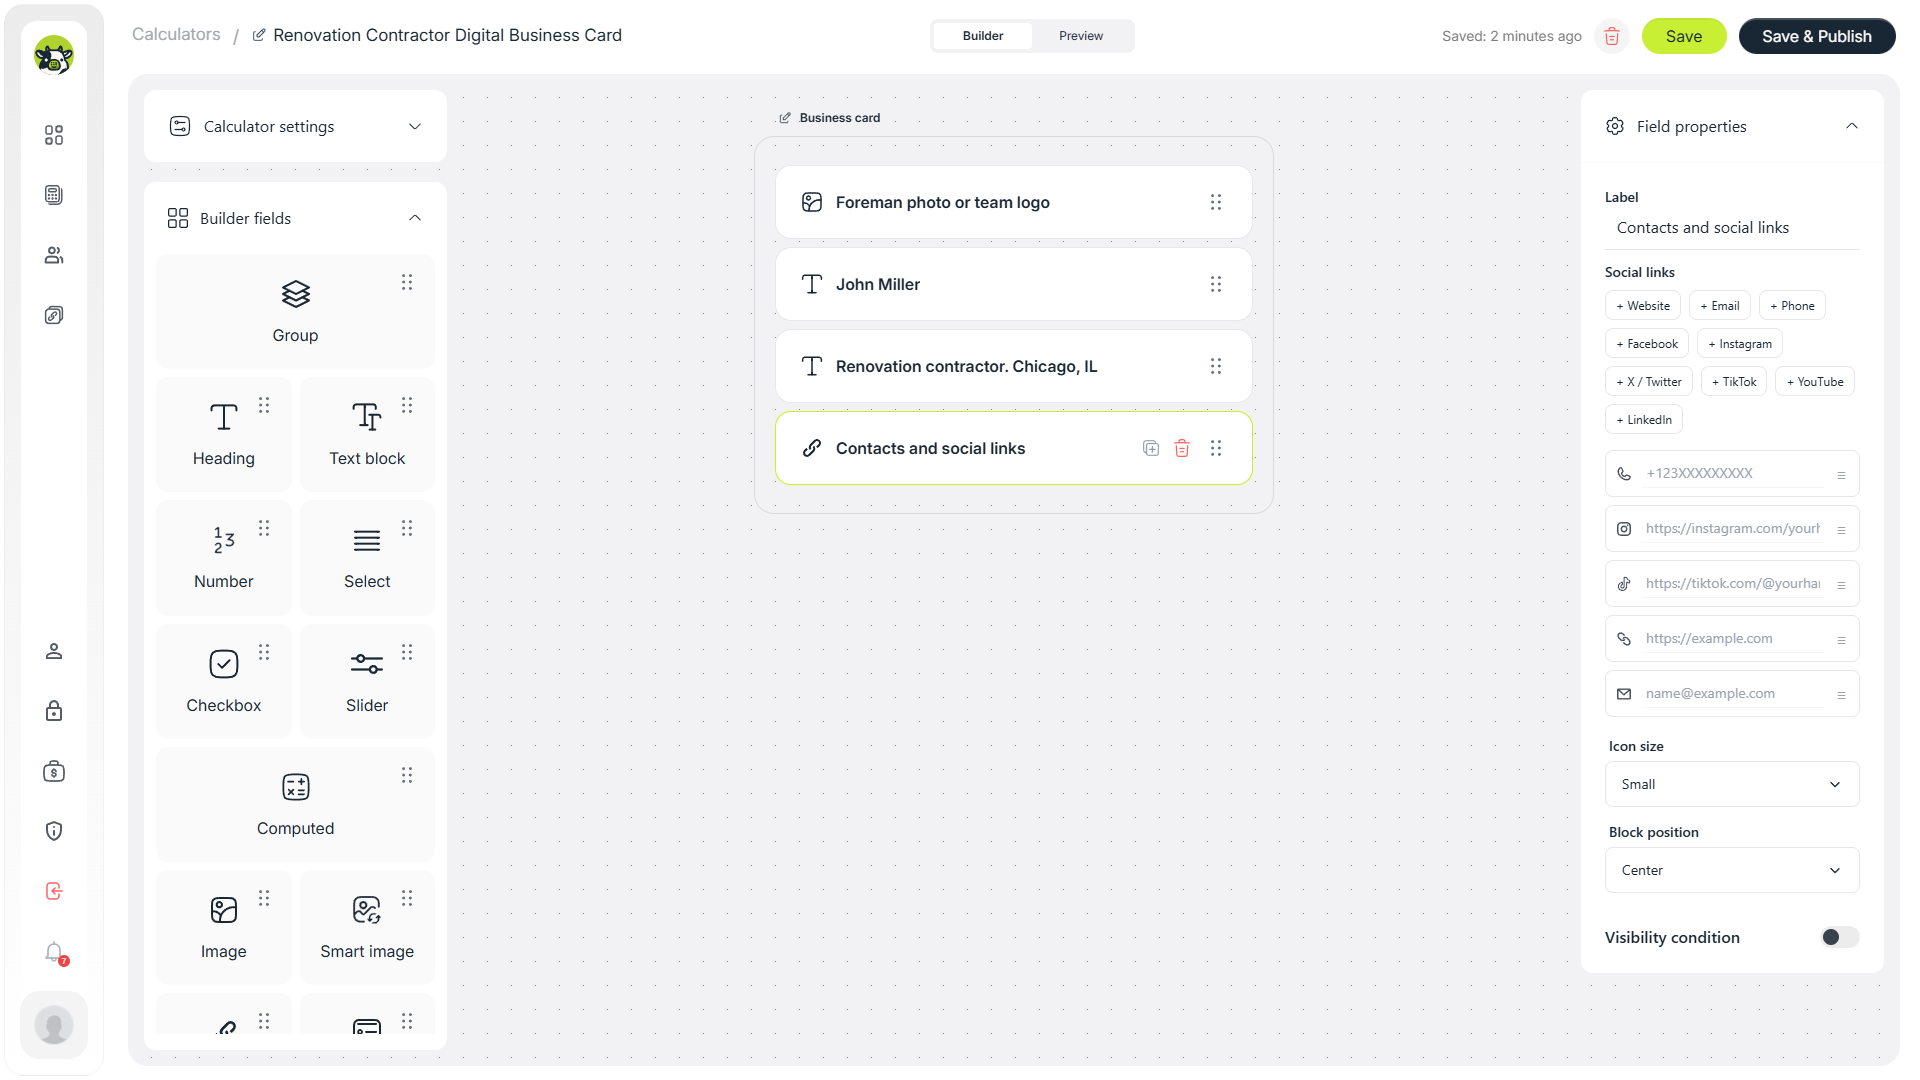
Then we configure social and contact links. For this type of business, that may include phone, Telegram, Instagram, website, email, TikTok, or whatever channels the contractor actively uses.
Social links work as fast contact buttons on the page.
Next, we add a banner and a short team presentation section. This is a good place to show a renovation-related visual: a project photo, a before/after image, or a service banner.
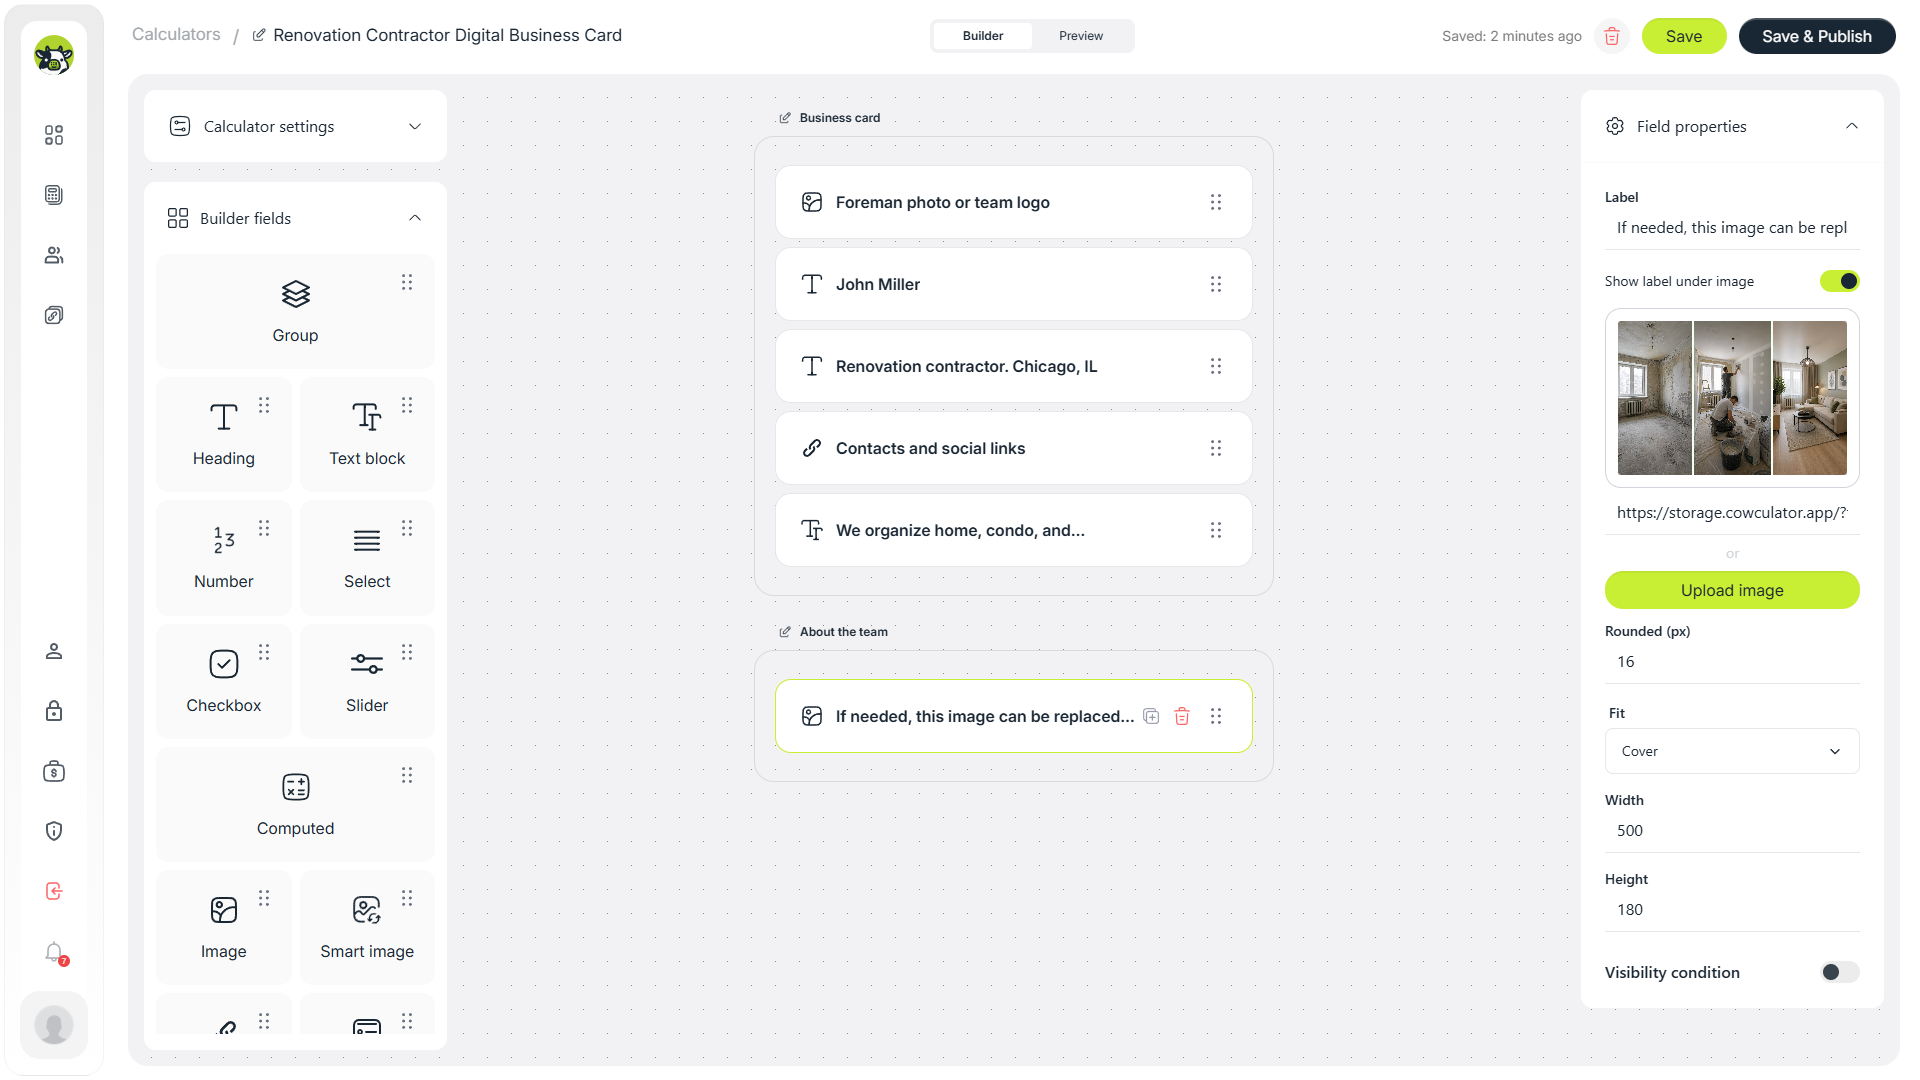
A banner in the team section makes the page more visual and engaging.
The text block should stay short. Instead of writing a long company story, it is better to explain what types of renovation projects the team takes on and what the visitor can do next.
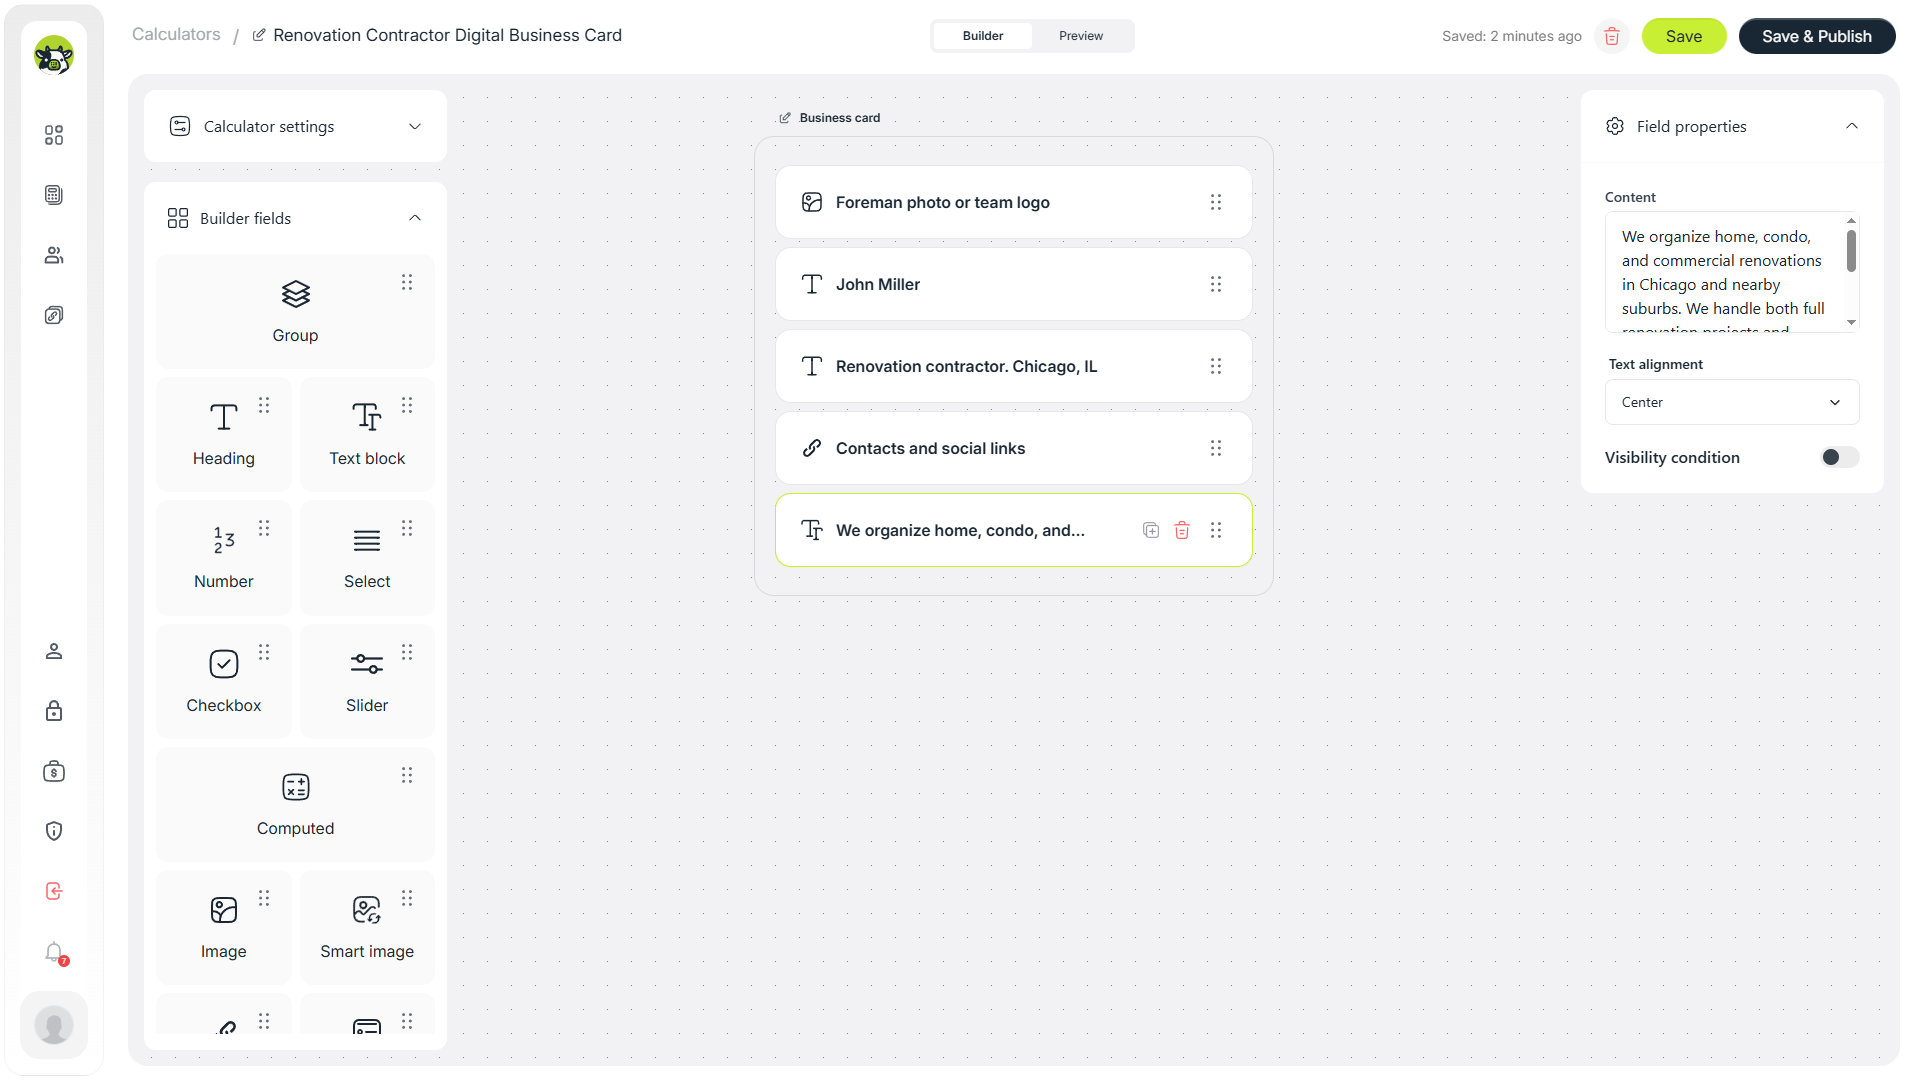
A short team introduction builds trust before the calculator starts.
2. Add a smart image for the property type
The template includes a “Property type” field: condo/apartment, house, office, or commercial space. To make the page respond to user input visually, you can use a smart image: different visuals appear under different conditions.
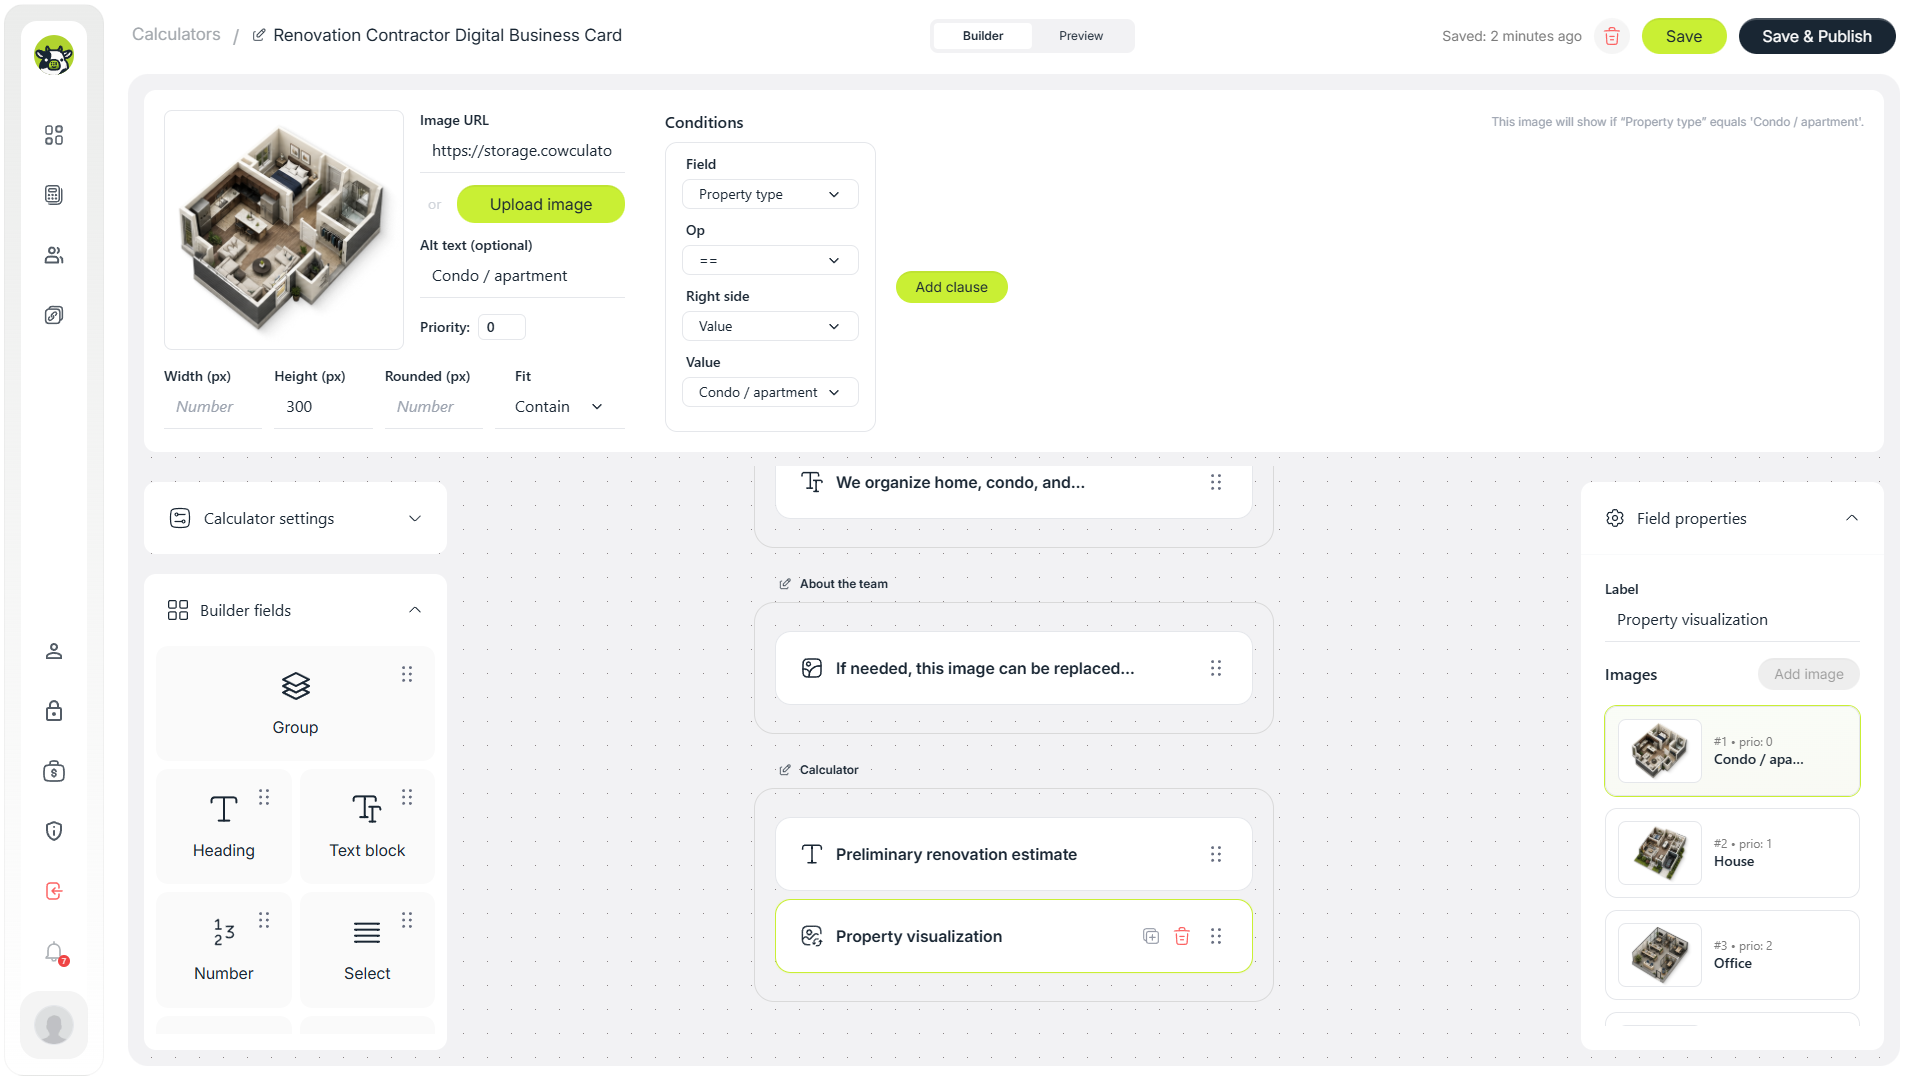
The first smart image condition shows an apartment visual when the selected property type is an apartment.
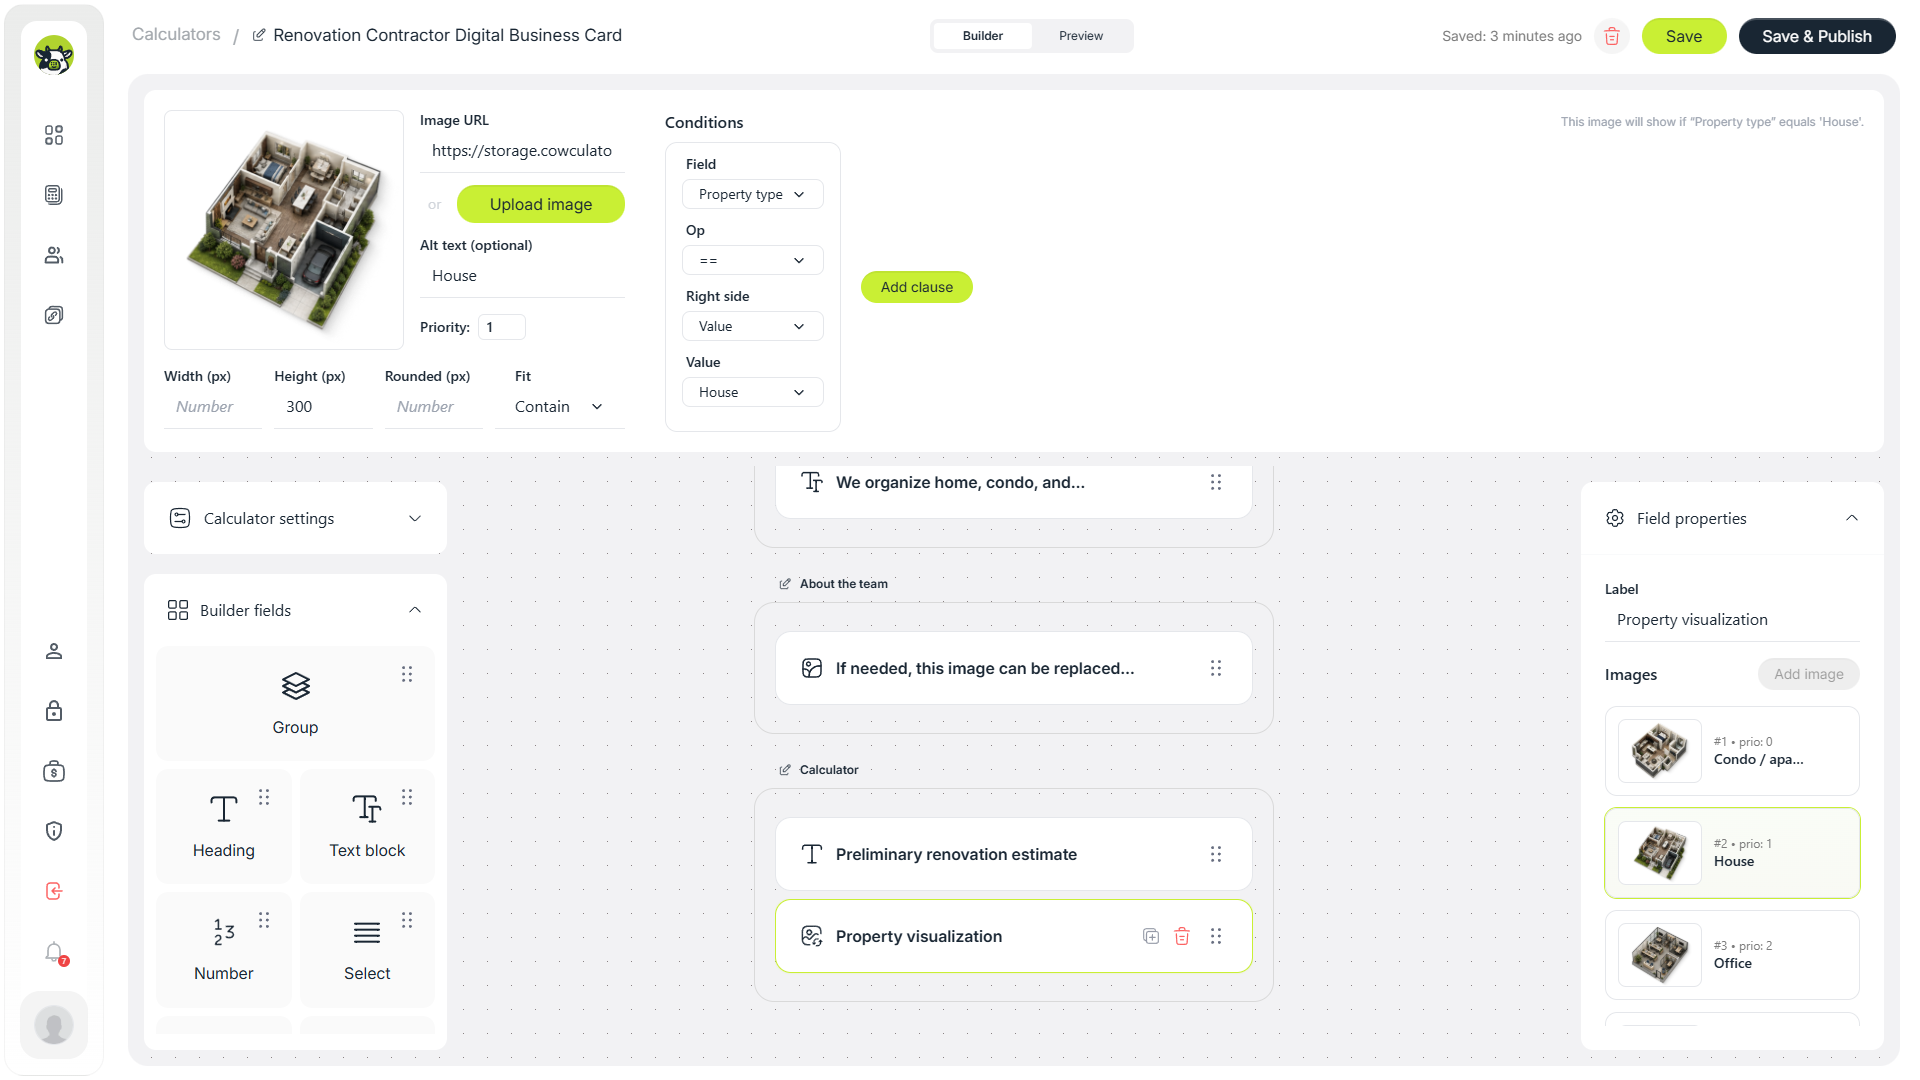
A separate smart image condition for the house scenario.
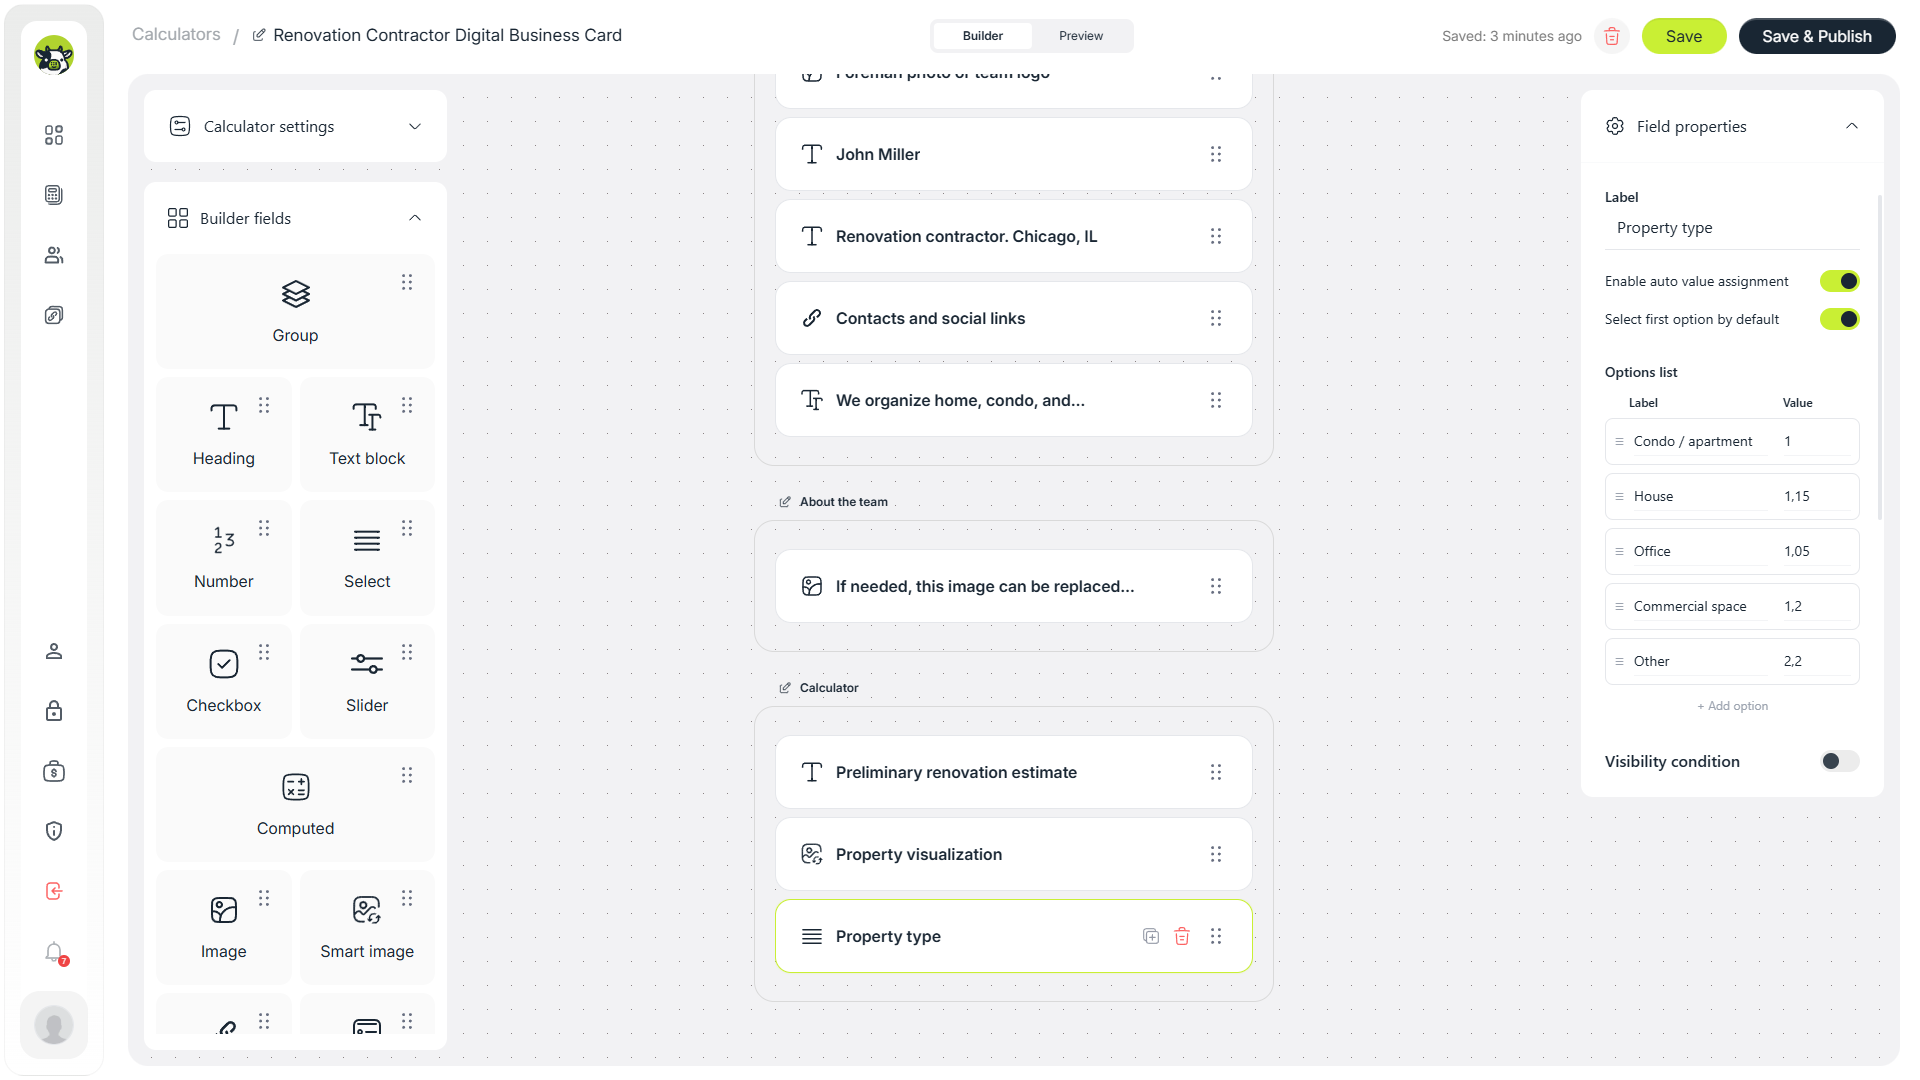
Another smart image condition for the office scenario.
The smart image does not directly change the formula, but it improves the perceived quality of the template. The page feels responsive and tailored to the user’s choices rather than static.
3. Configure the core calculator fields
Now we move into the calculator itself. The key is to avoid asking too much. The contractor still has not seen the property, so the calculator should collect only the fields that are genuinely useful for a preliminary estimate.
Area
Area is the main variable for most renovation formulas. In the English version, it makes sense to use square feet instead of square meters.
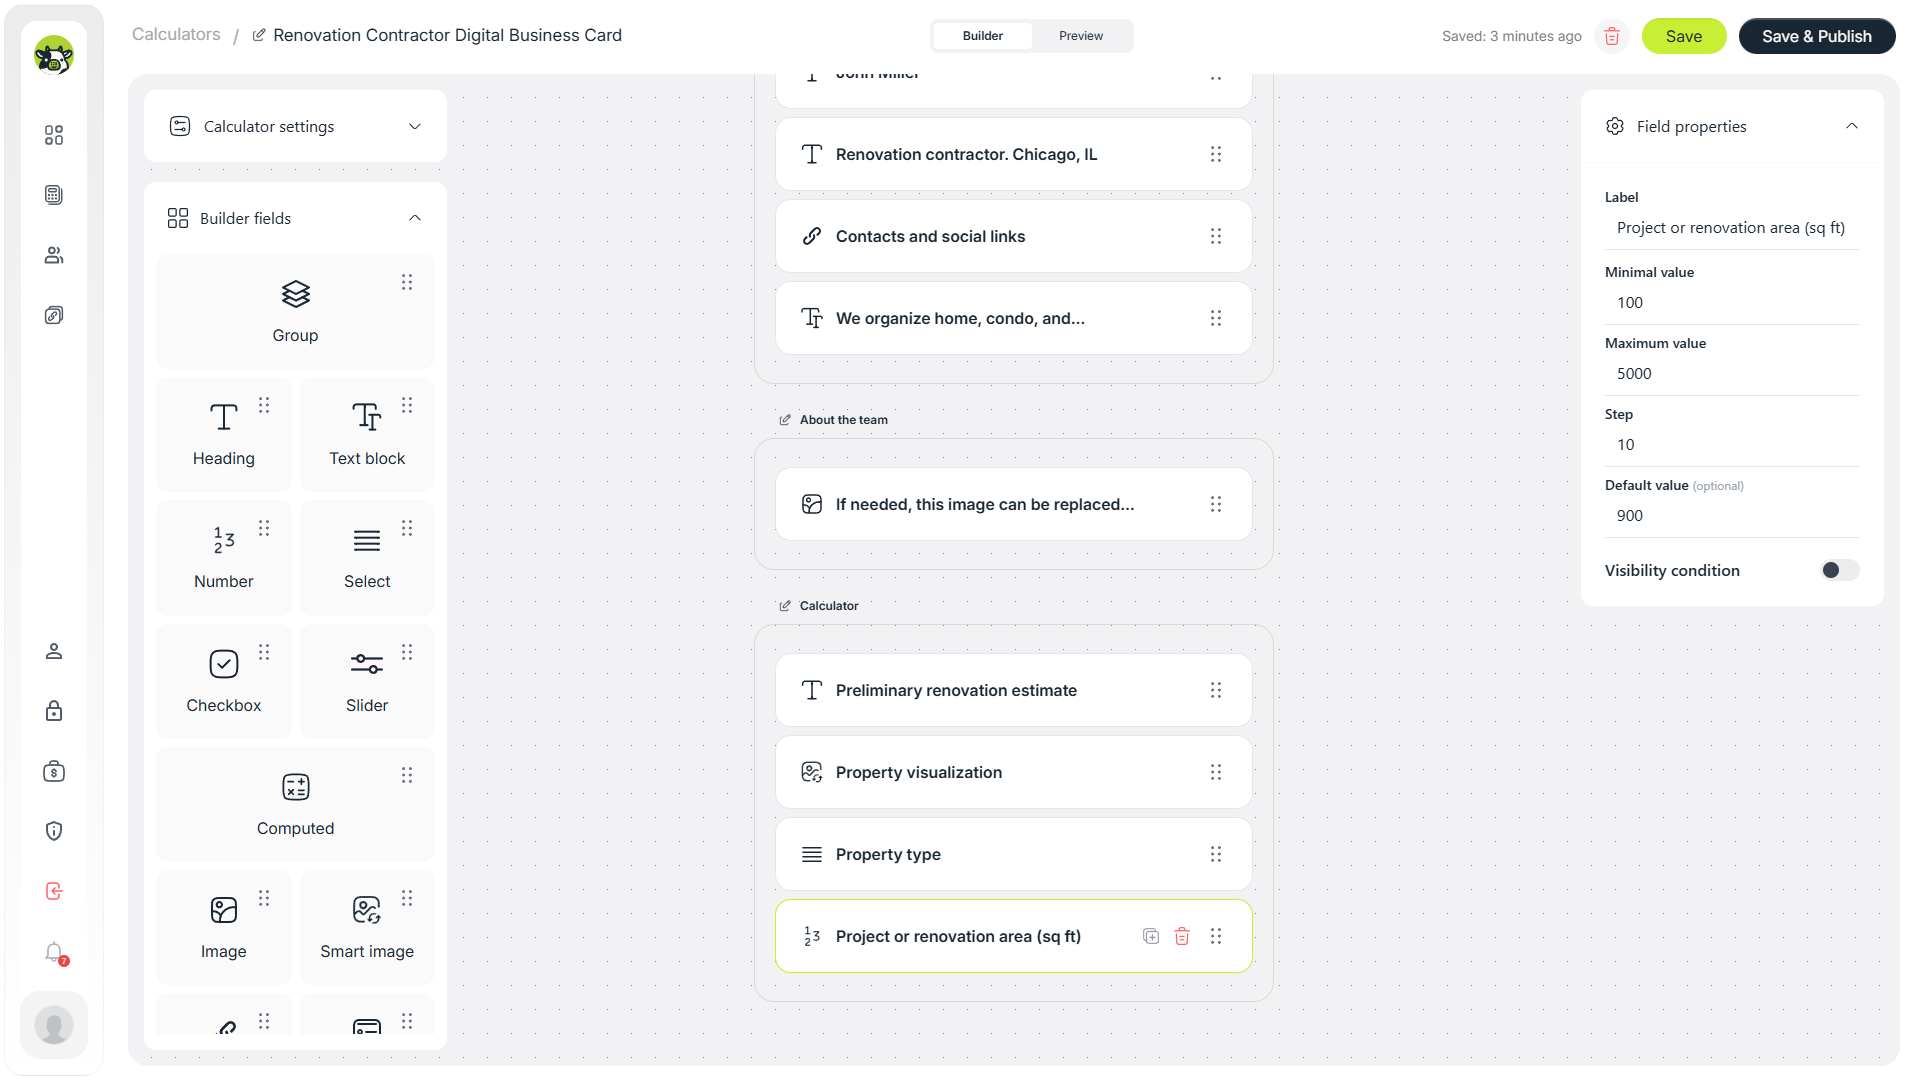
The area field includes minimum, maximum, and default values.
Wall height
Wall height is useful for estimating wall surface area. It is not a precise architectural measurement, but it works well enough for a preliminary estimate.
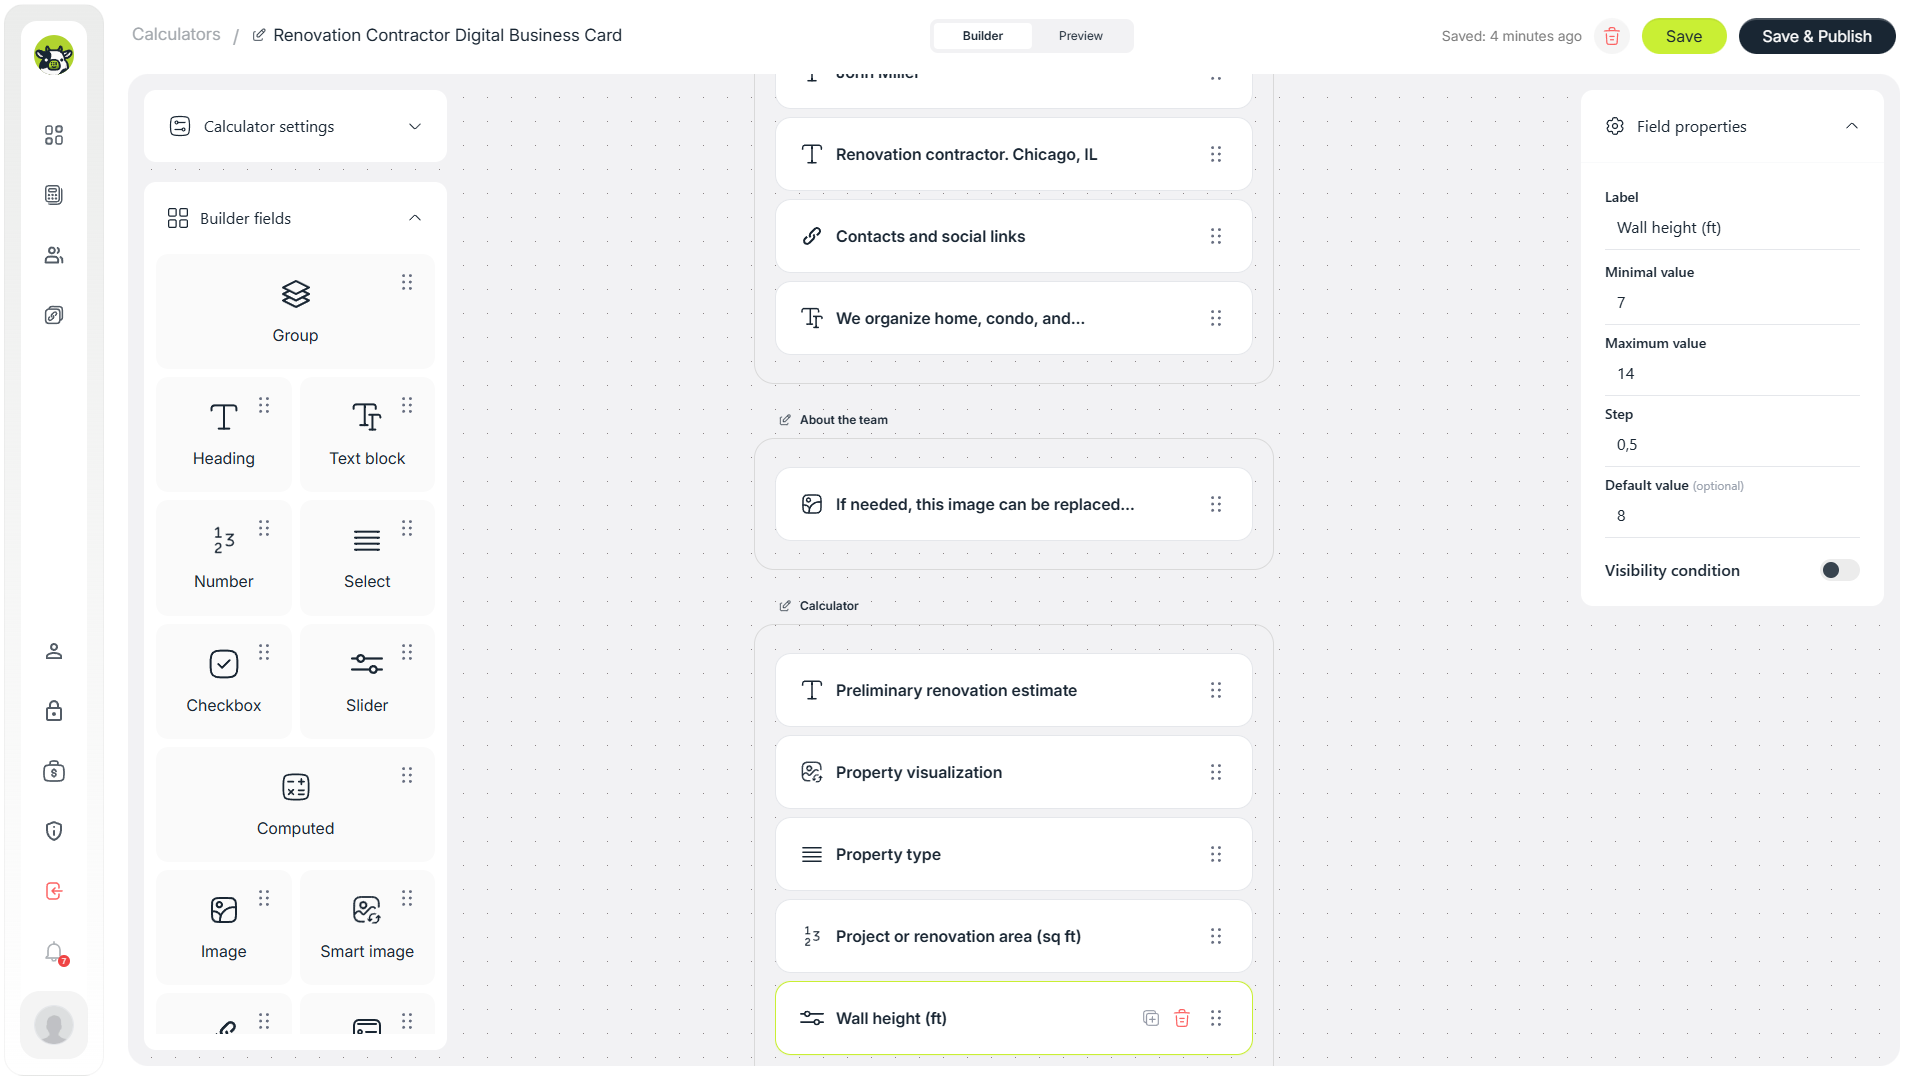
The wall height slider is used inside the helper wall area formula.
Estimate format
The most important field in the template is the estimate format. The user chooses between full renovation and partial works. This choice controls what sections appear next.
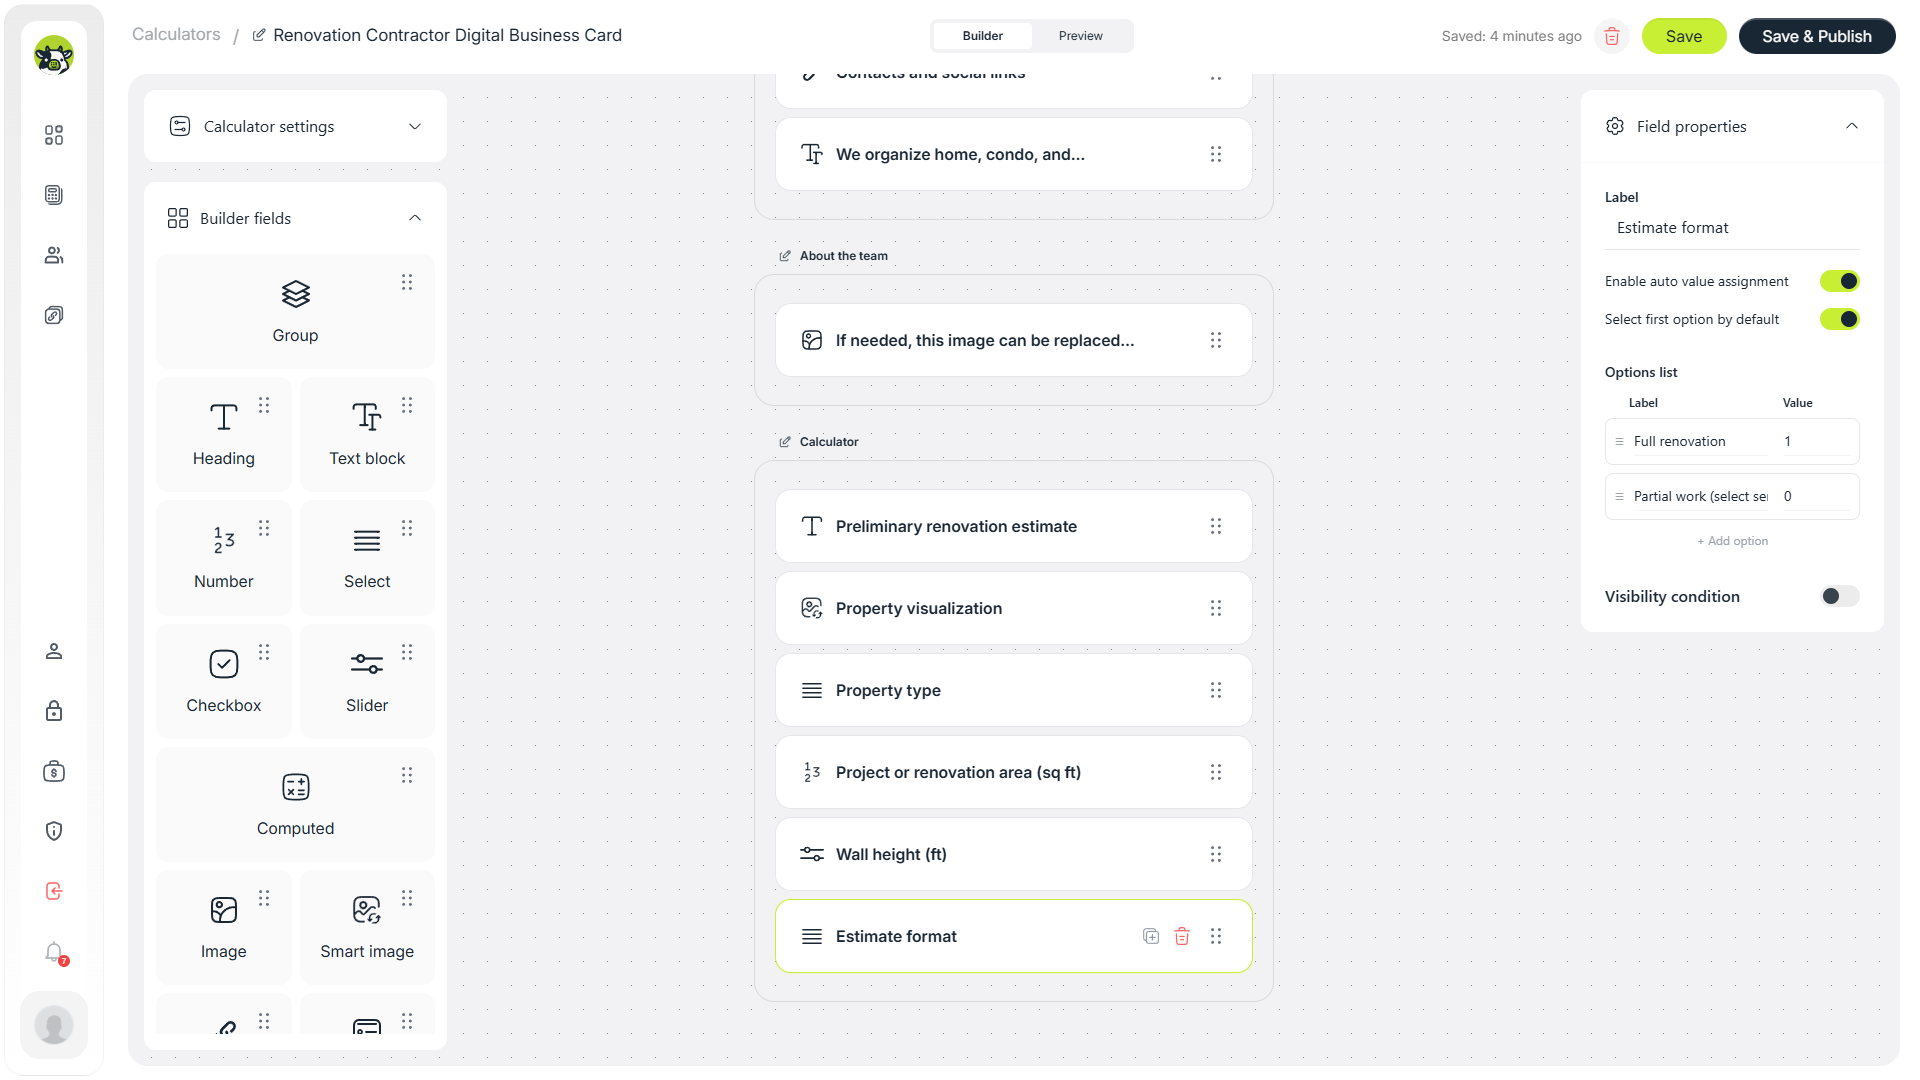
This select field controls the main branch of the user flow: full renovation or partial works.
Property condition
Property condition affects how difficult the renovation is. A new build without finishing, a resale property in decent condition, or a space with heavy demolition needs all lead to different estimate ranges.
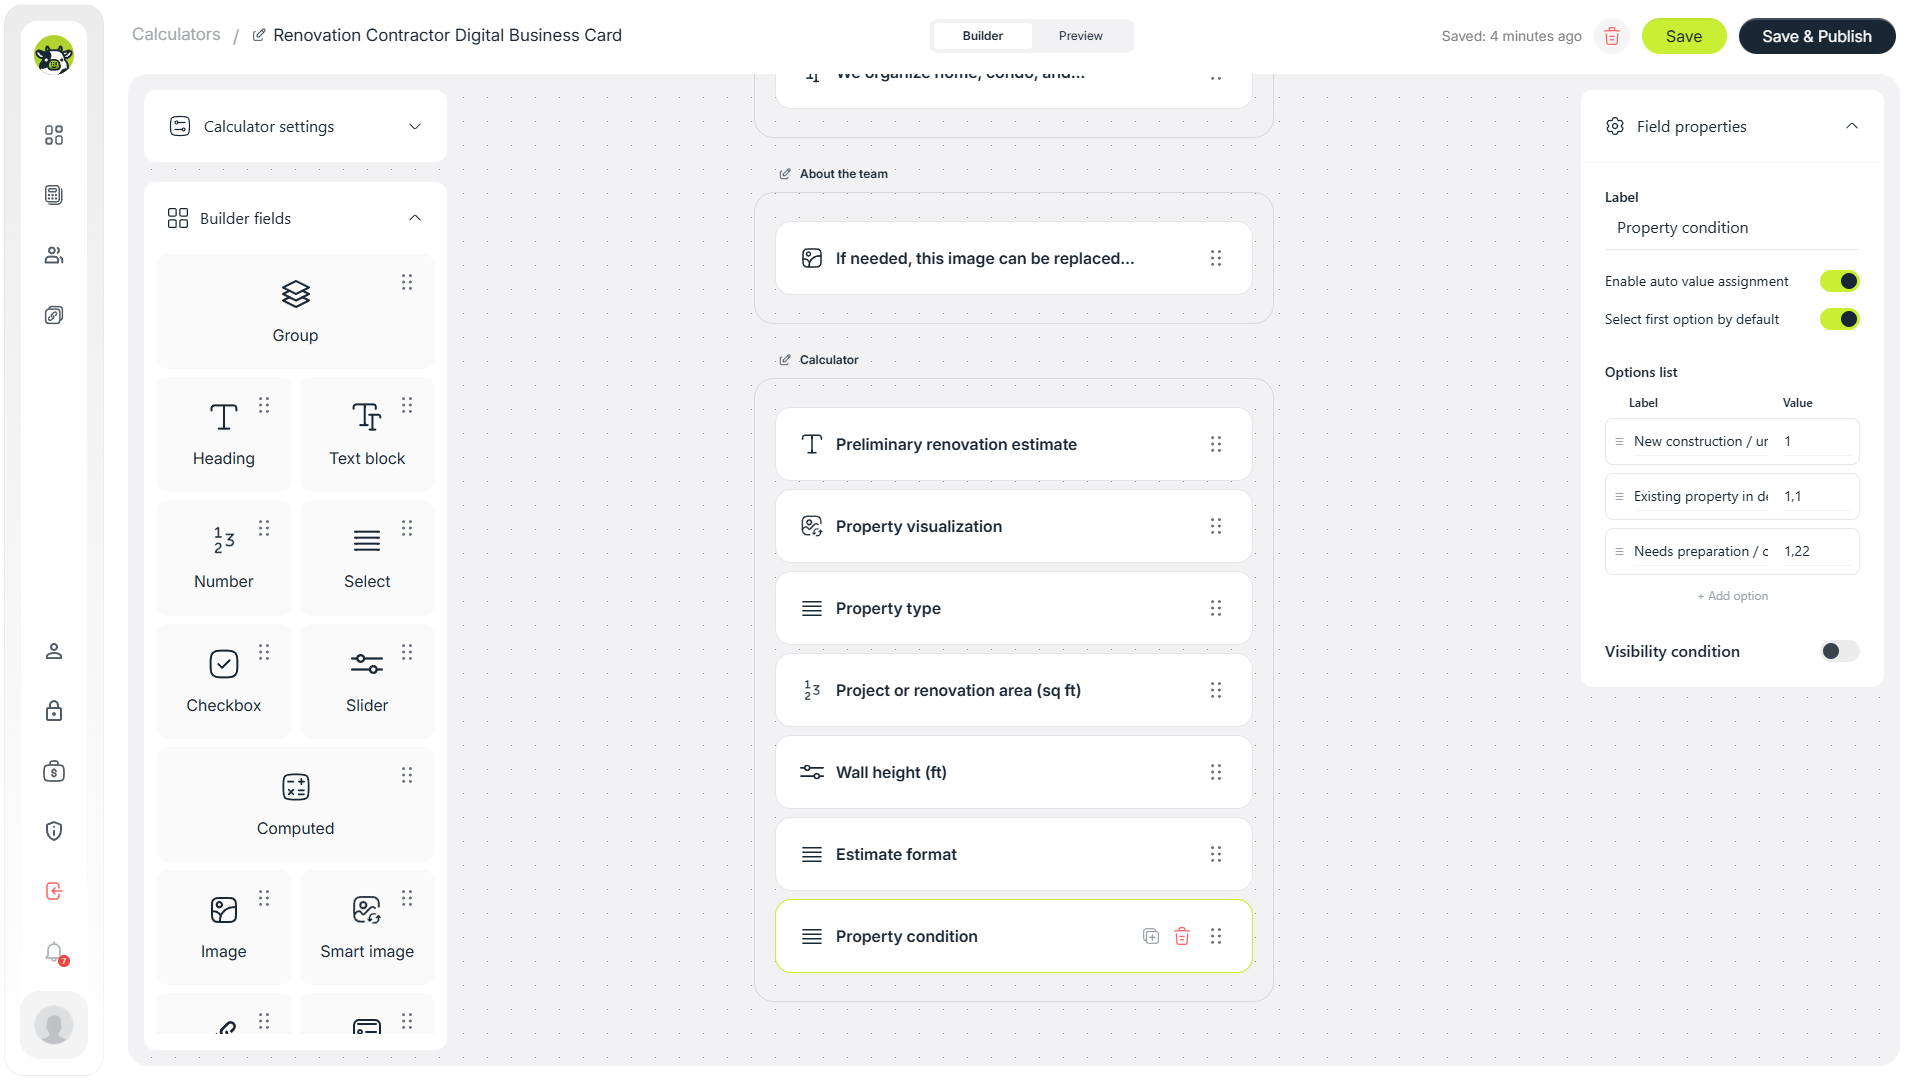
The property condition is used as a factor inside the estimate logic.
Demolition works
Demolition is worth keeping as a separate checkbox. Even in a preliminary estimate, it can significantly affect both budget and timeline.
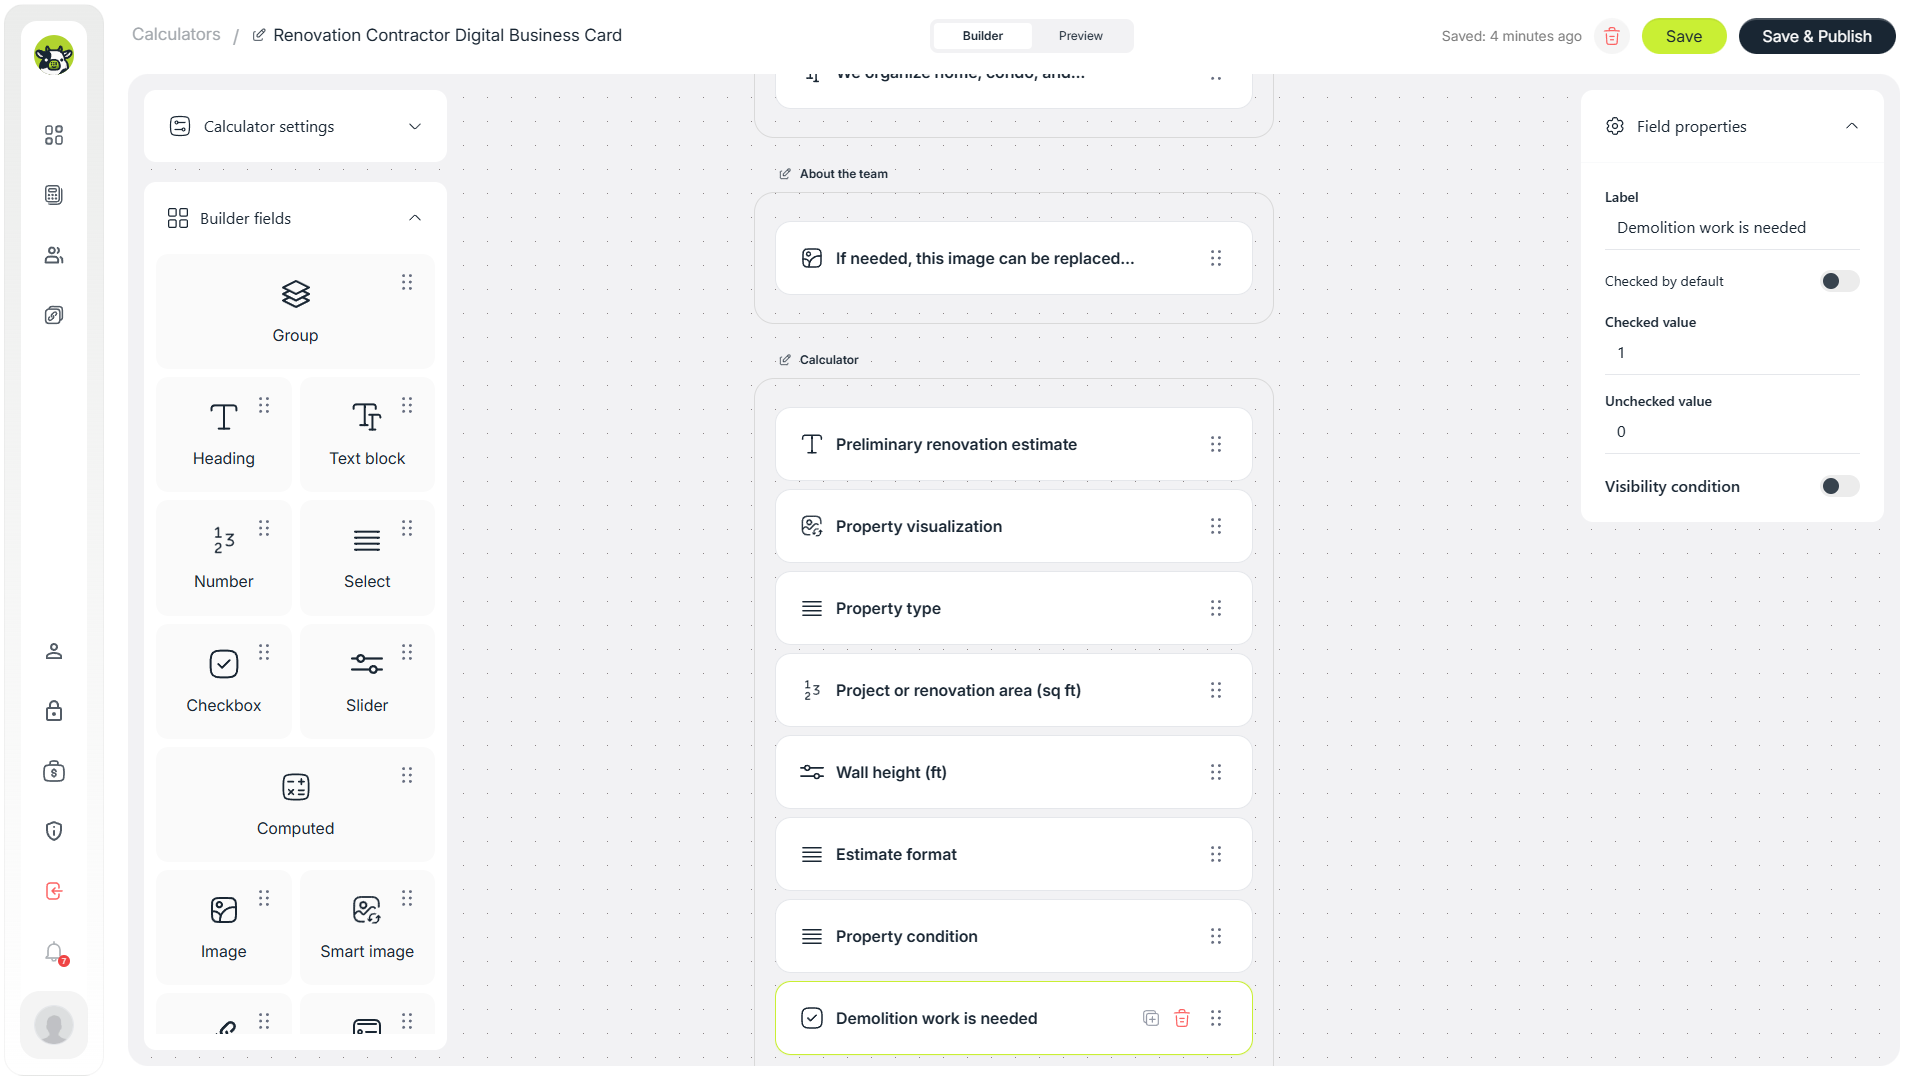
The demolition checkbox adds a separate technical cost layer to the calculation.
4. Add the “Full renovation” branch
When the user selects “Full renovation,” the calculator reveals a dedicated section with additional inputs. The goal is not to turn the business card into a heavy quote system, so only a few strong fields are enough.
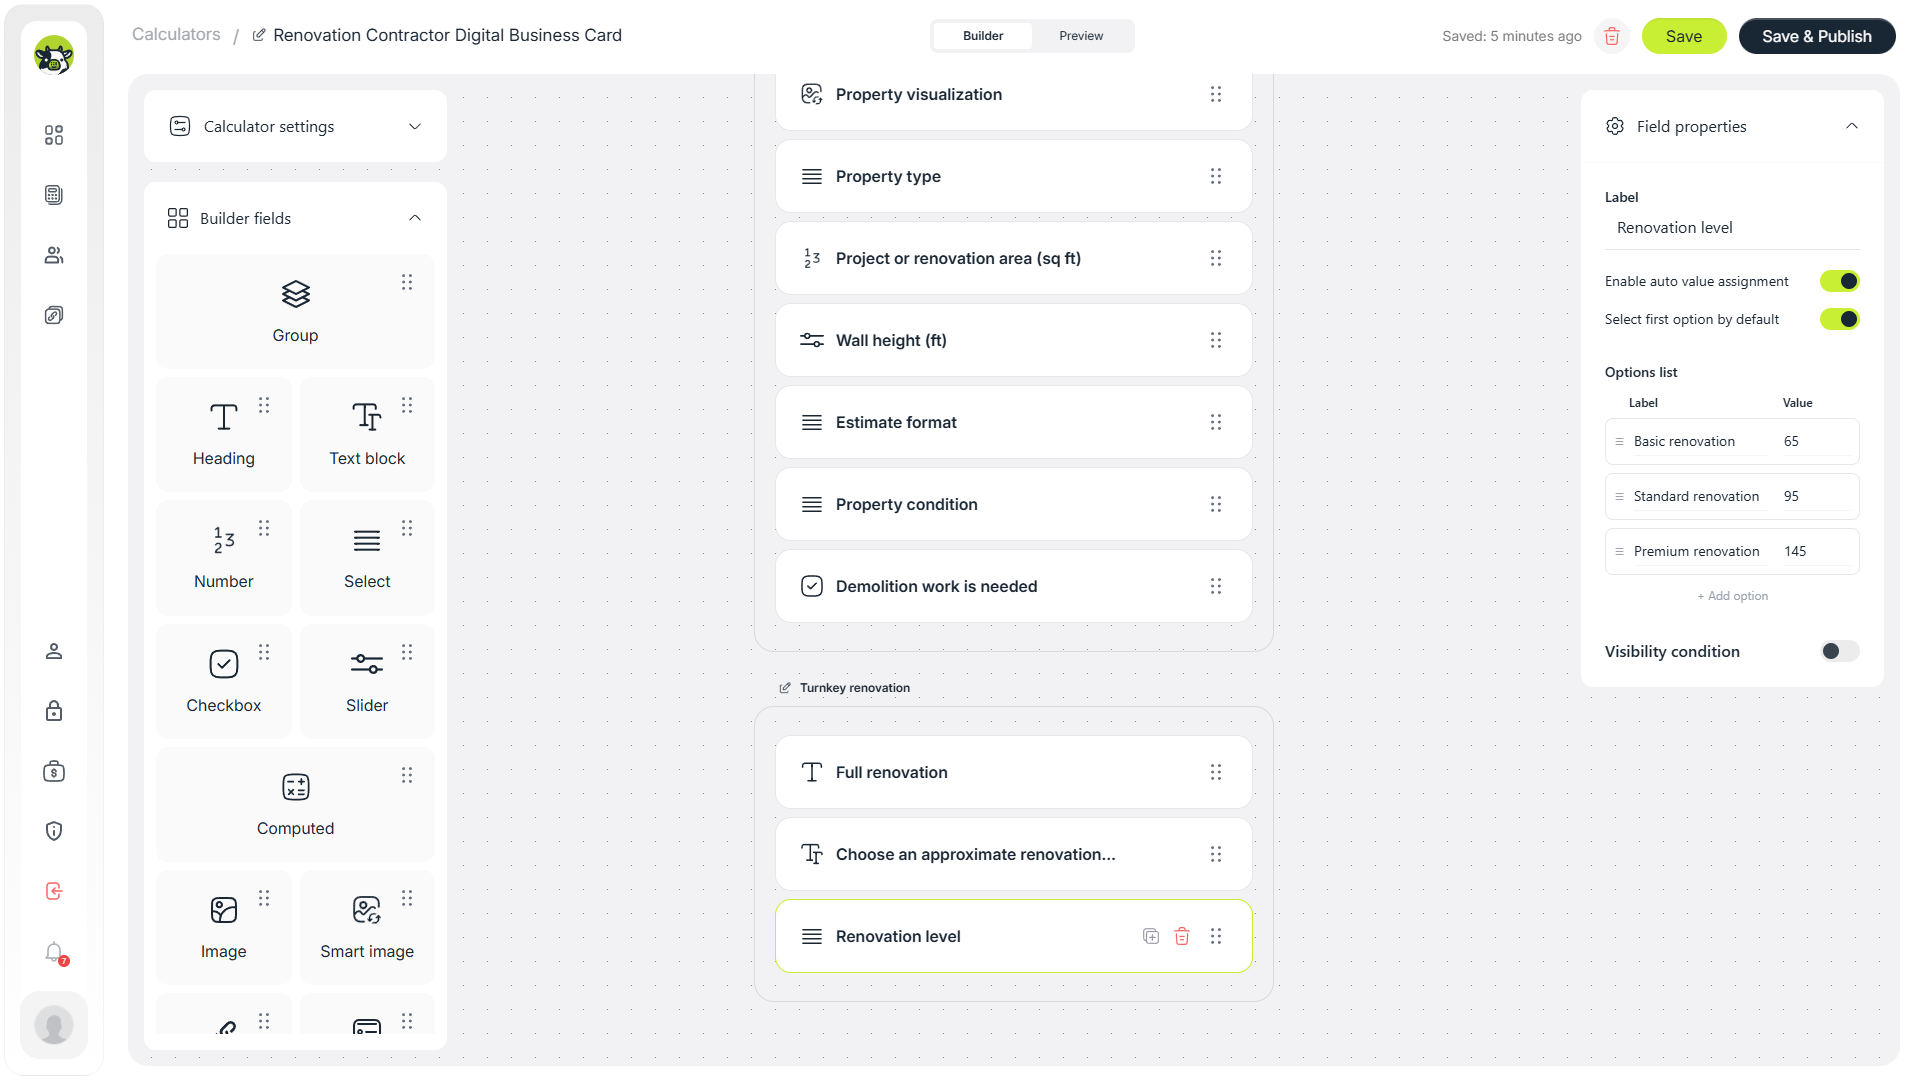
The full renovation section appears only for the matching estimate format.
Renovation level
The renovation level can be basic, standard, or premium. In the formula, this can act as a rate per square foot or as a multiplier depending on your structure.
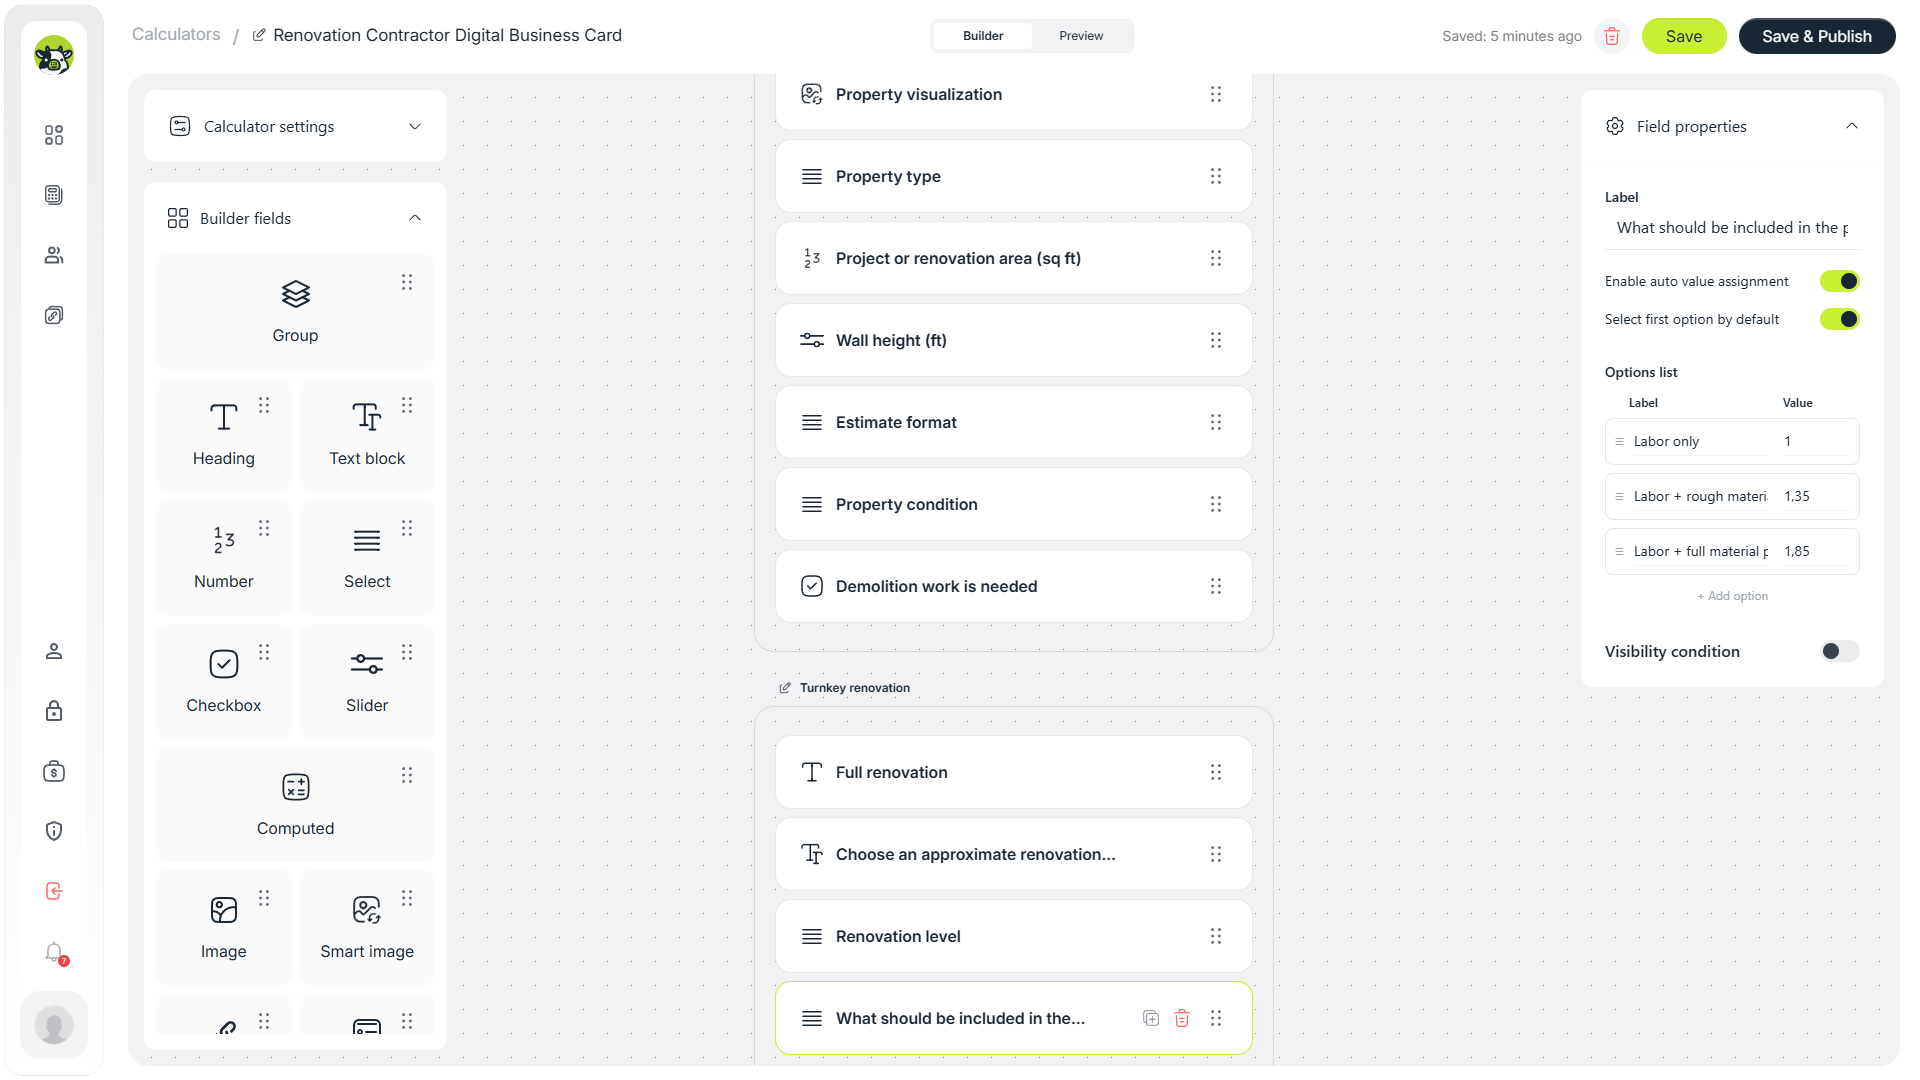
The renovation level field defines the base pricing layer for the full renovation scenario.
Design or layout help
A separate checkbox can add design or layout planning to the estimate. For smaller teams, this does not have to mean a full interior design package — it can simply mean guidance on layout and planning.
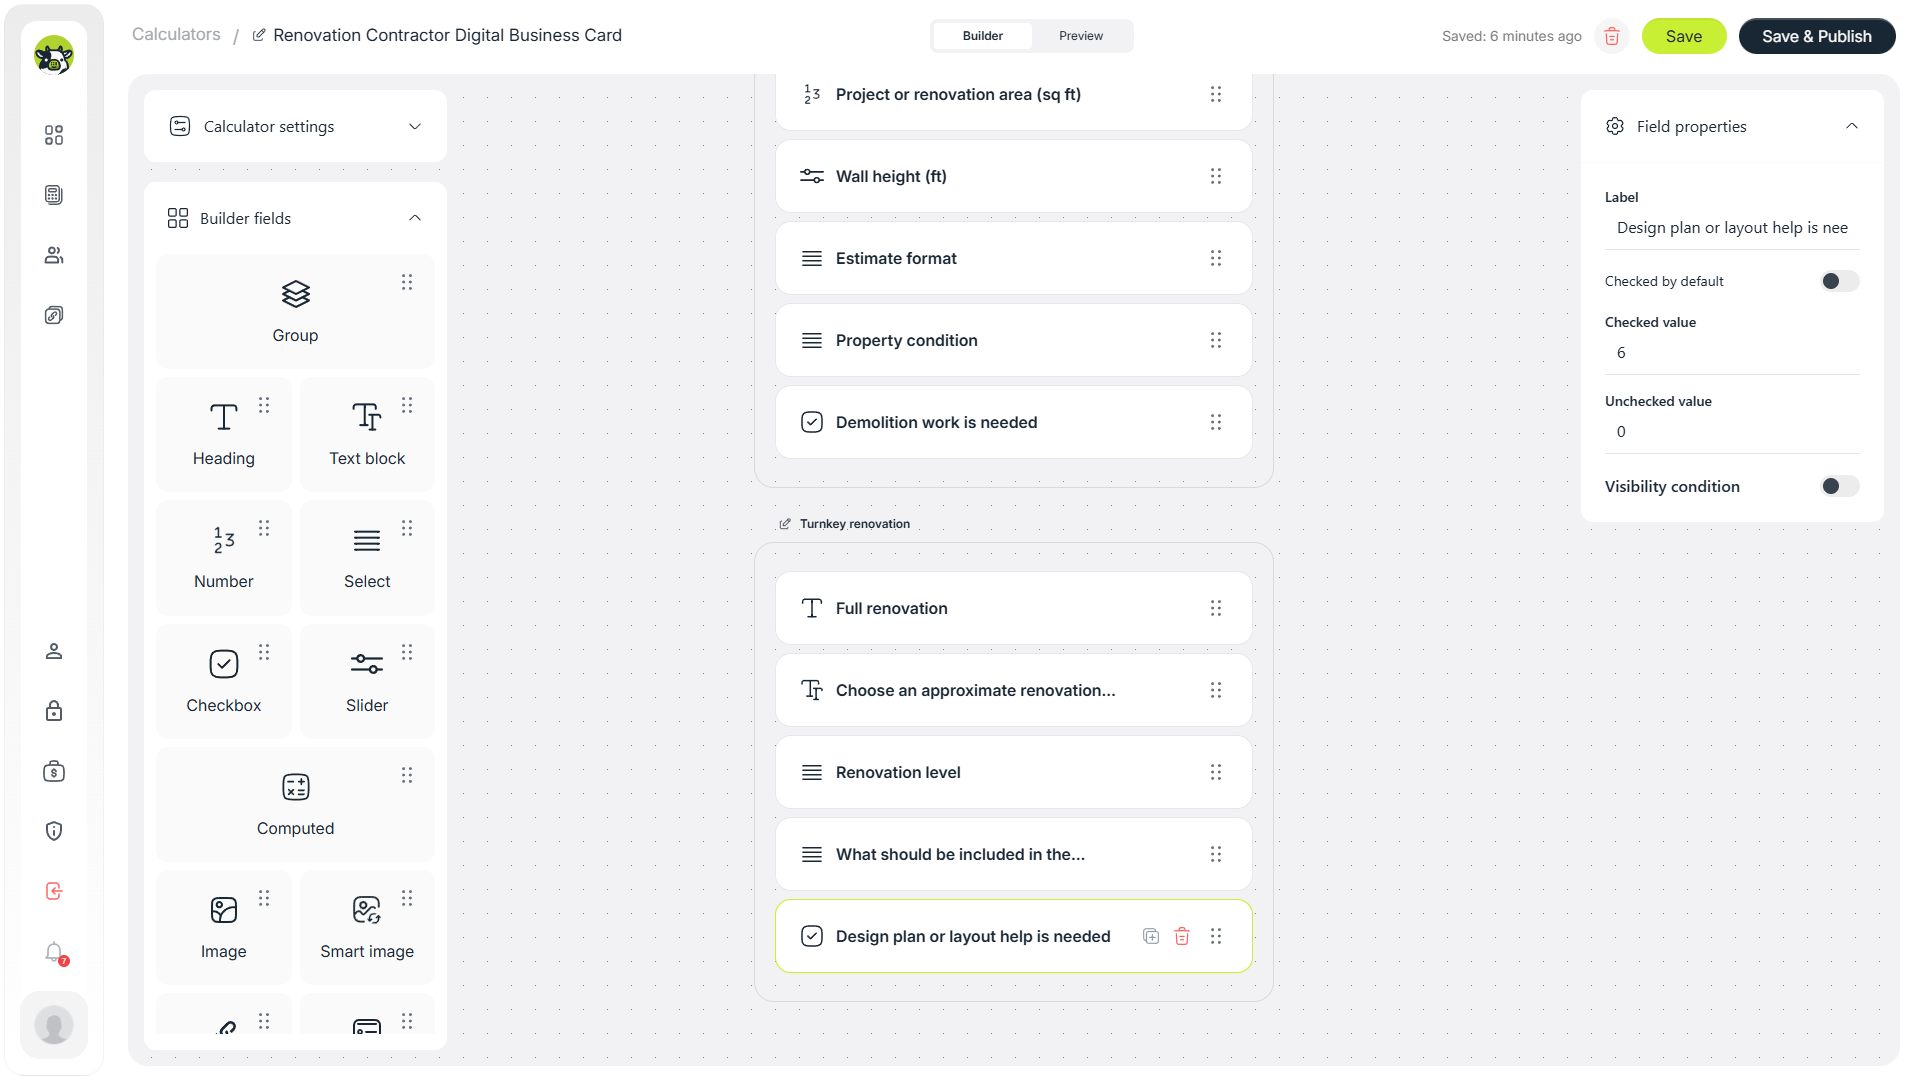
The design or layout checkbox adds an extra amount to the estimate.
Preferred work pace
If the customer wants the project done faster, that can affect scheduling, team planning, and sometimes the estimate itself. That is why the work pace is a useful separate field.
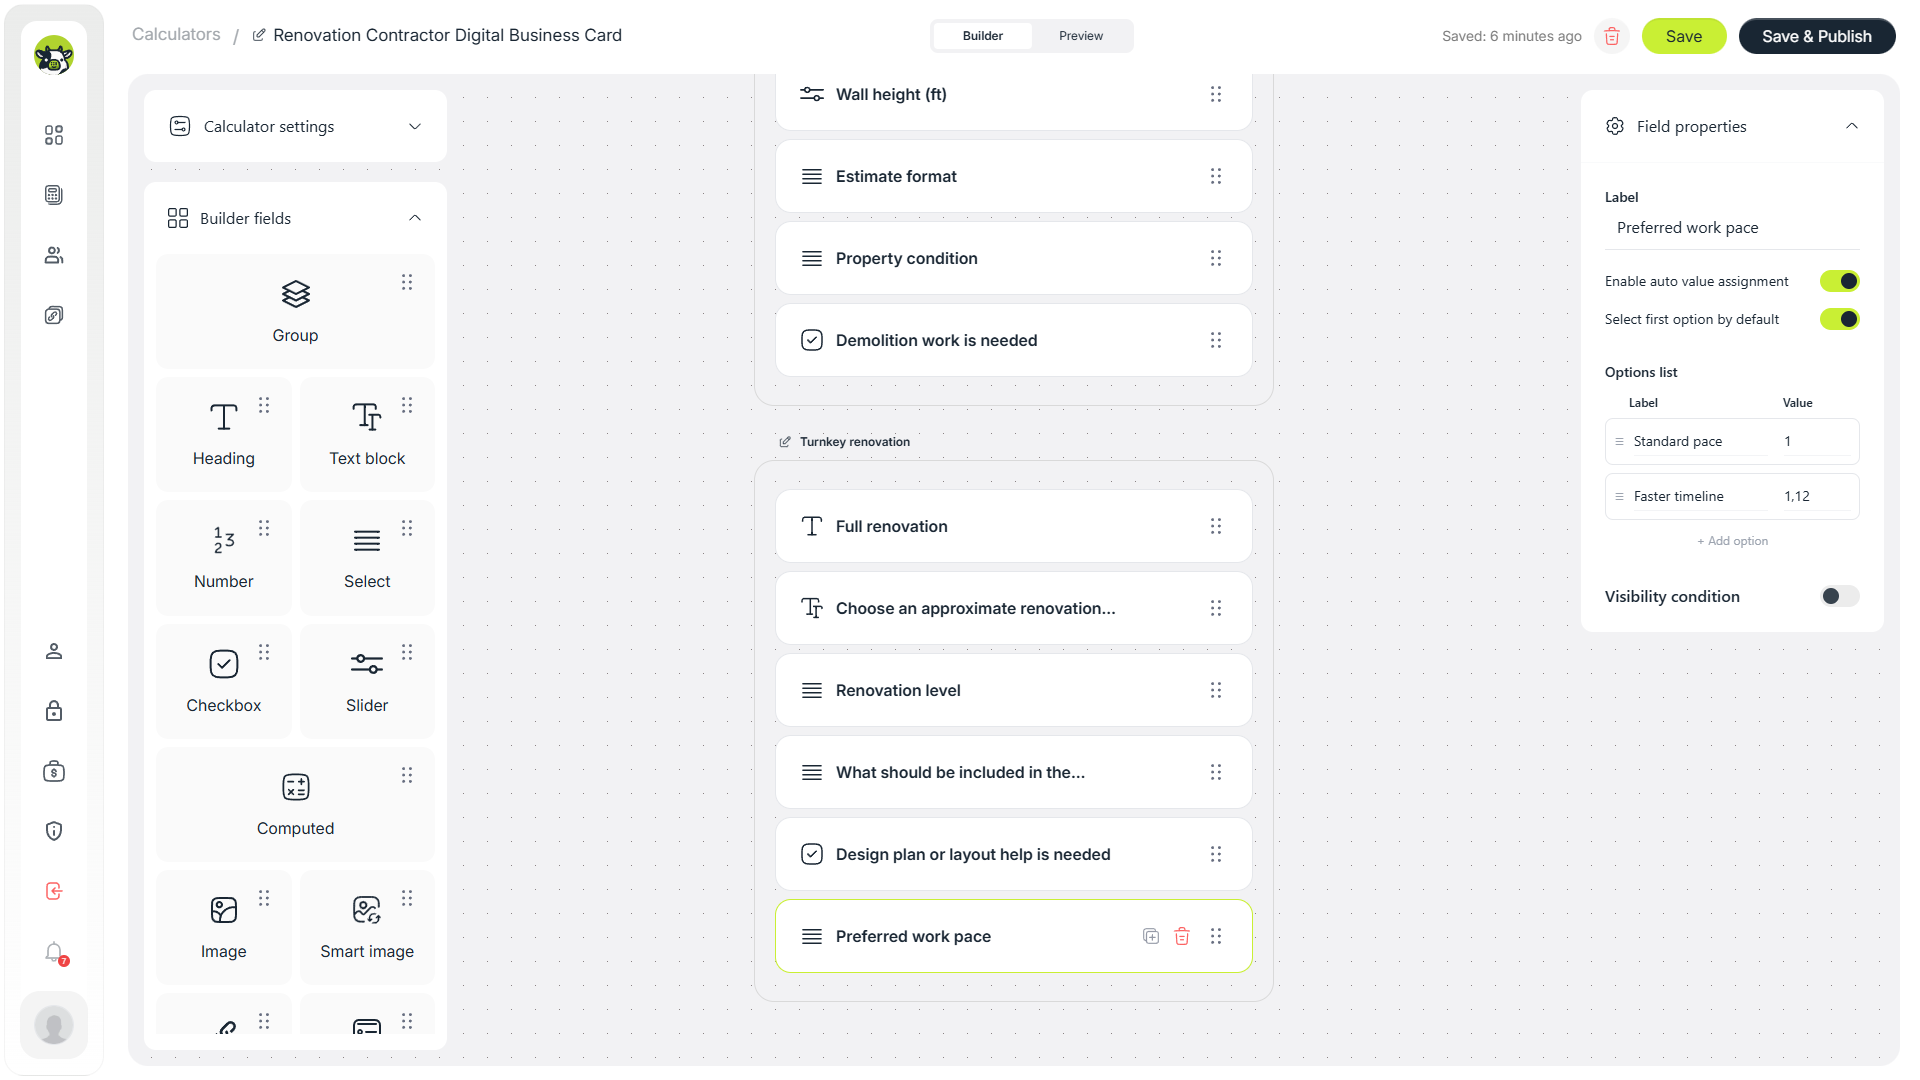
The work pace field can be used as a multiplier inside the estimate logic.
5. Add the partial works branch
The second scenario is partial works. This is useful when the customer does not want a full renovation but asks about a specific scope such as walls, ceiling, flooring, windows, or doors.
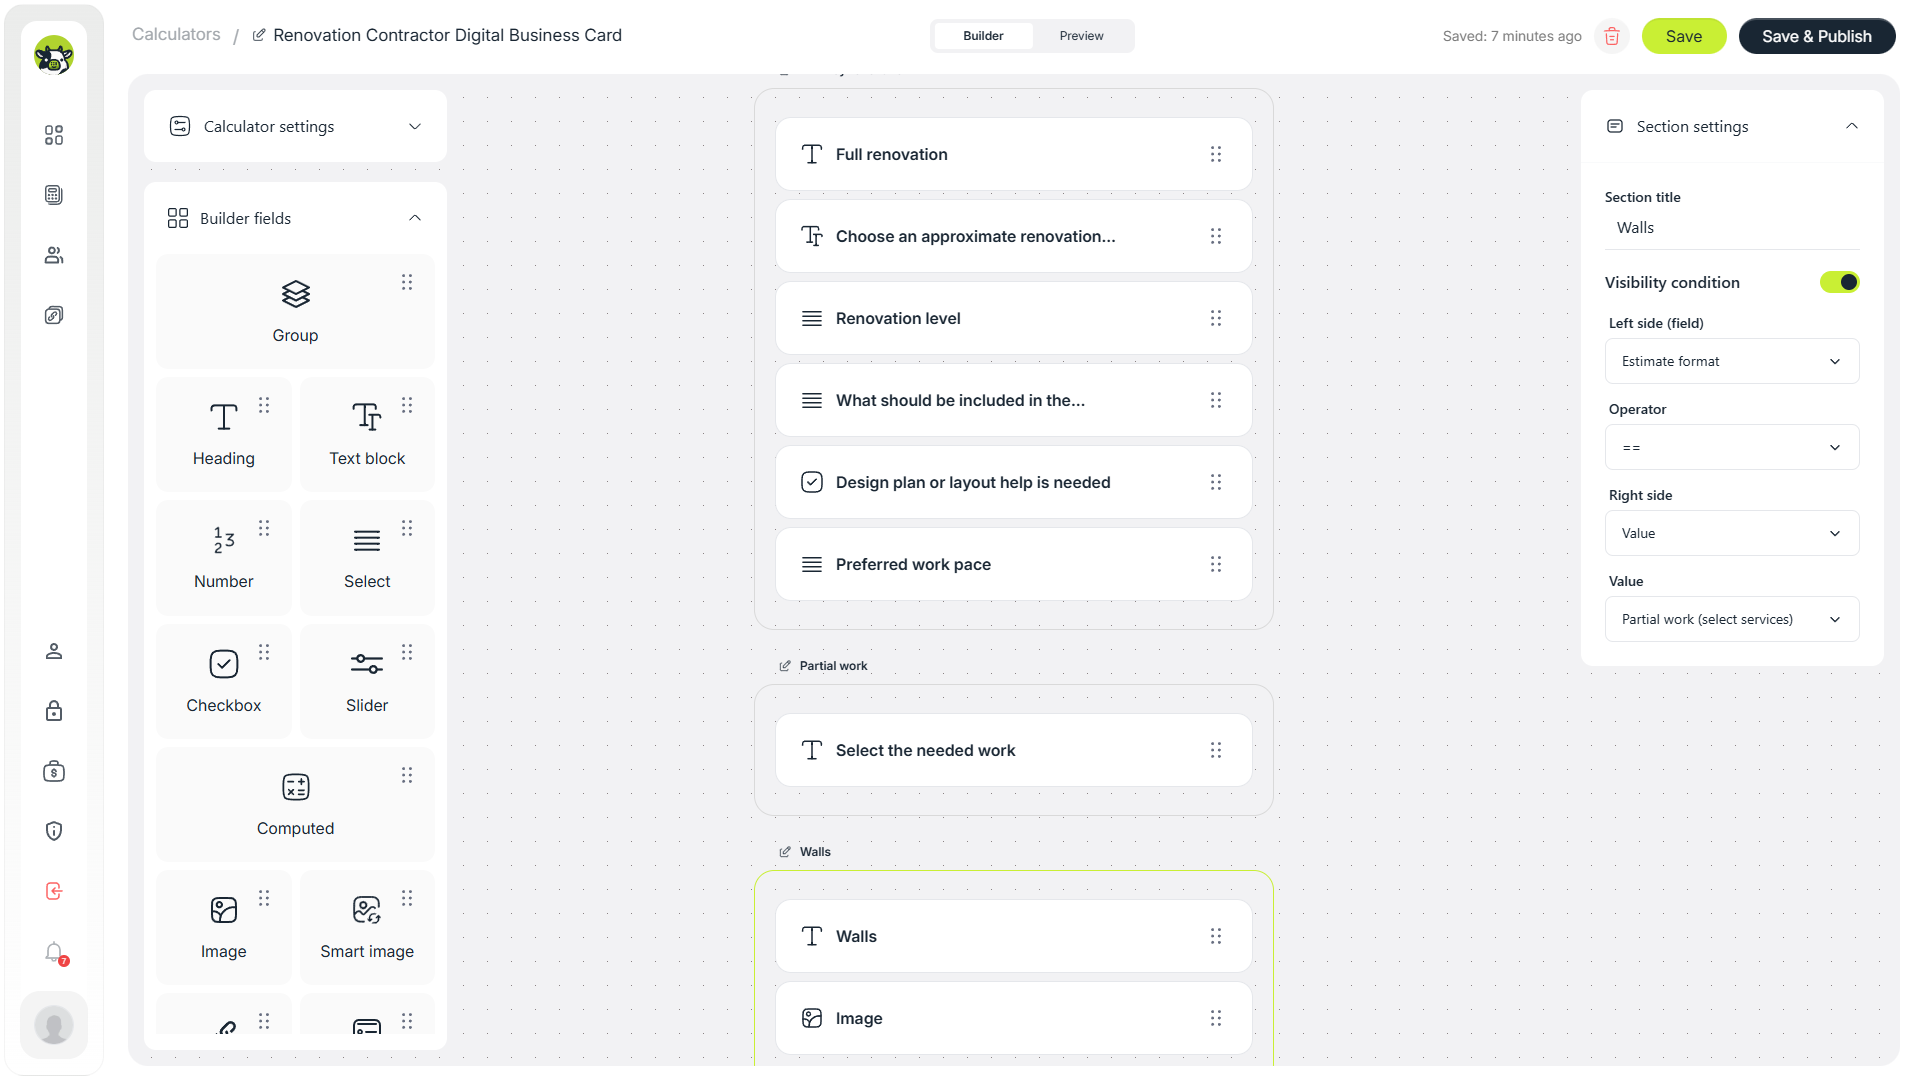
The partial works section starts with its own heading.
Walls
For walls, you can add checkboxes for plastering, skim coating, painting, wallpapering, or drywall-related work. In the technical logic, these values can be multiplied by the estimated wall area.
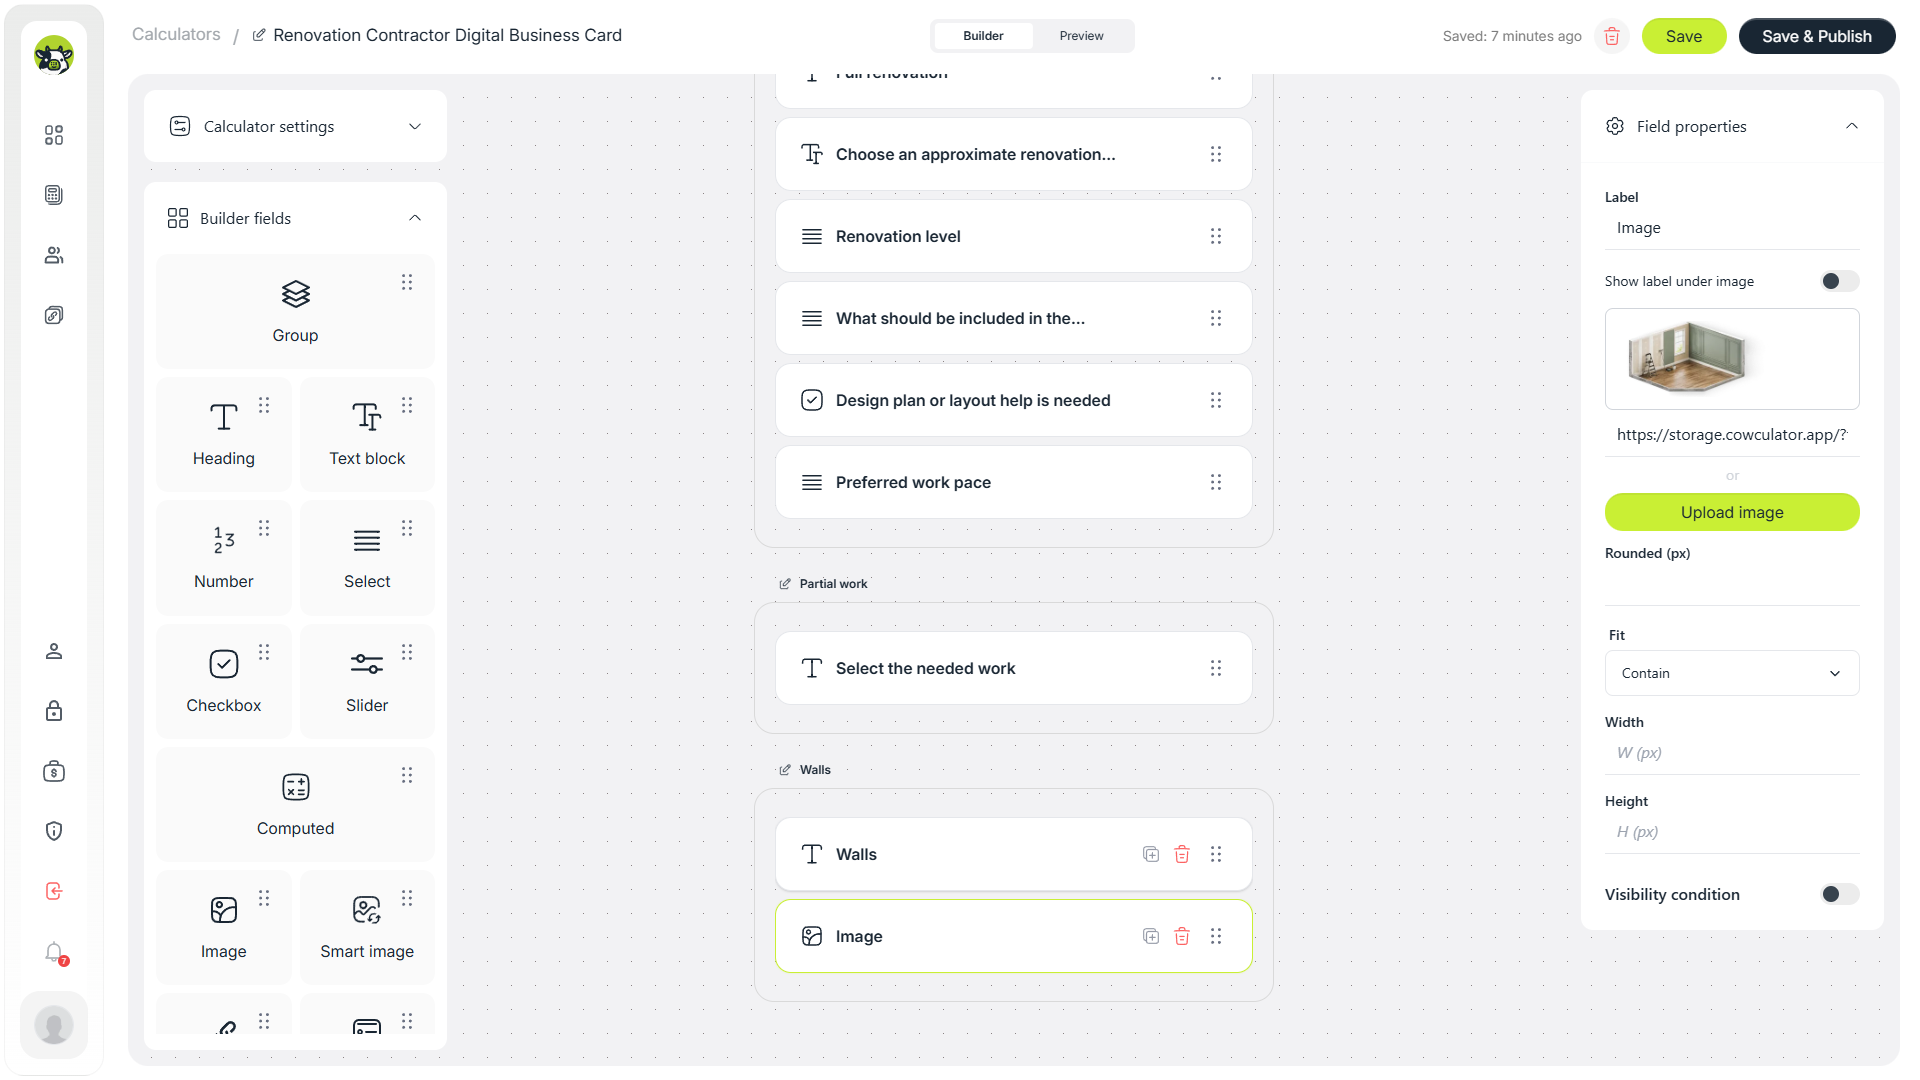
The visual block for the walls section.
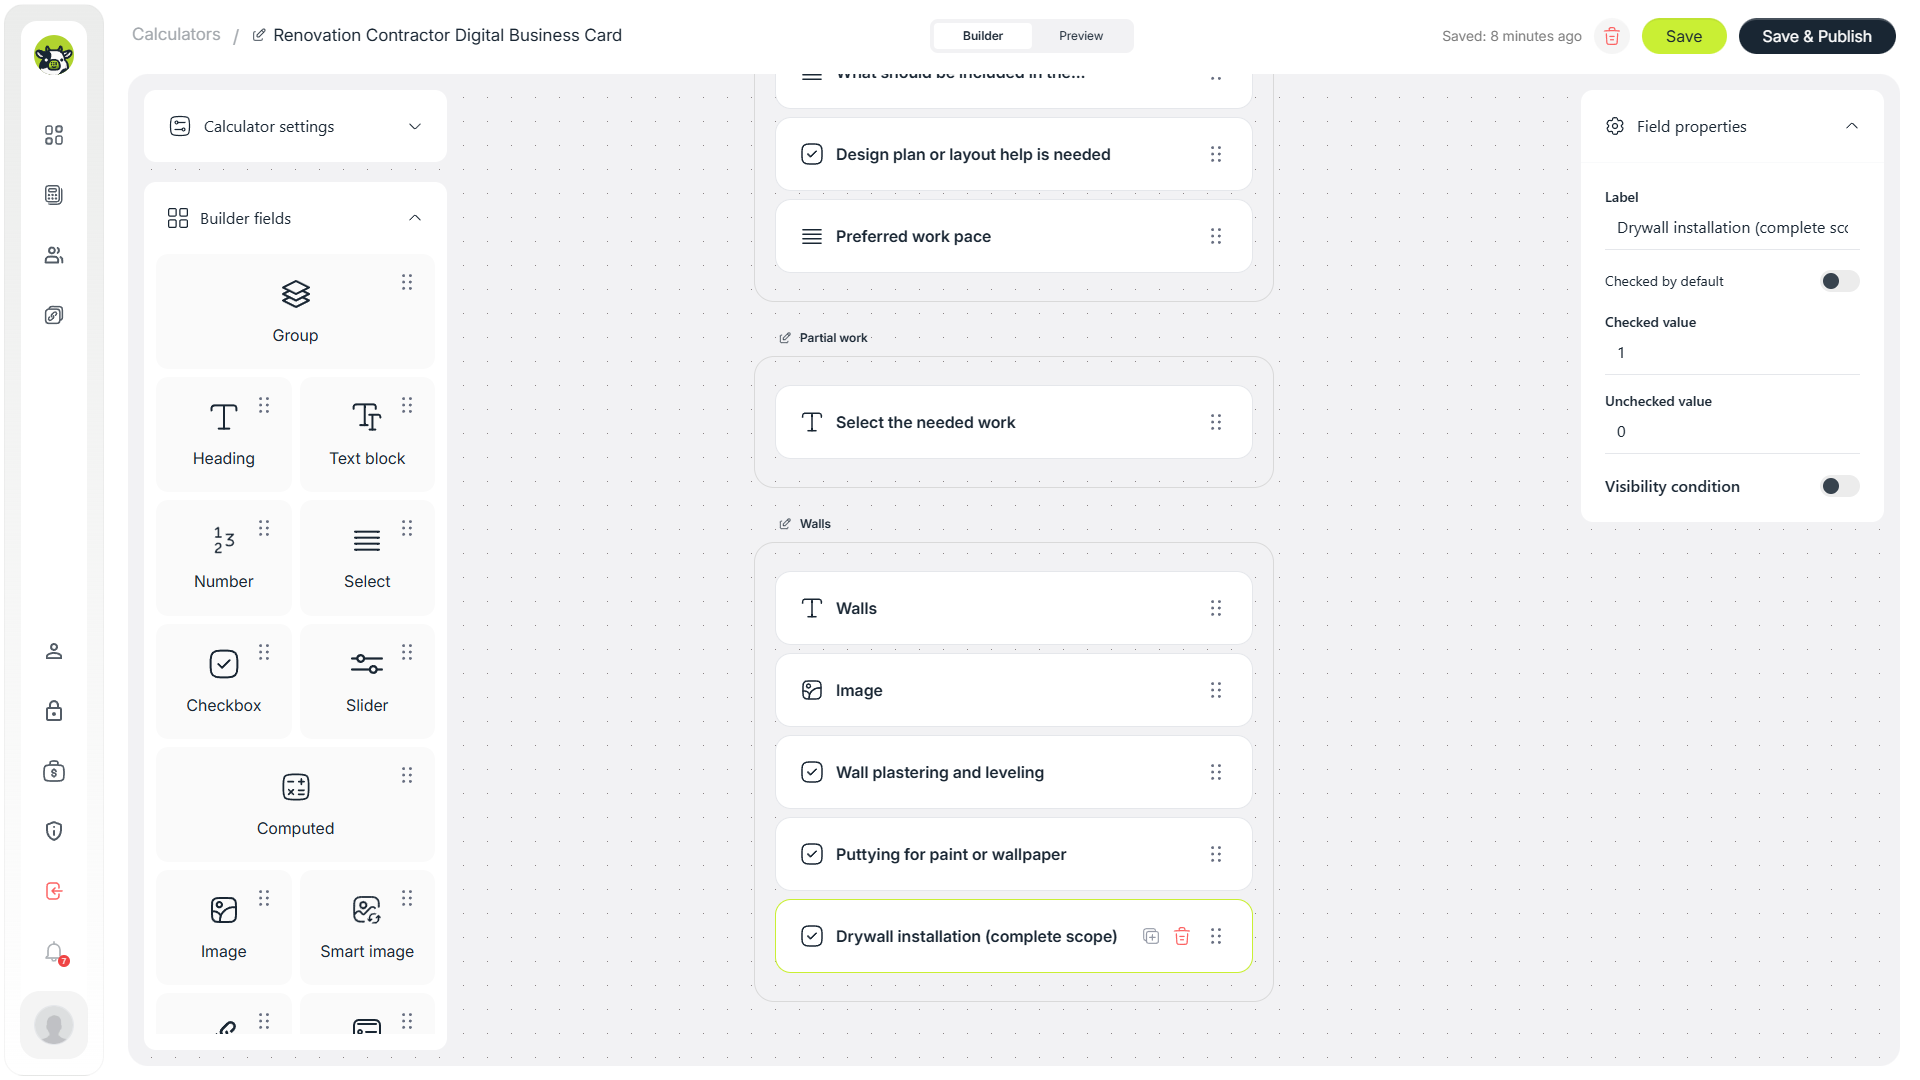
Walls work checkboxes help capture a more specific partial works request.
Ceiling
The ceiling section can include painting, smoothing, suspended ceiling systems, drywall work, and other relevant tasks.
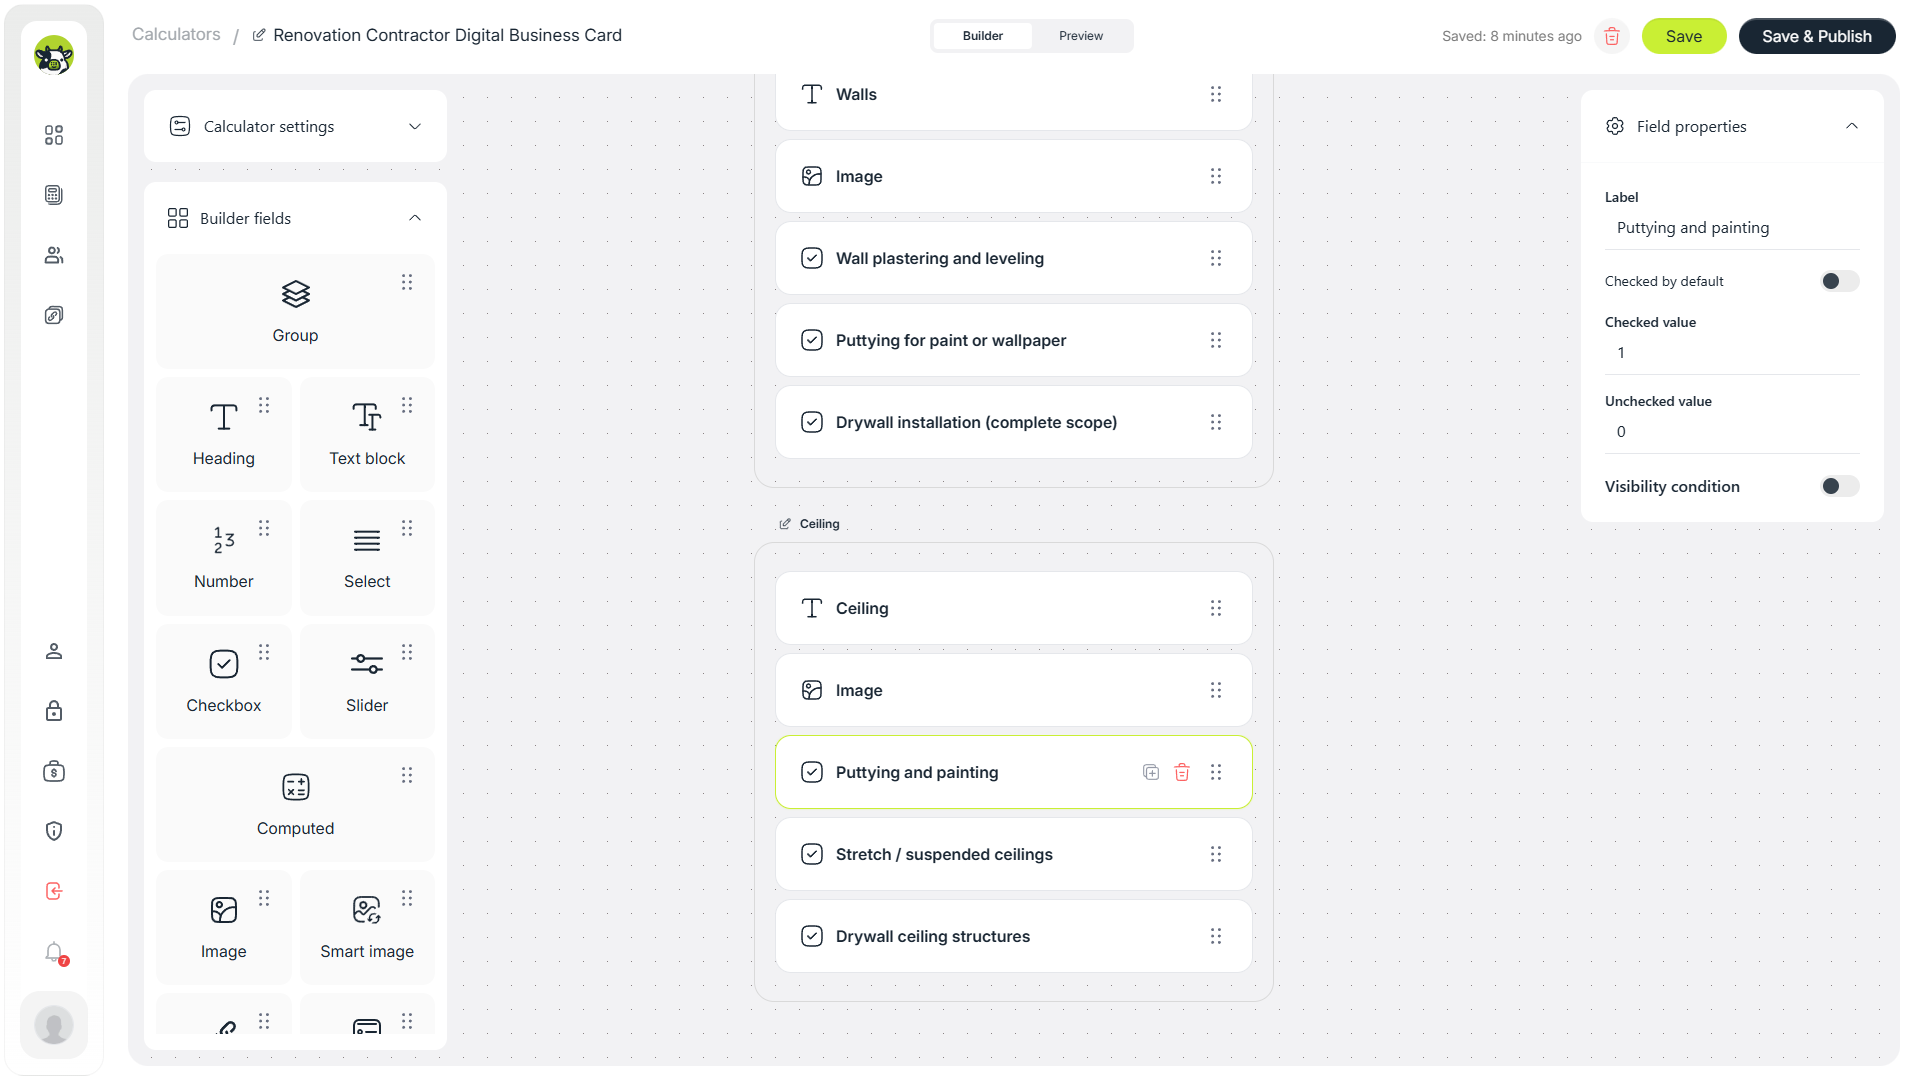
A dedicated section for ceiling-related work.
Flooring
For flooring, you can cover leveling, screed work, and floor covering installation. That gives enough structure without forcing the user into too many detailed material choices.
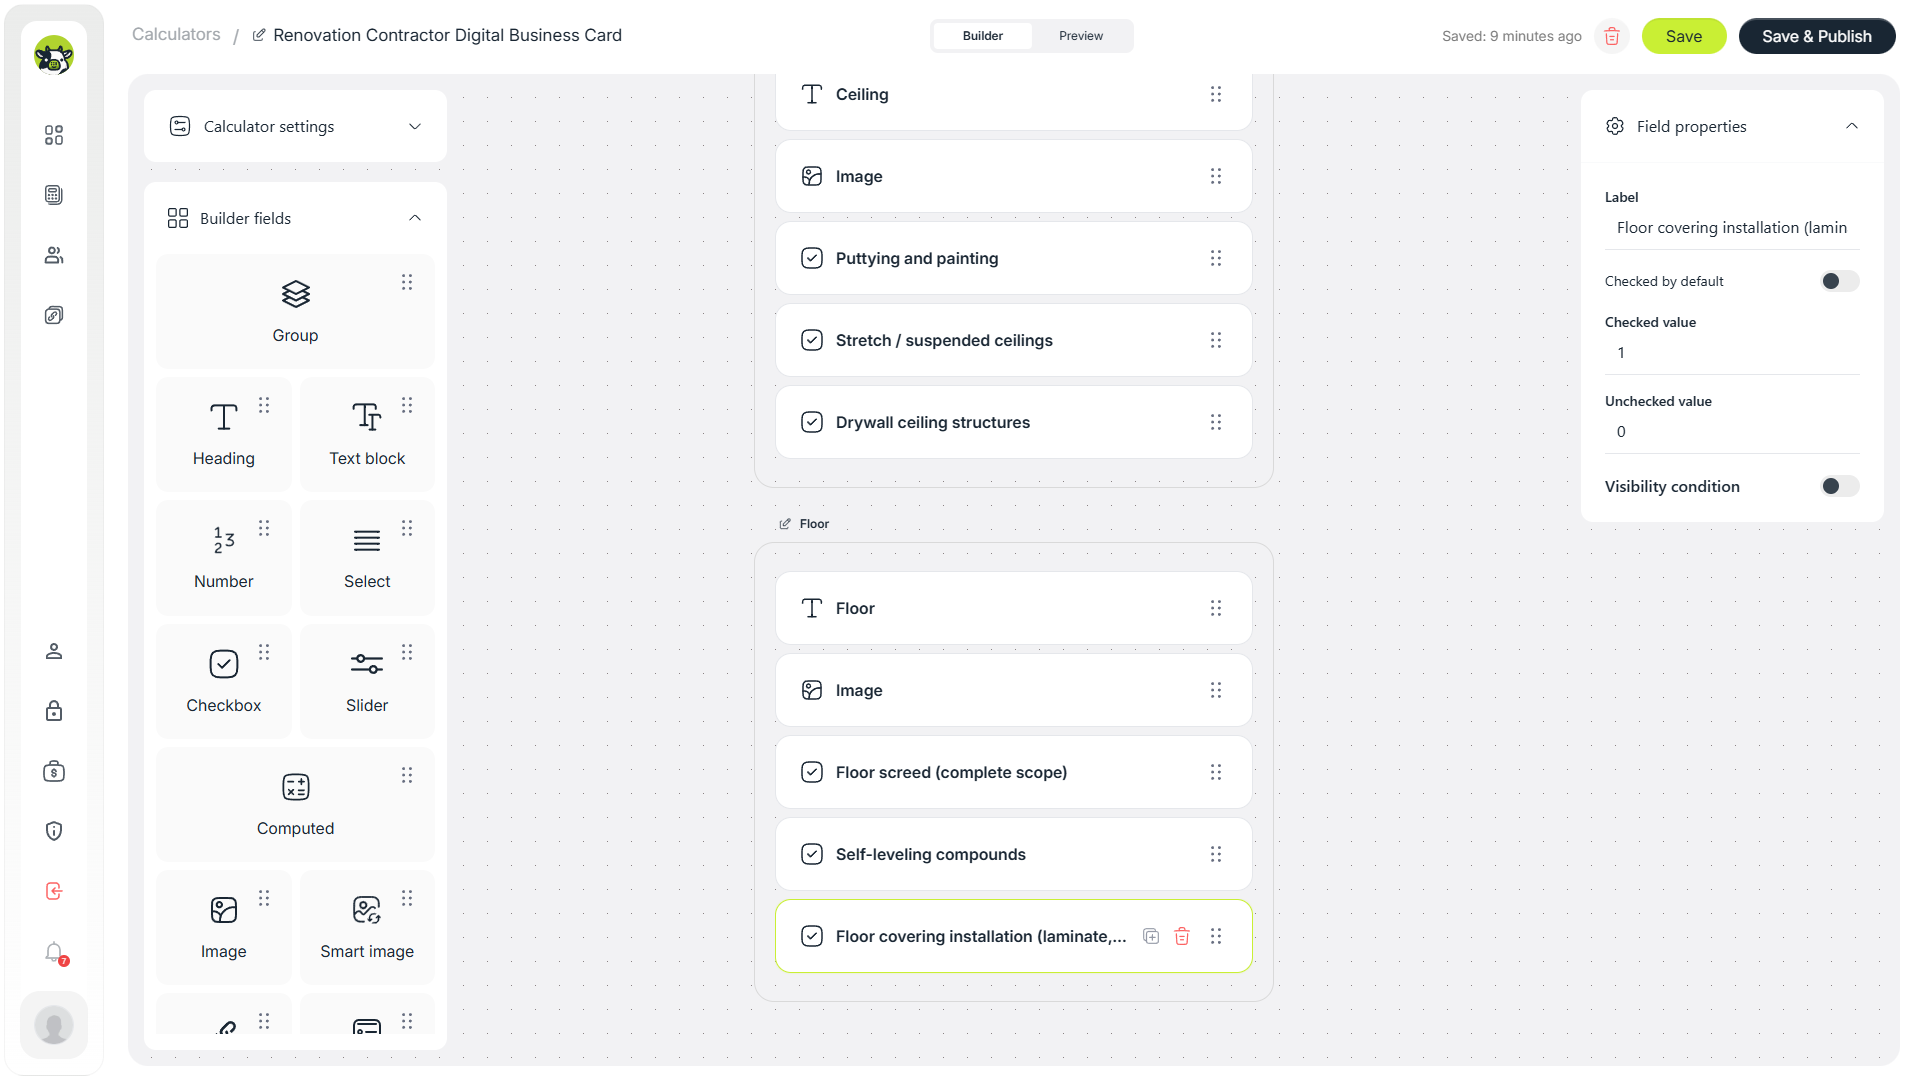
Flooring-related checkboxes inside the calculator.
Windows and doors
For windows and doors, sliders often work better than free-form text inputs. The user can simply select the estimated quantity.
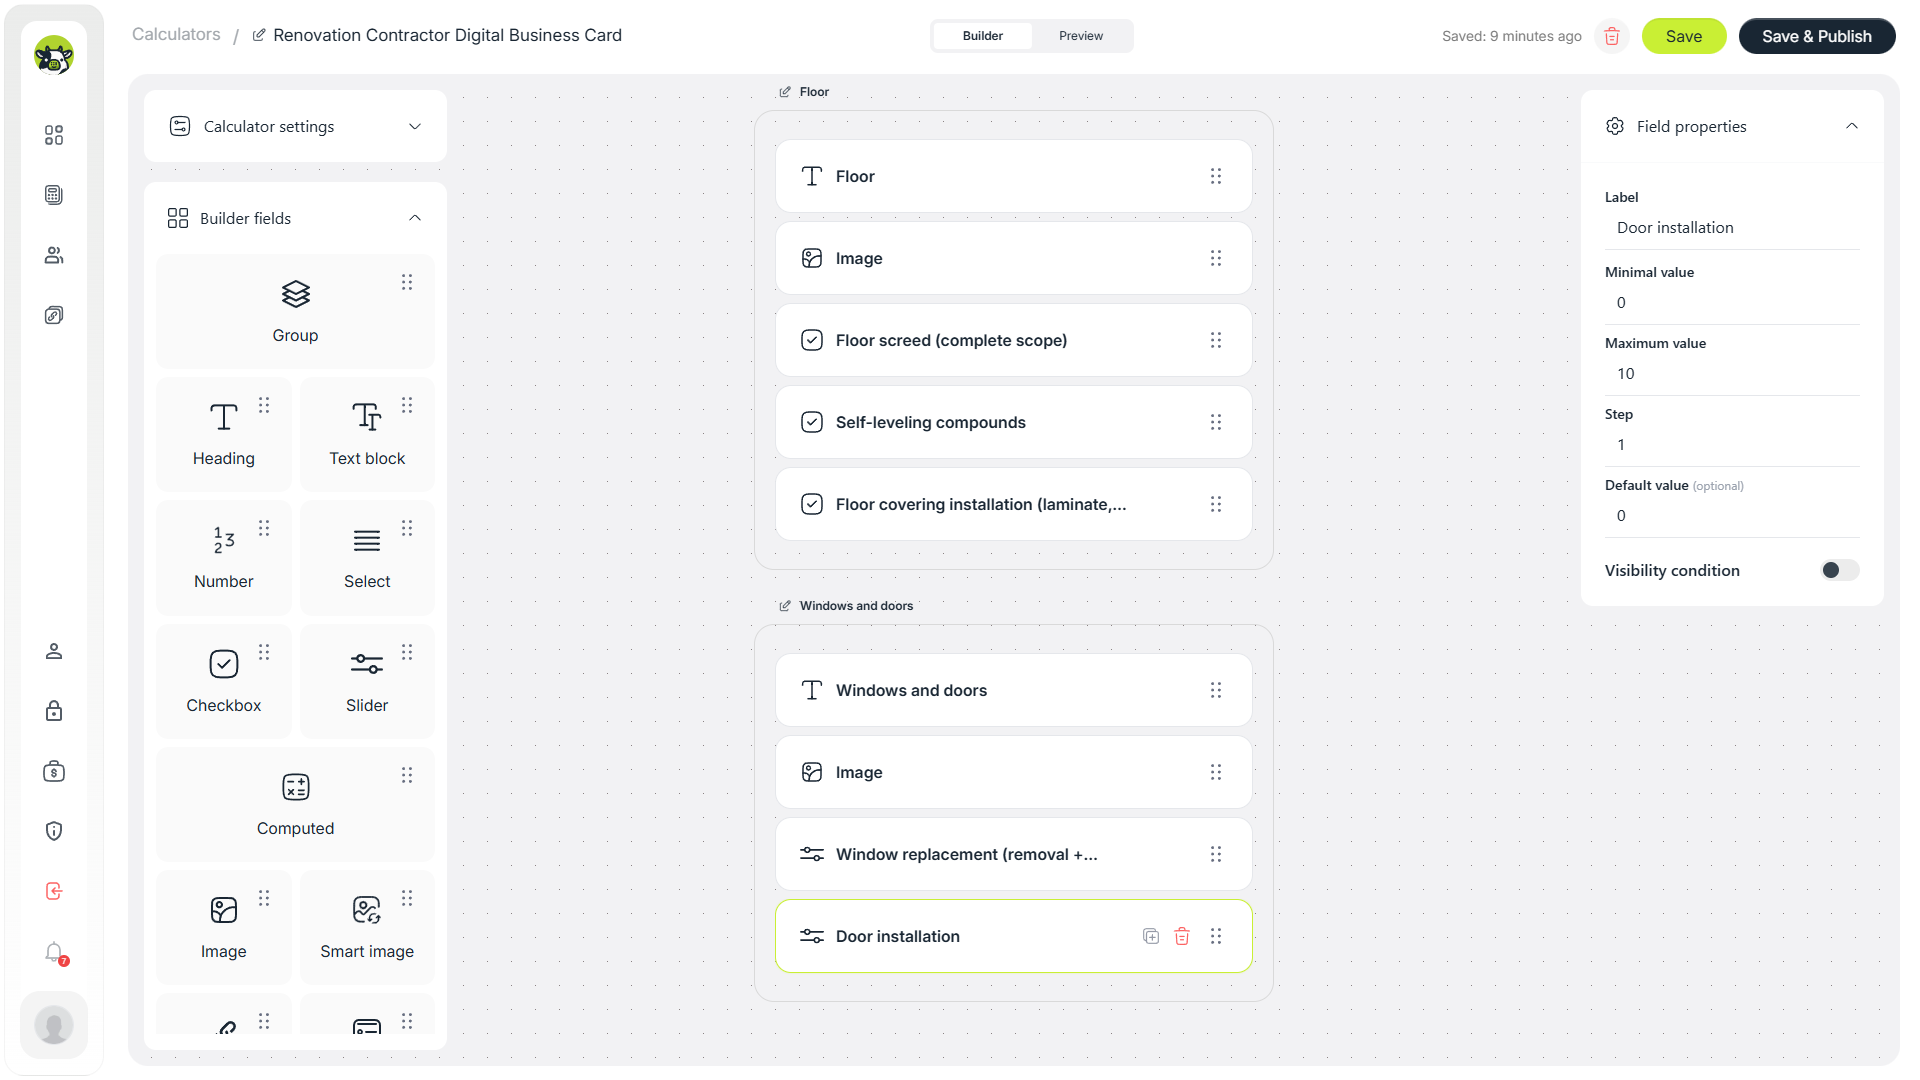
Sliders for window and door quantities.
6. Build the technical formulas
Instead of writing one giant formula, it is usually better to split the logic into technical helper fields. These fields can stay hidden from the end user, but they power the final results.
Estimated wall area
For a preliminary estimate, a simple model works well: area × wall height × a coefficient. It does not replace real measurements, but it is a useful base for internal calculations.
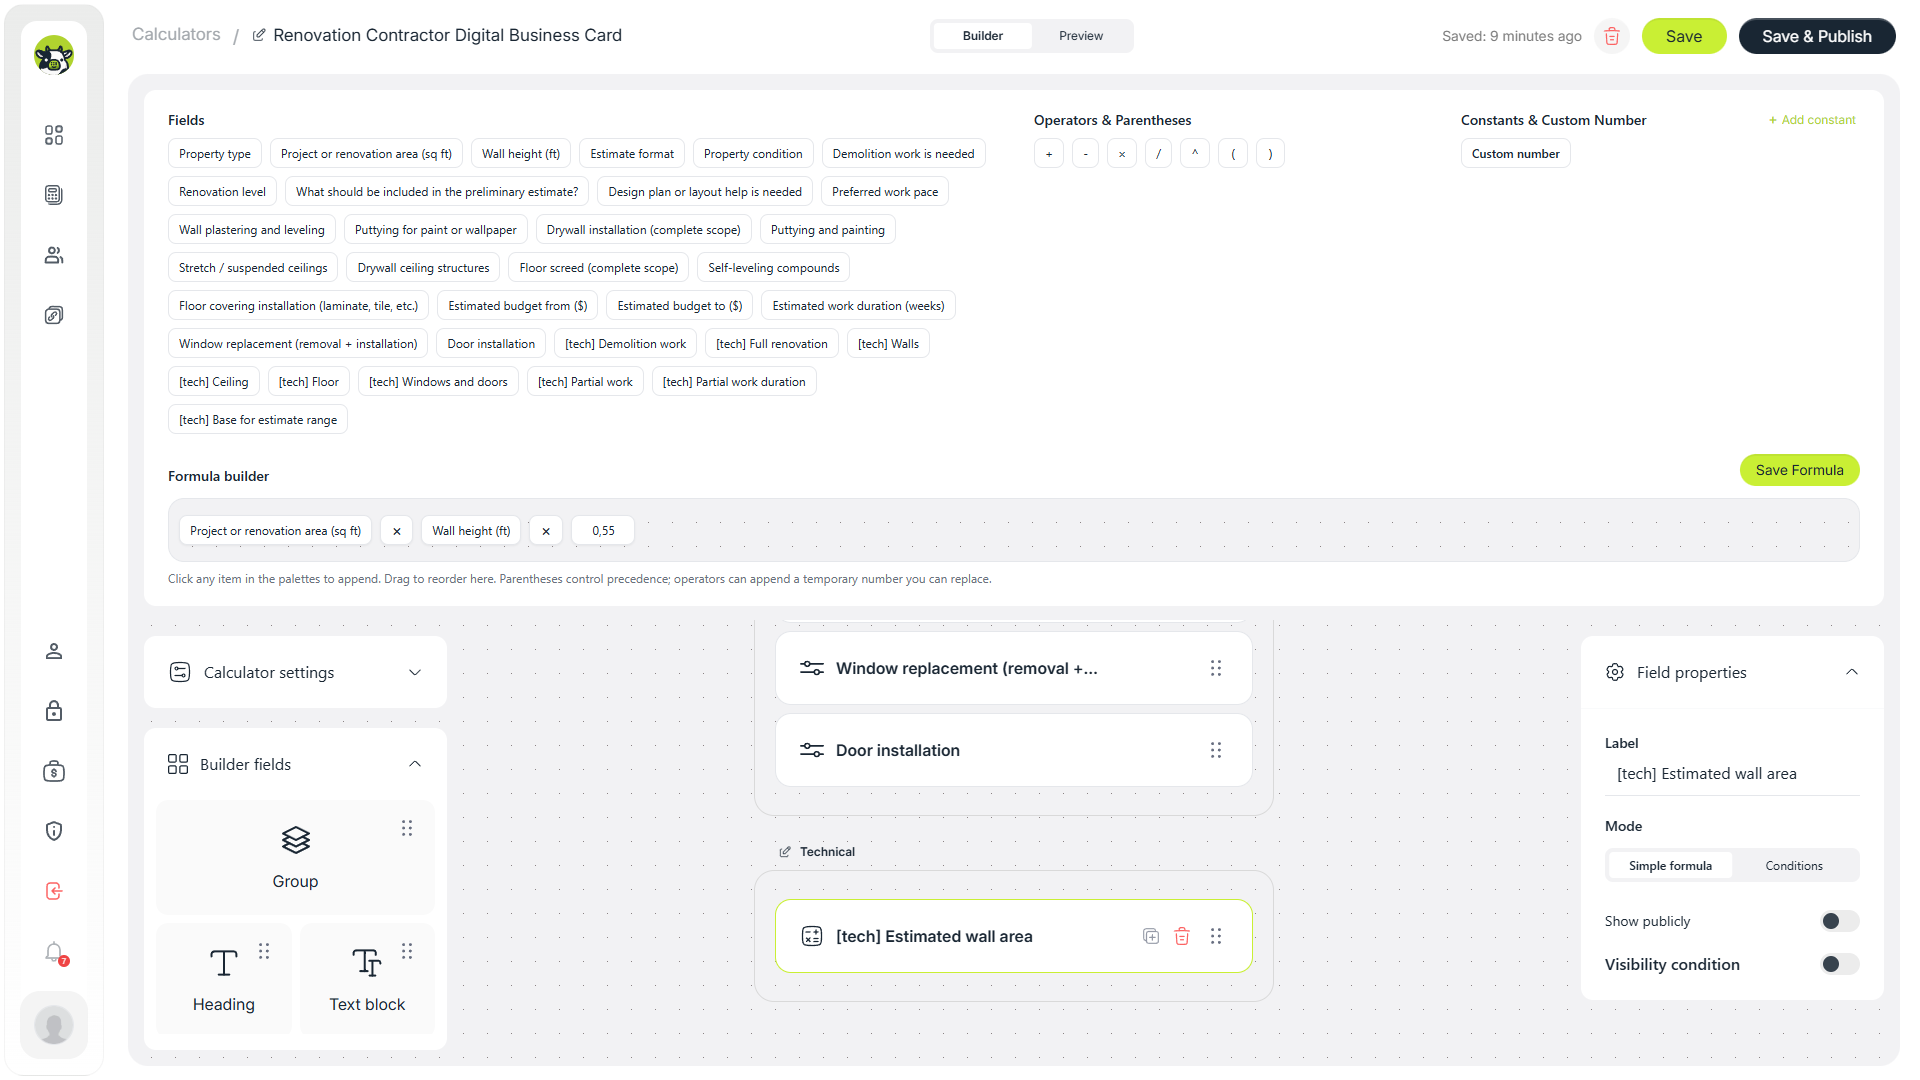
The helper formula for estimated wall area.
Demolition works
Demolition can be calculated as area × demolition rate × checkbox value. If the checkbox is off, the demolition result becomes zero.
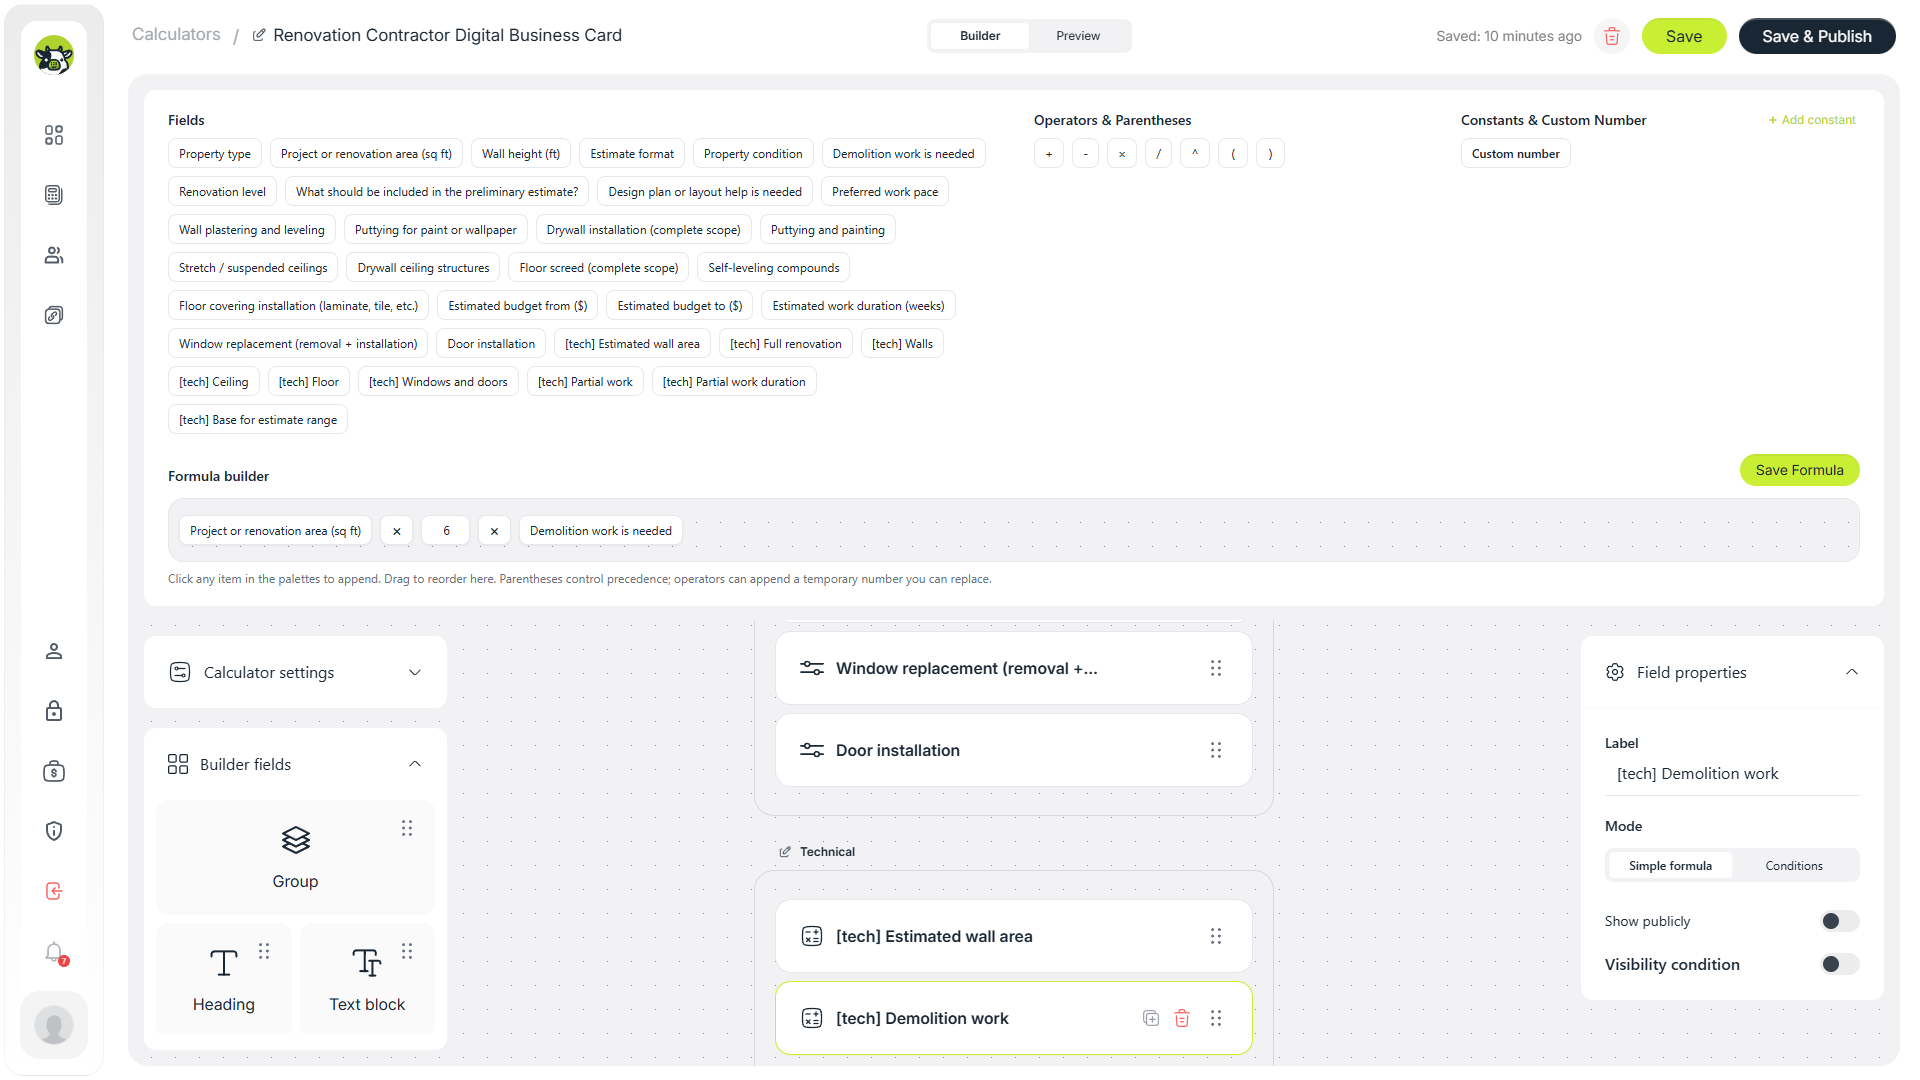
The demolition formula uses the area value and the demolition checkbox.
Full renovation
For the full renovation scenario, the technical formula can include area, renovation level, materials, property type, property condition, work pace, design help, and demolition.
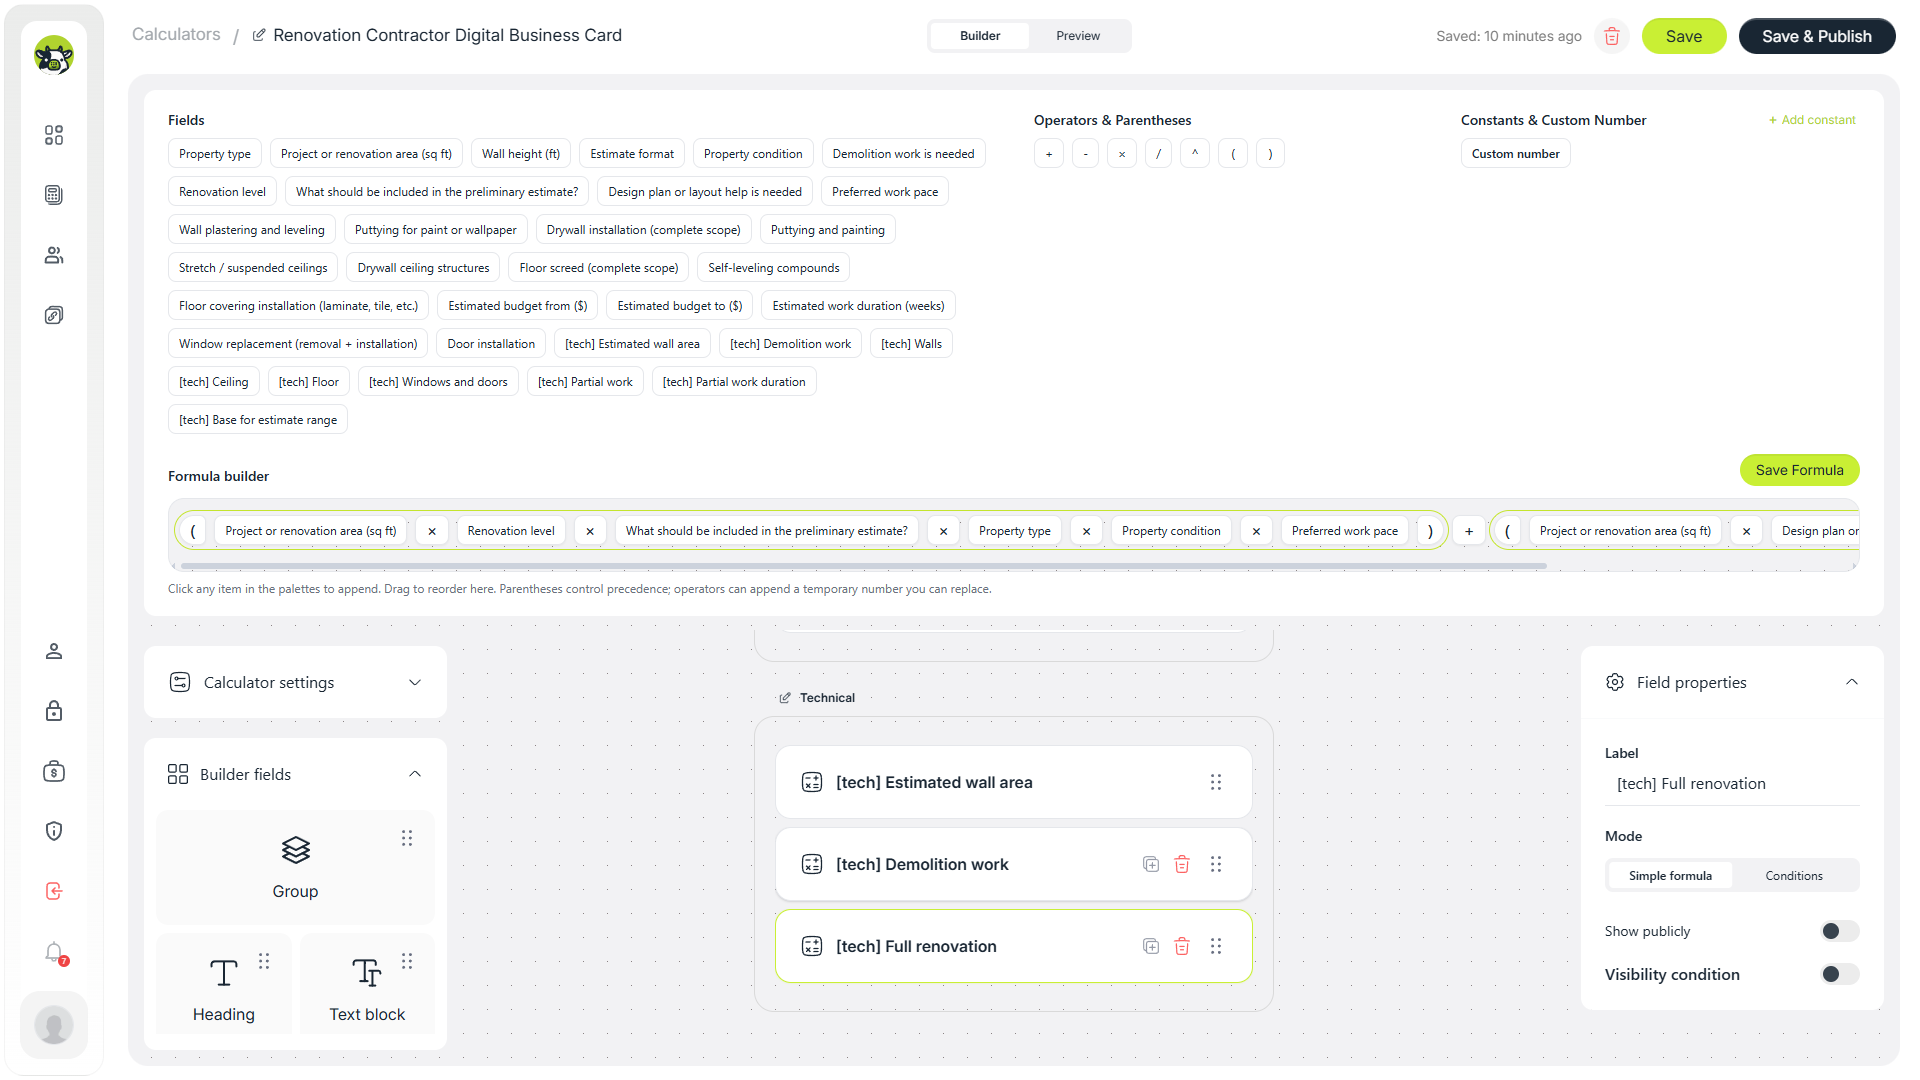
The main technical formula for the full renovation scenario.
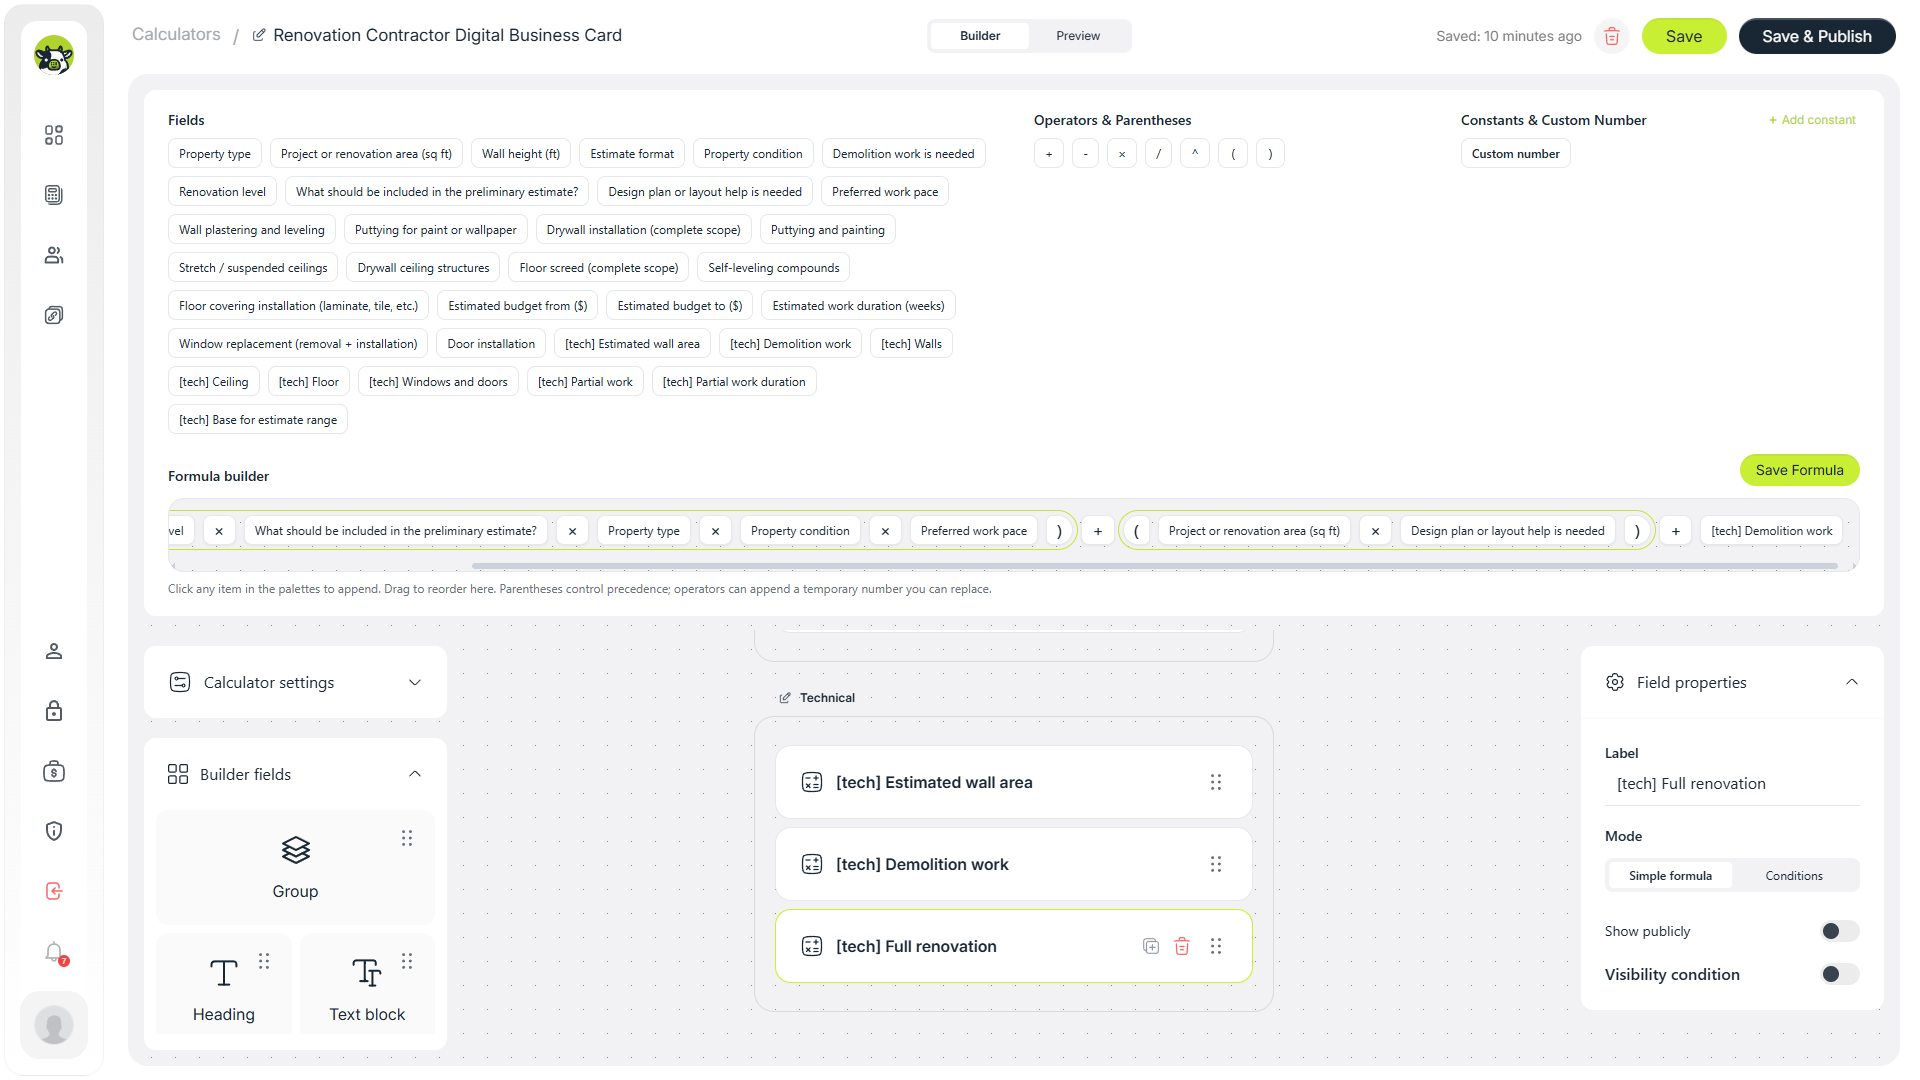
Long formulas can be checked using horizontal scroll inside the builder.
Walls, ceiling, flooring, windows, and doors
Each partial works group should ideally have its own formula. This makes the setup easier to maintain and much easier to debug.
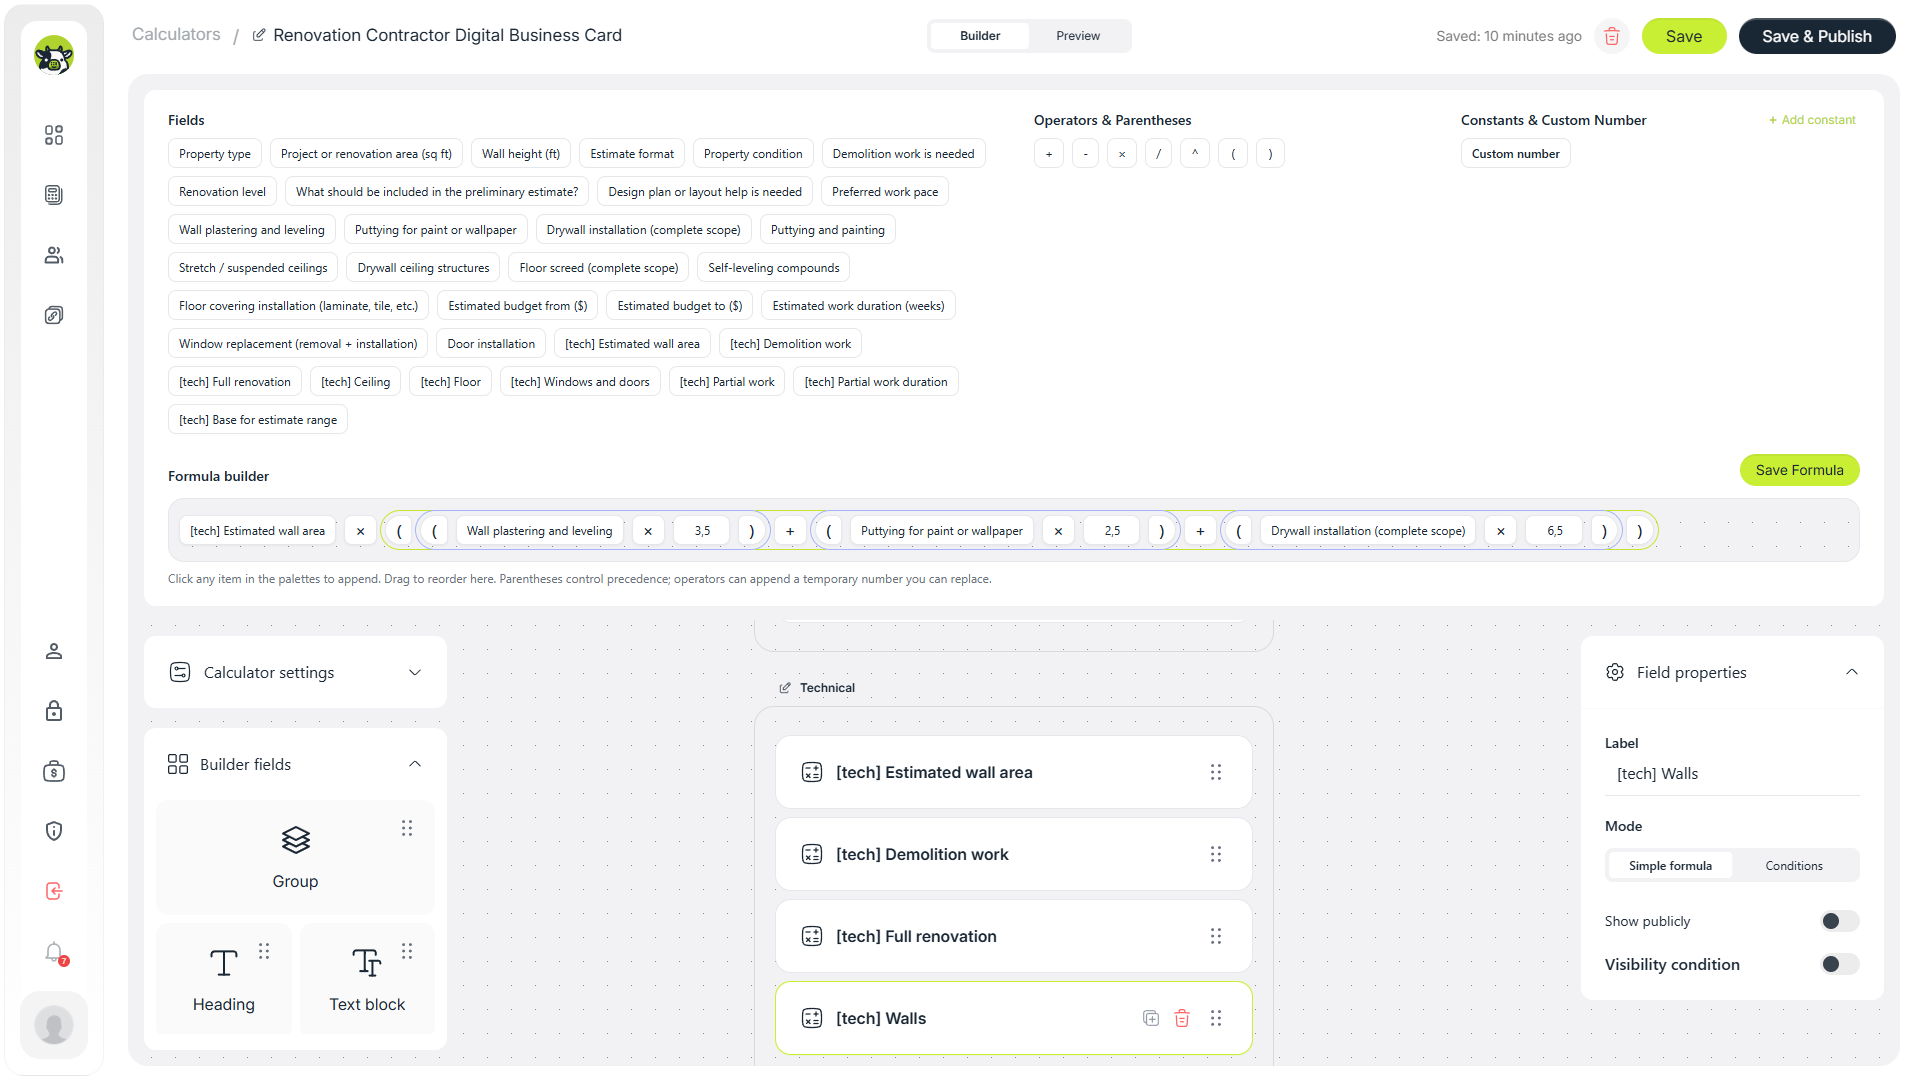
Technical formula for walls work.
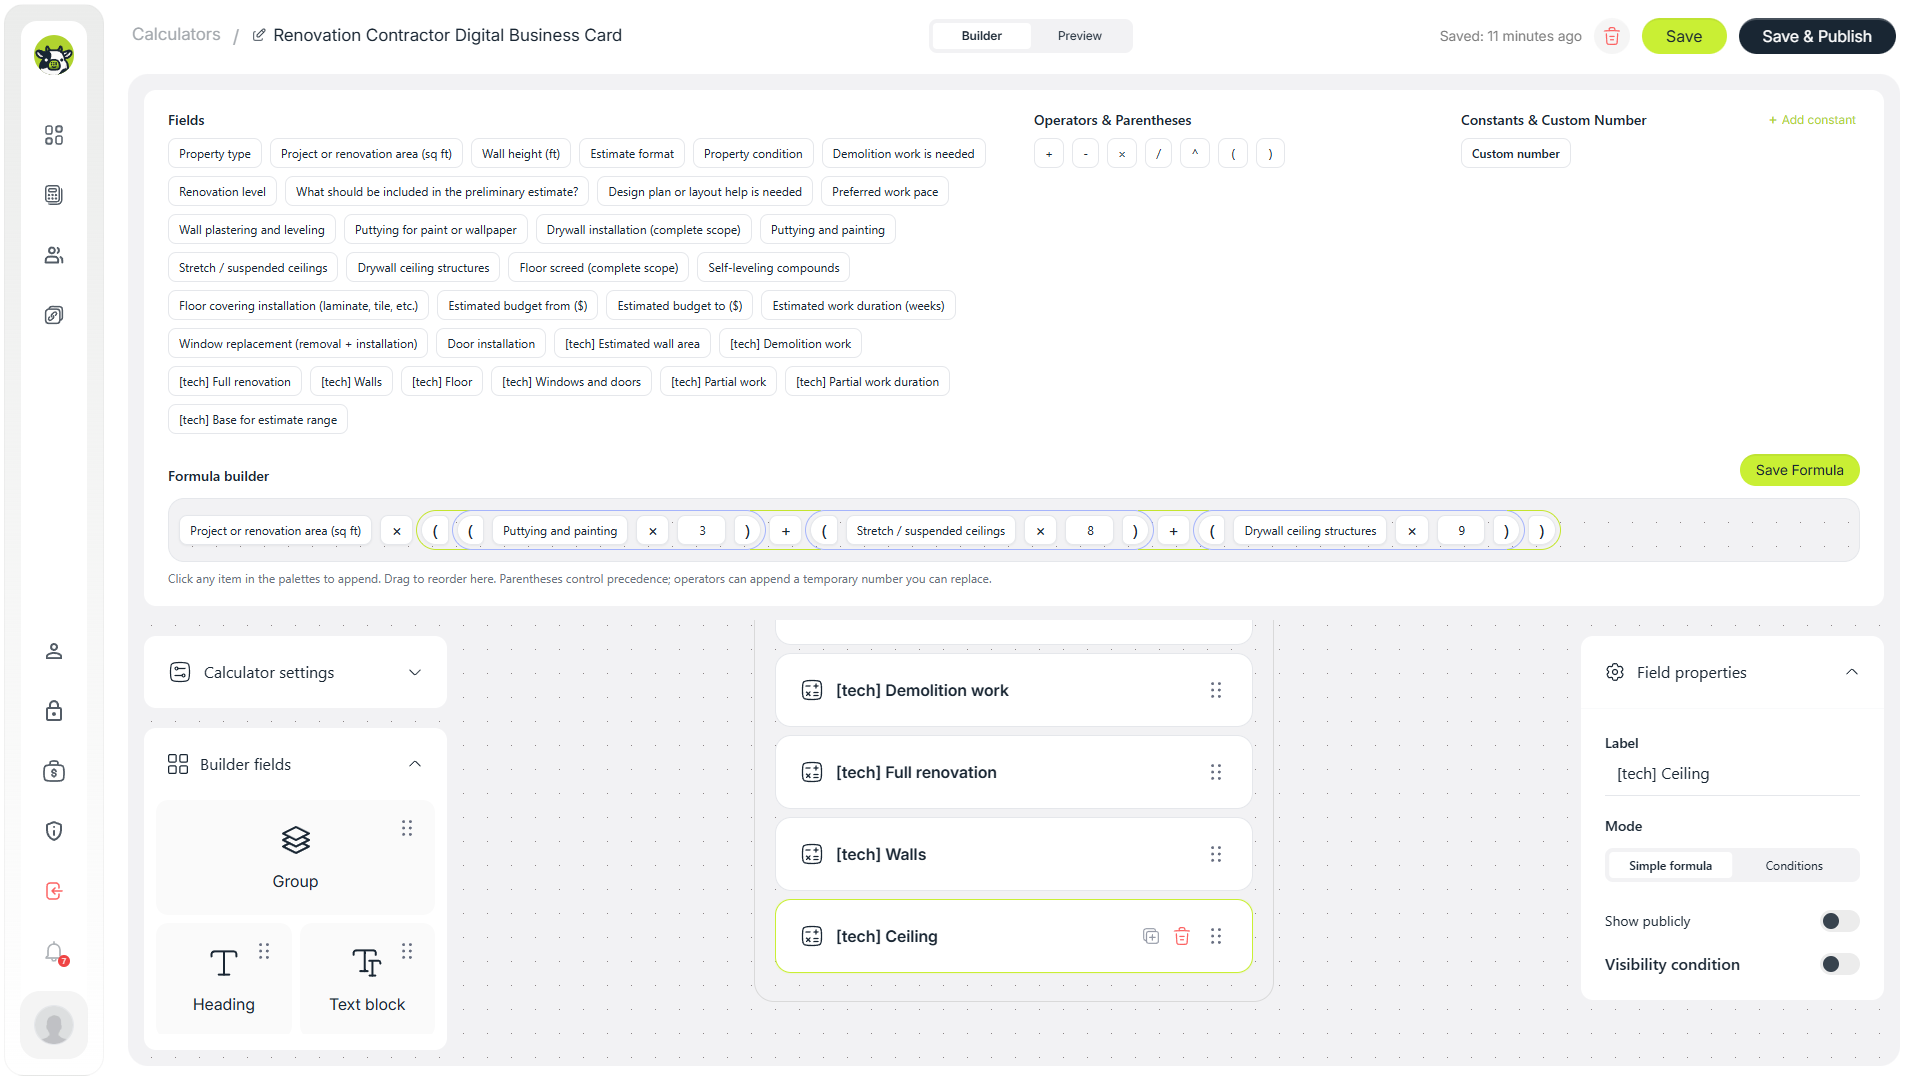
Technical formula for ceiling work.
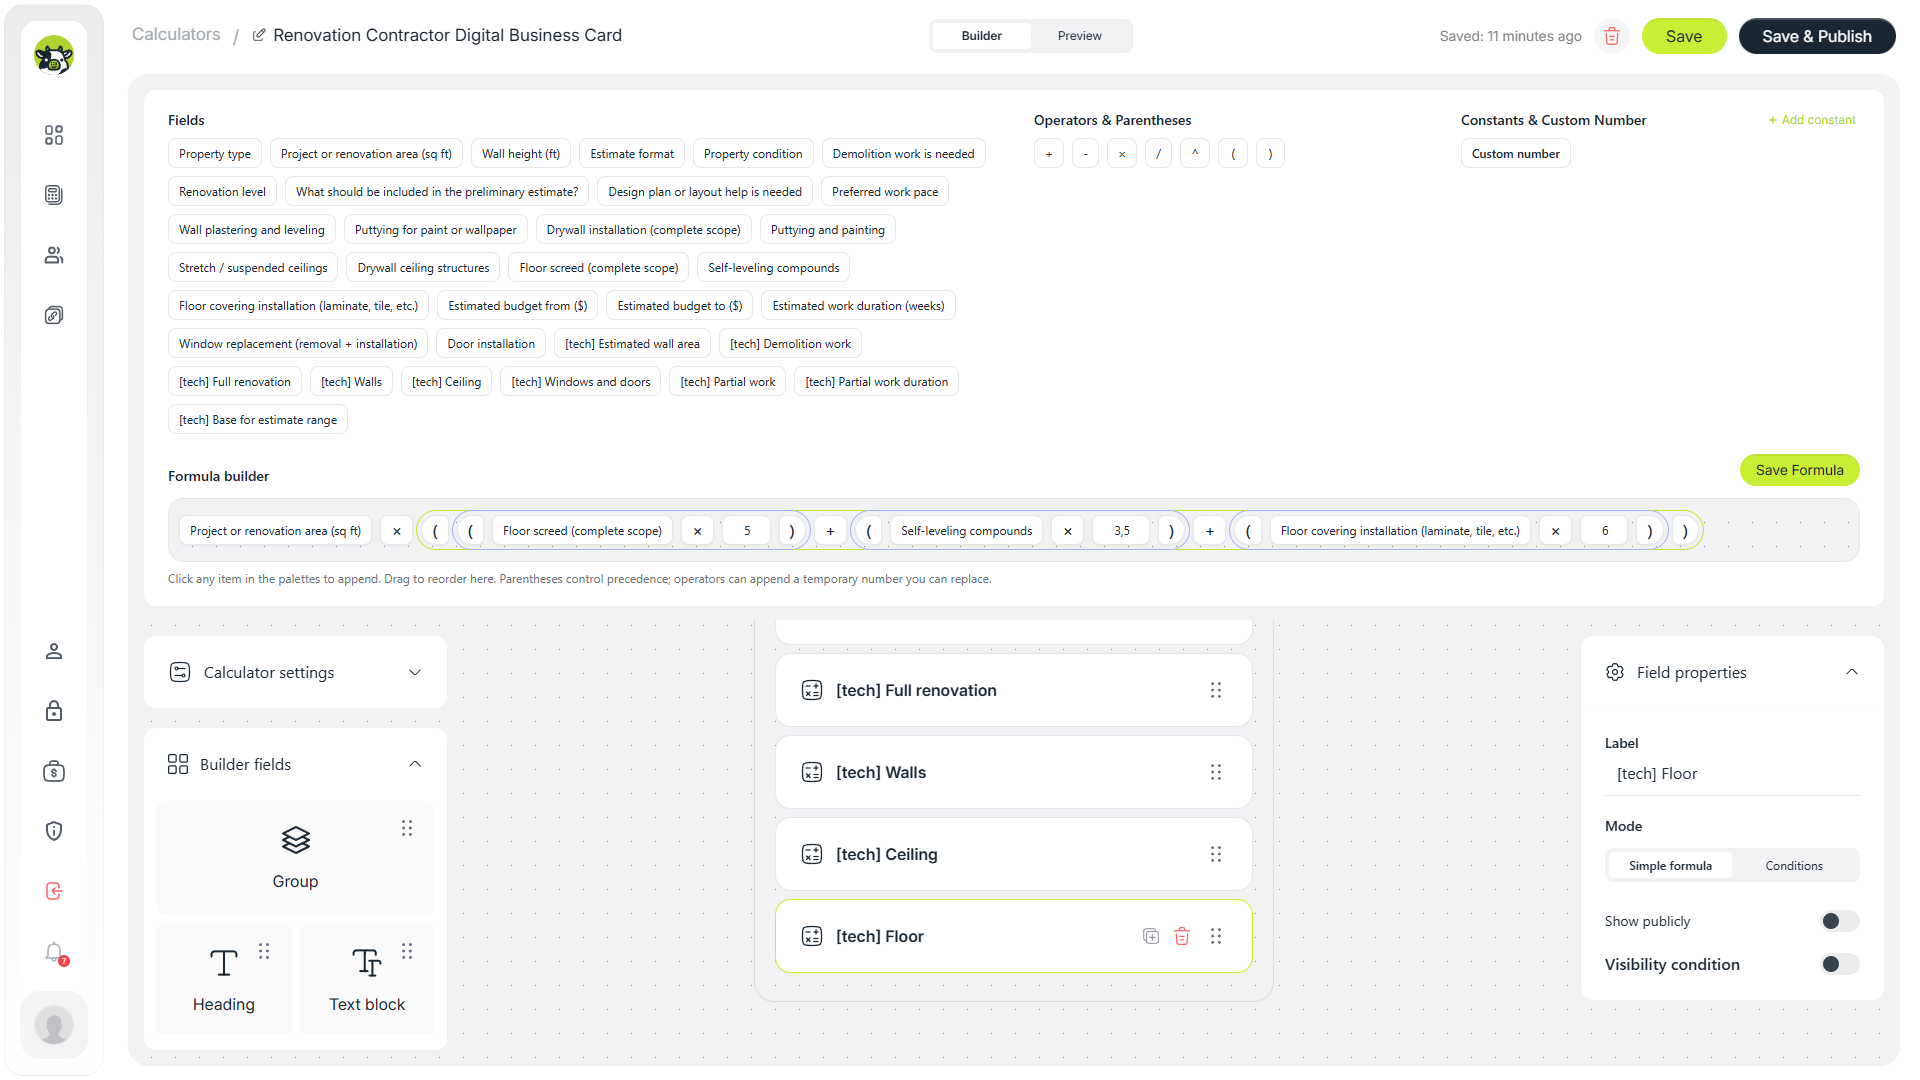
Technical formula for flooring work.
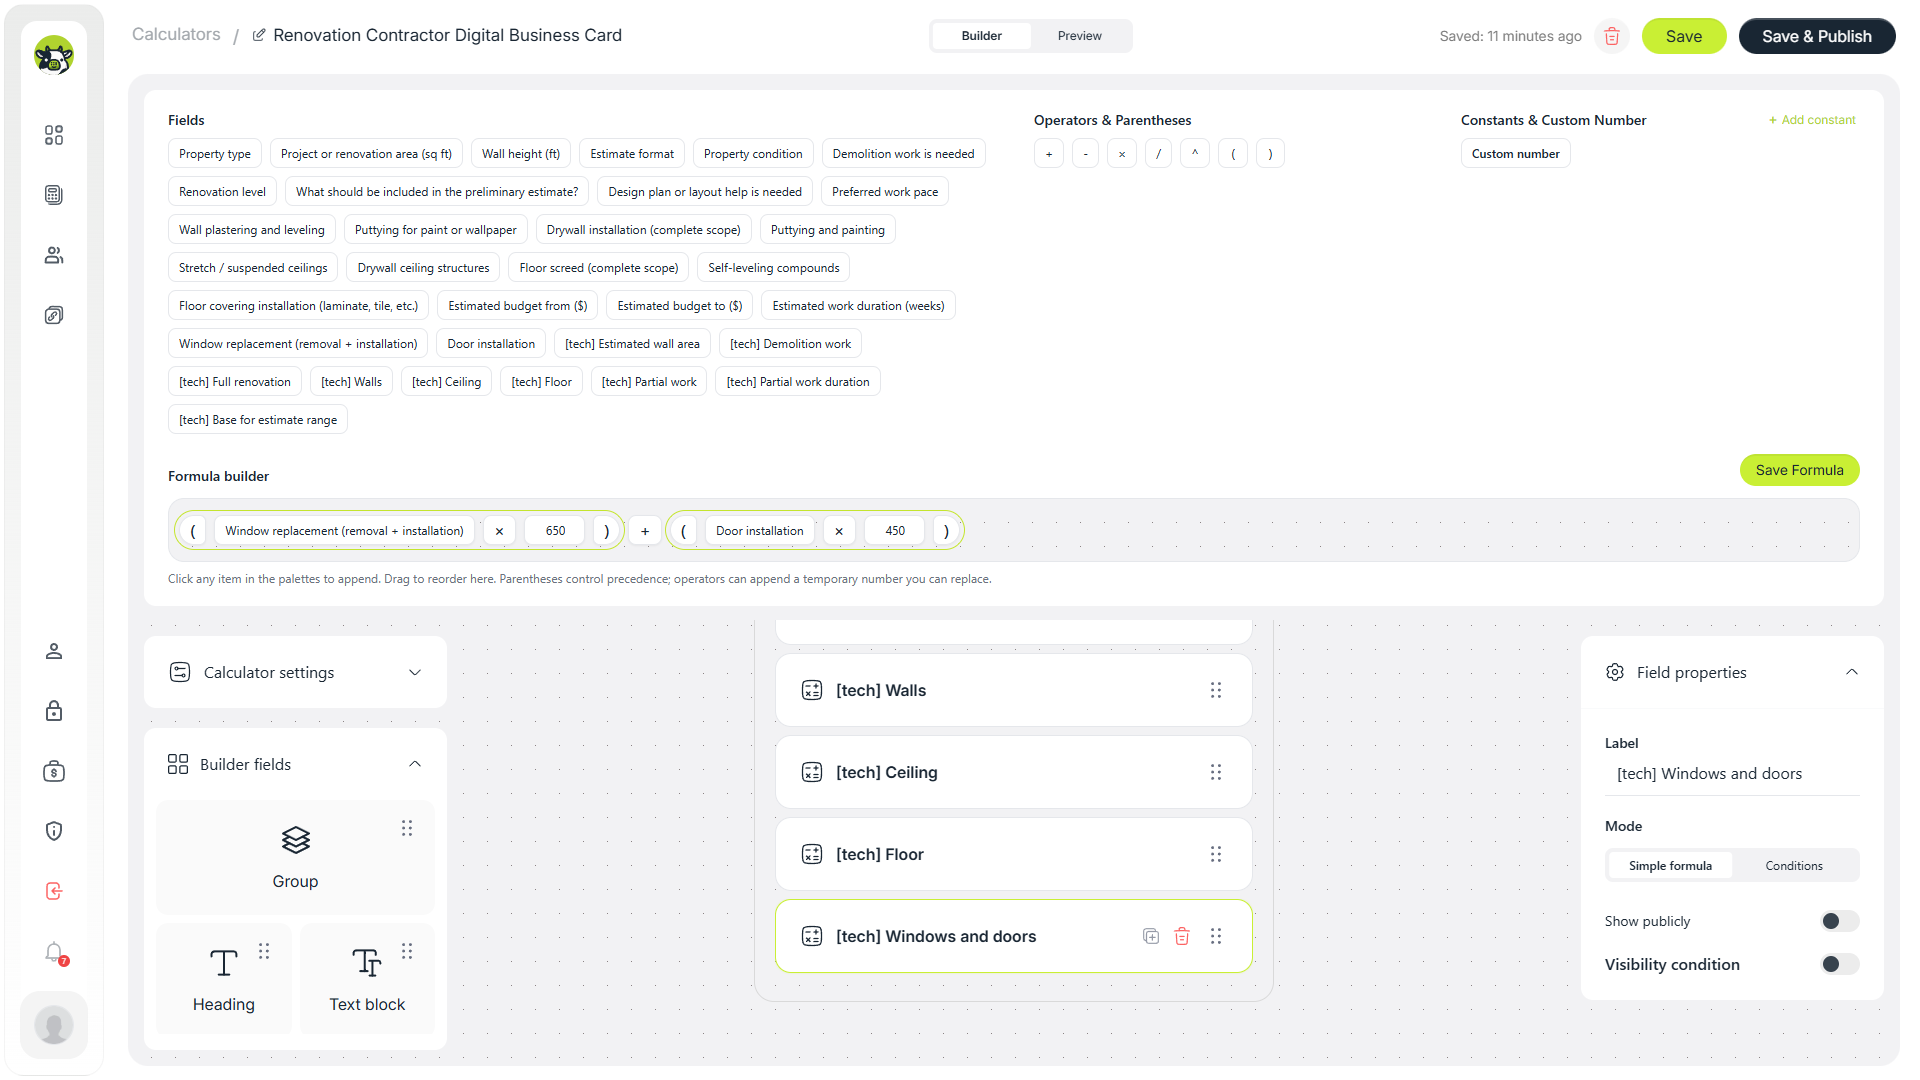
Technical formula for windows and doors.
Partial works total and timeline
Once the individual groups are calculated, you can create a combined partial works total and a separate timeline estimate. This allows the page to show not only budget range but also approximate project duration.
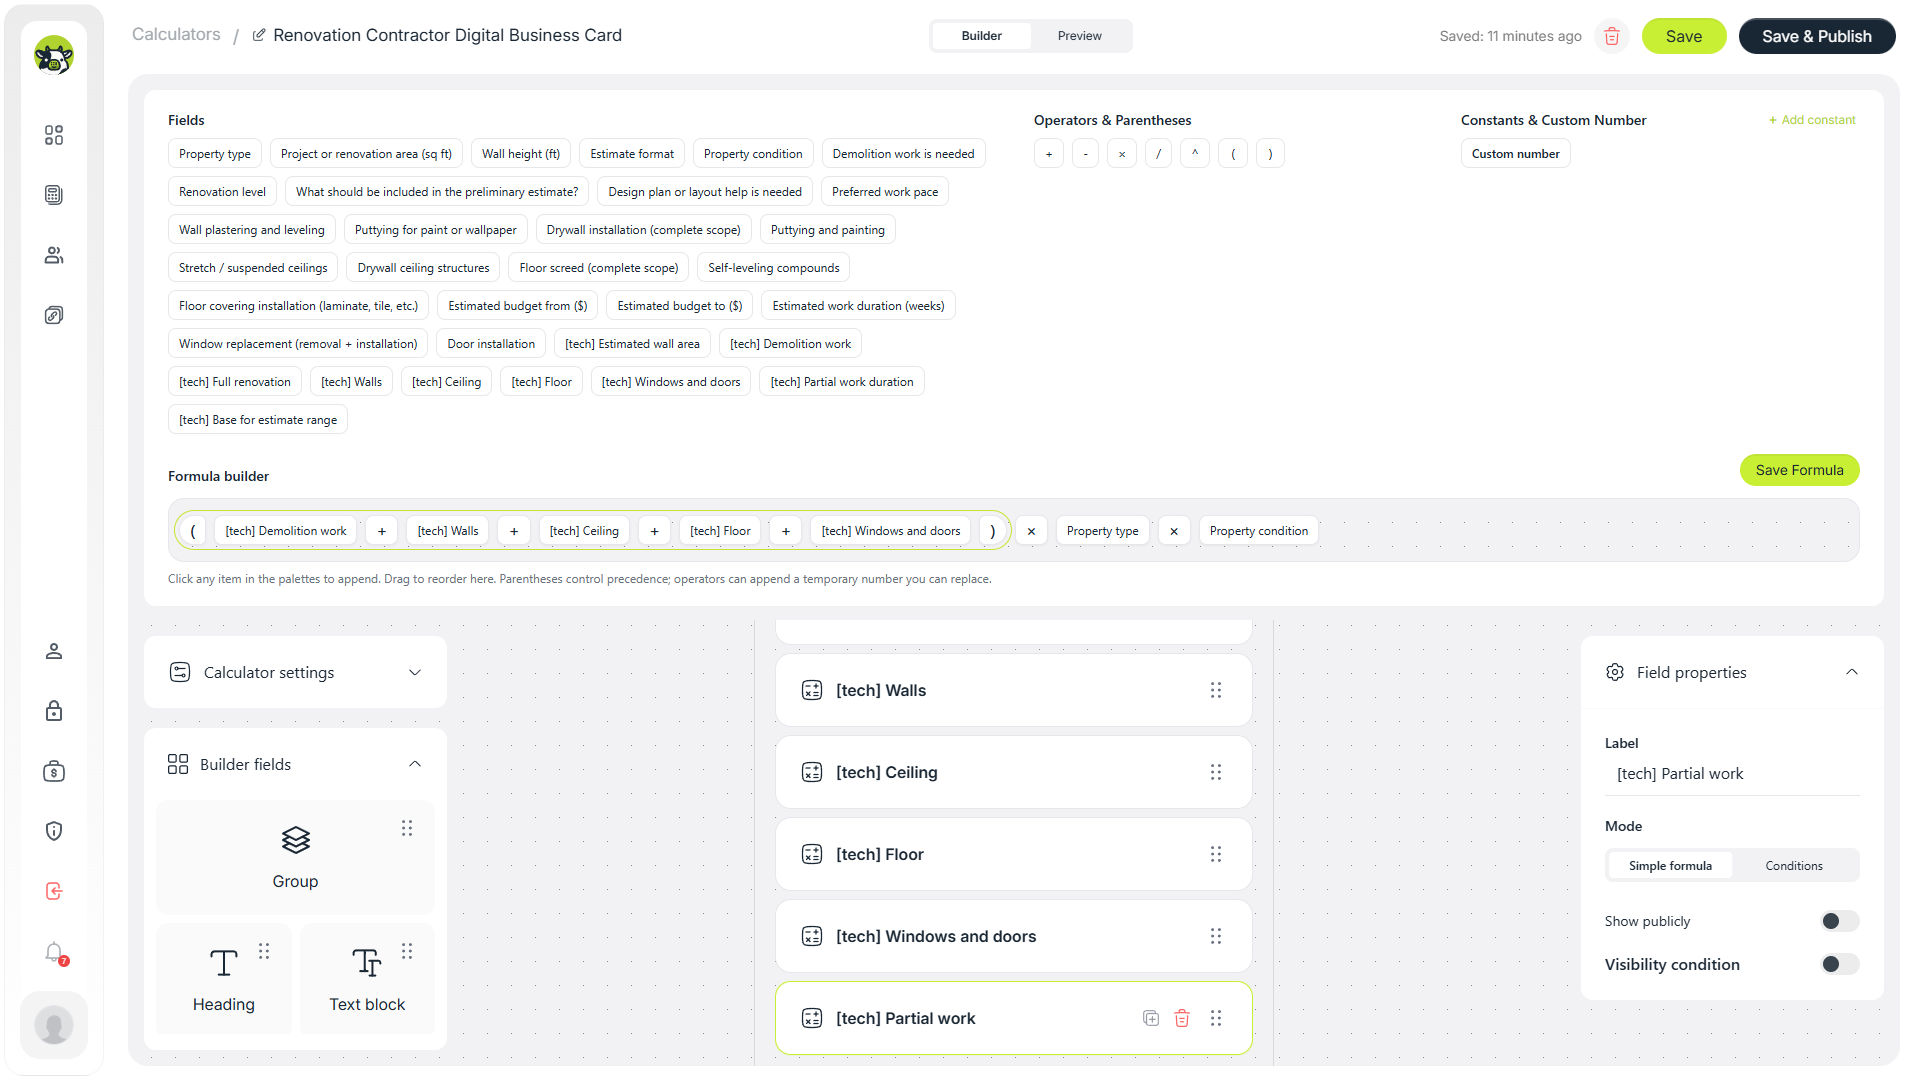
The combined formula for partial works.
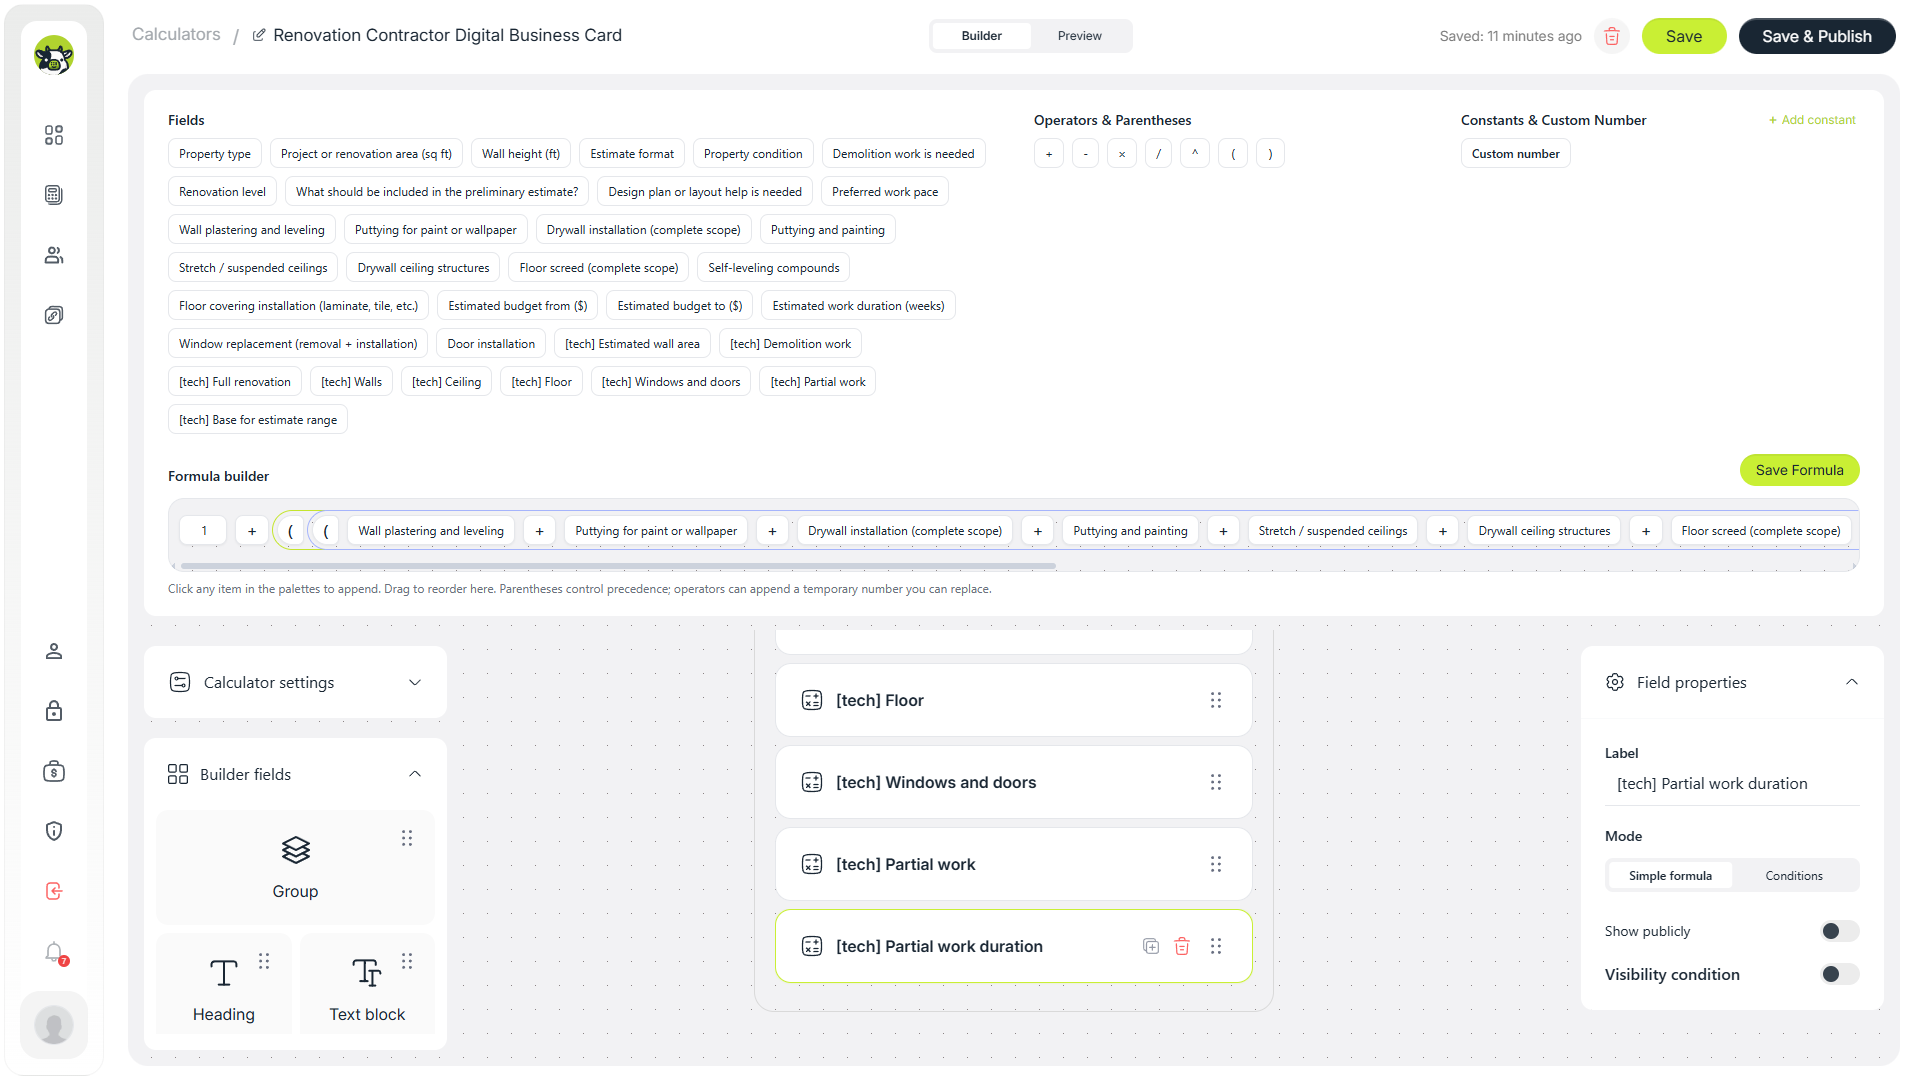
The technical formula for the estimated timeline of partial works.
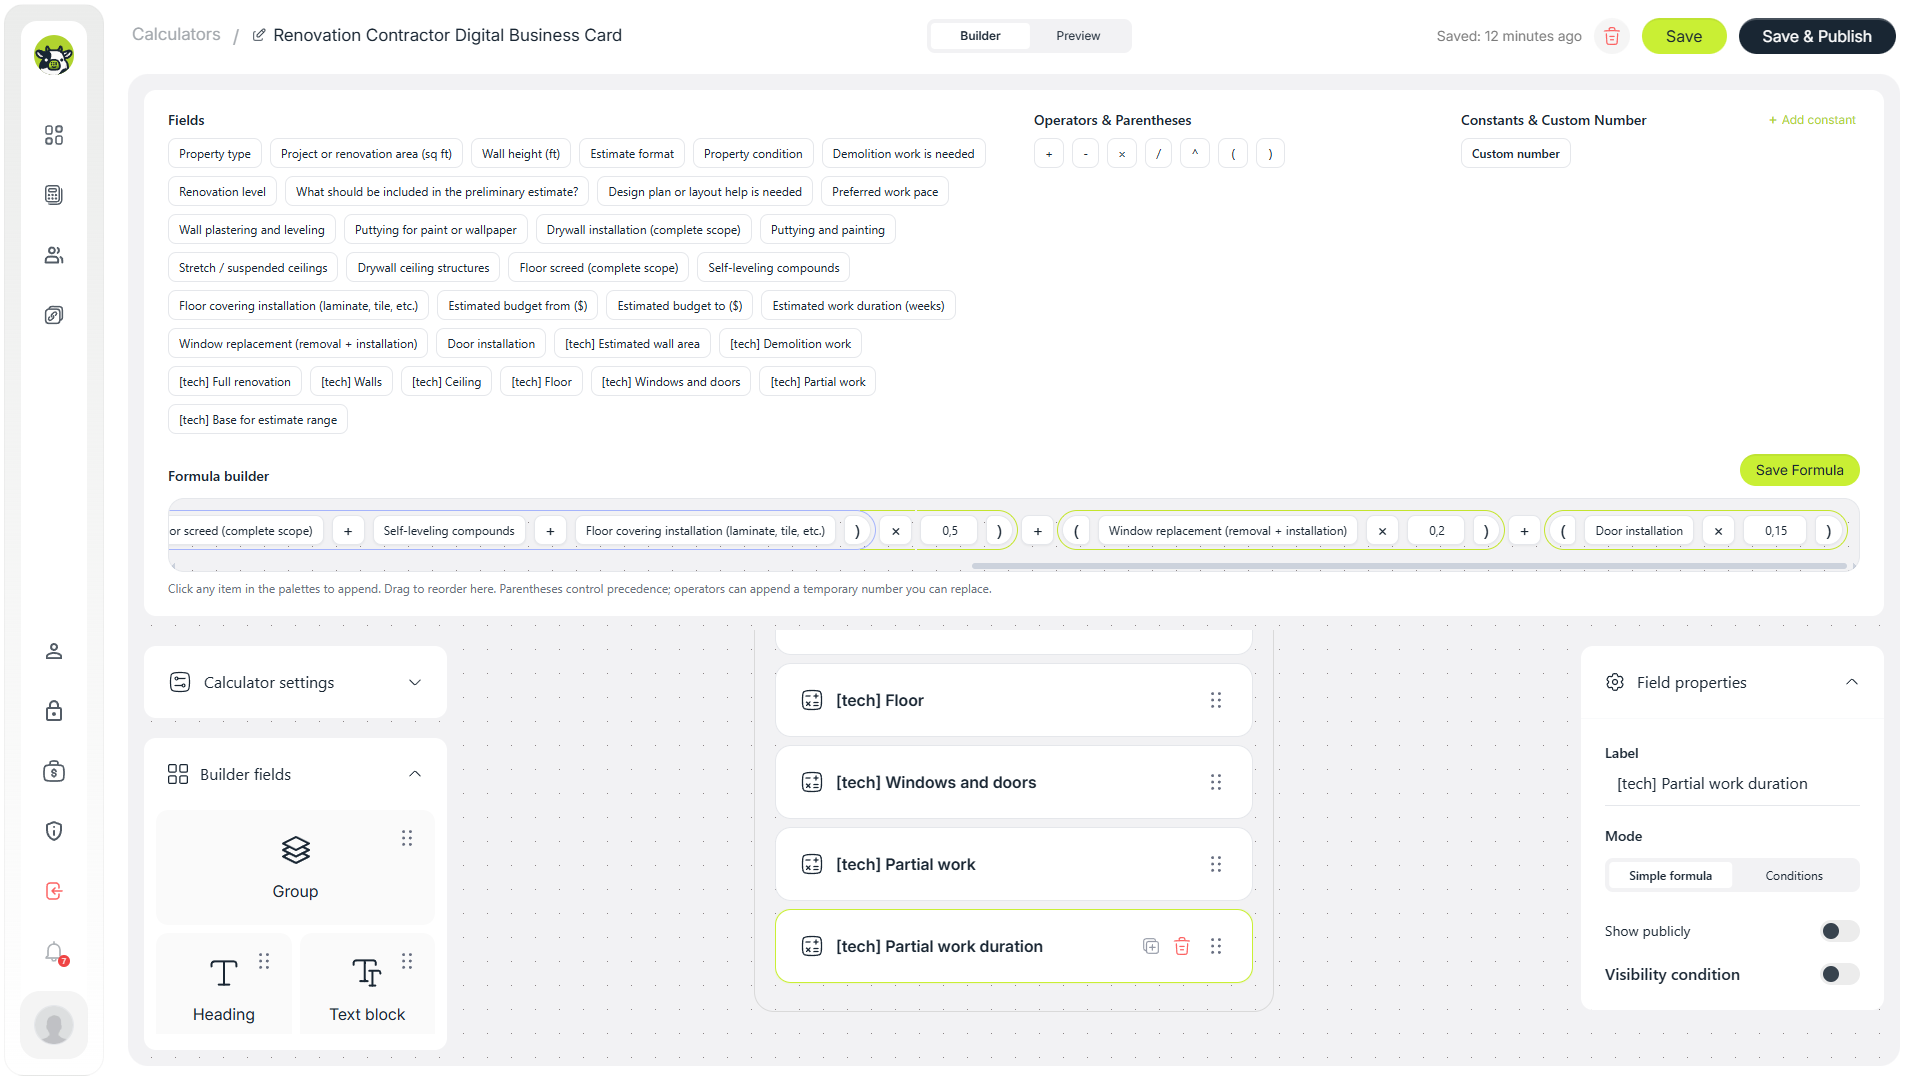
Horizontal scroll view of the partial works timeline formula.
7. Add conditional logic for the final result
Since the template has two different scenarios — full renovation and partial works — the final result needs to pick the correct calculation branch depending on what the user selected.
That is where a conditional computed field is useful. The first branch is used when the estimate format is “Full renovation.”
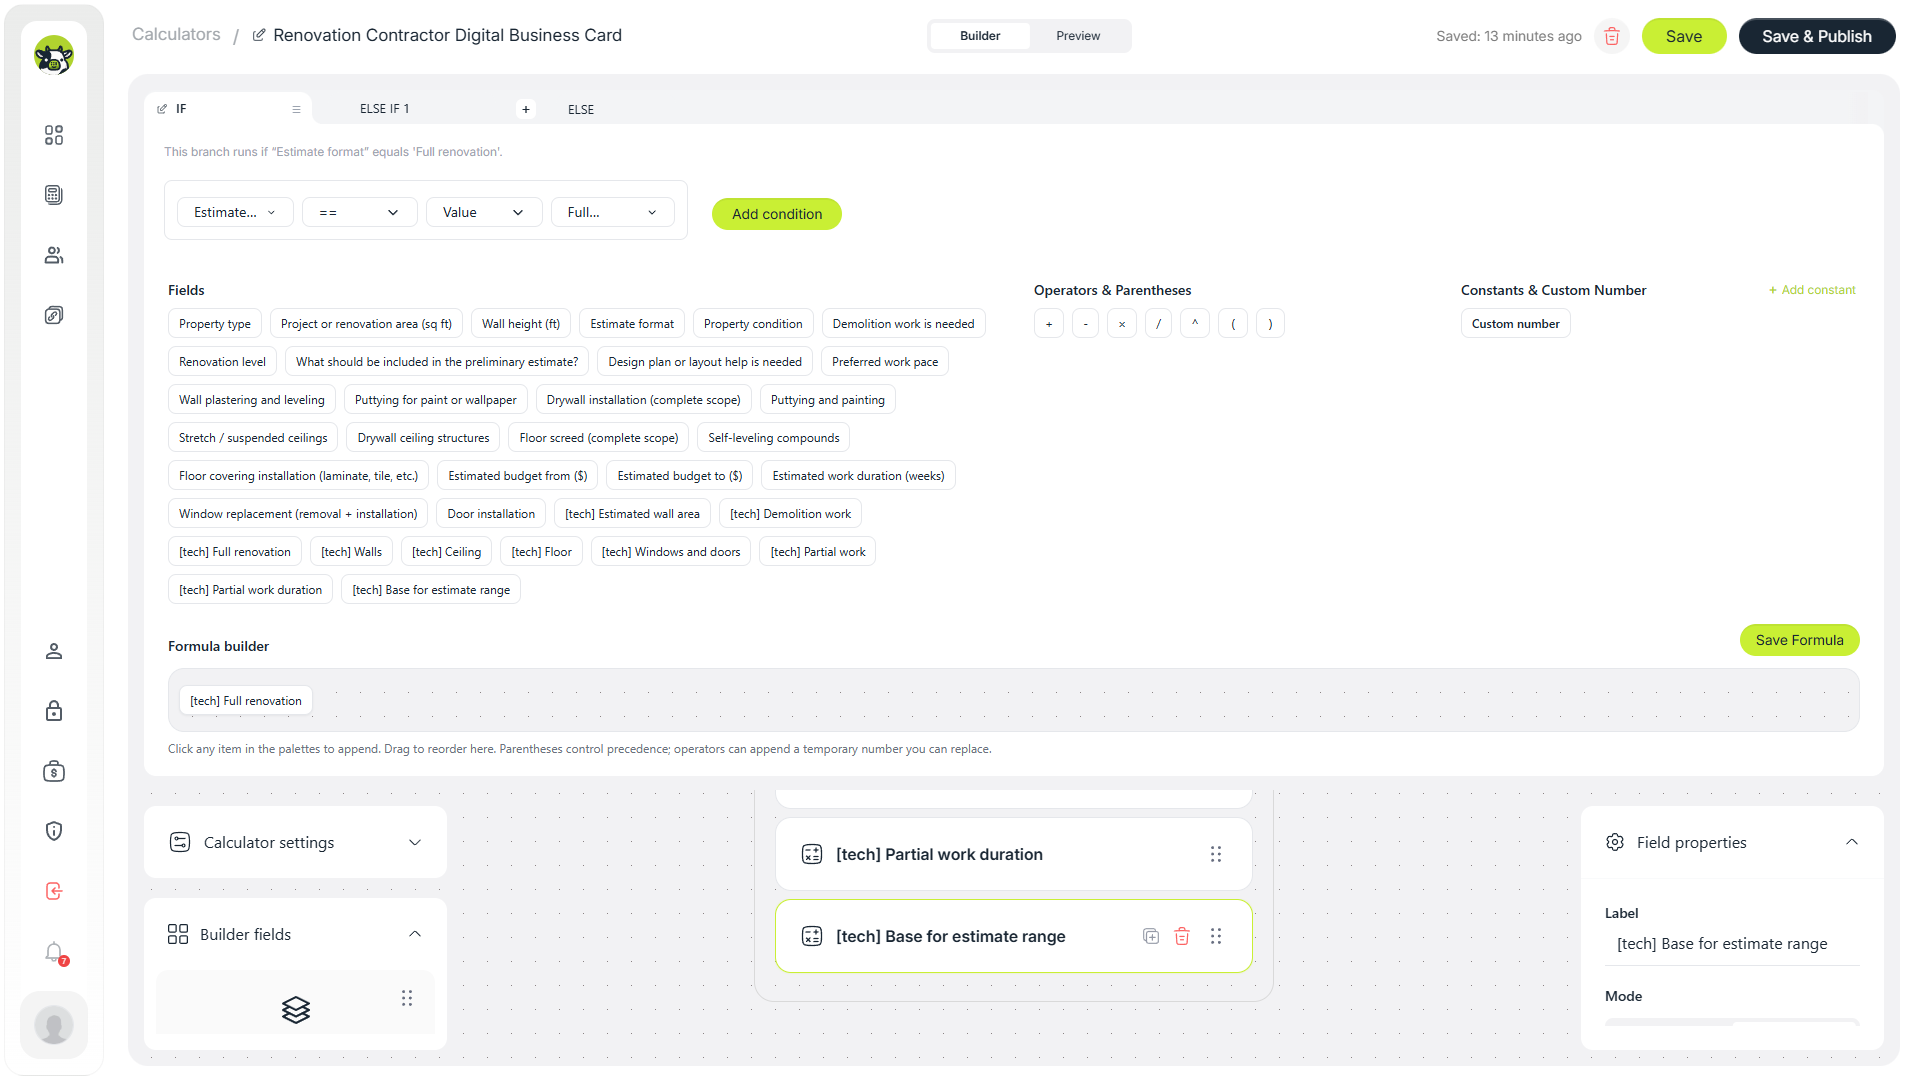
Conditional branch for the full renovation scenario.
The second branch is used when the user selects partial works.
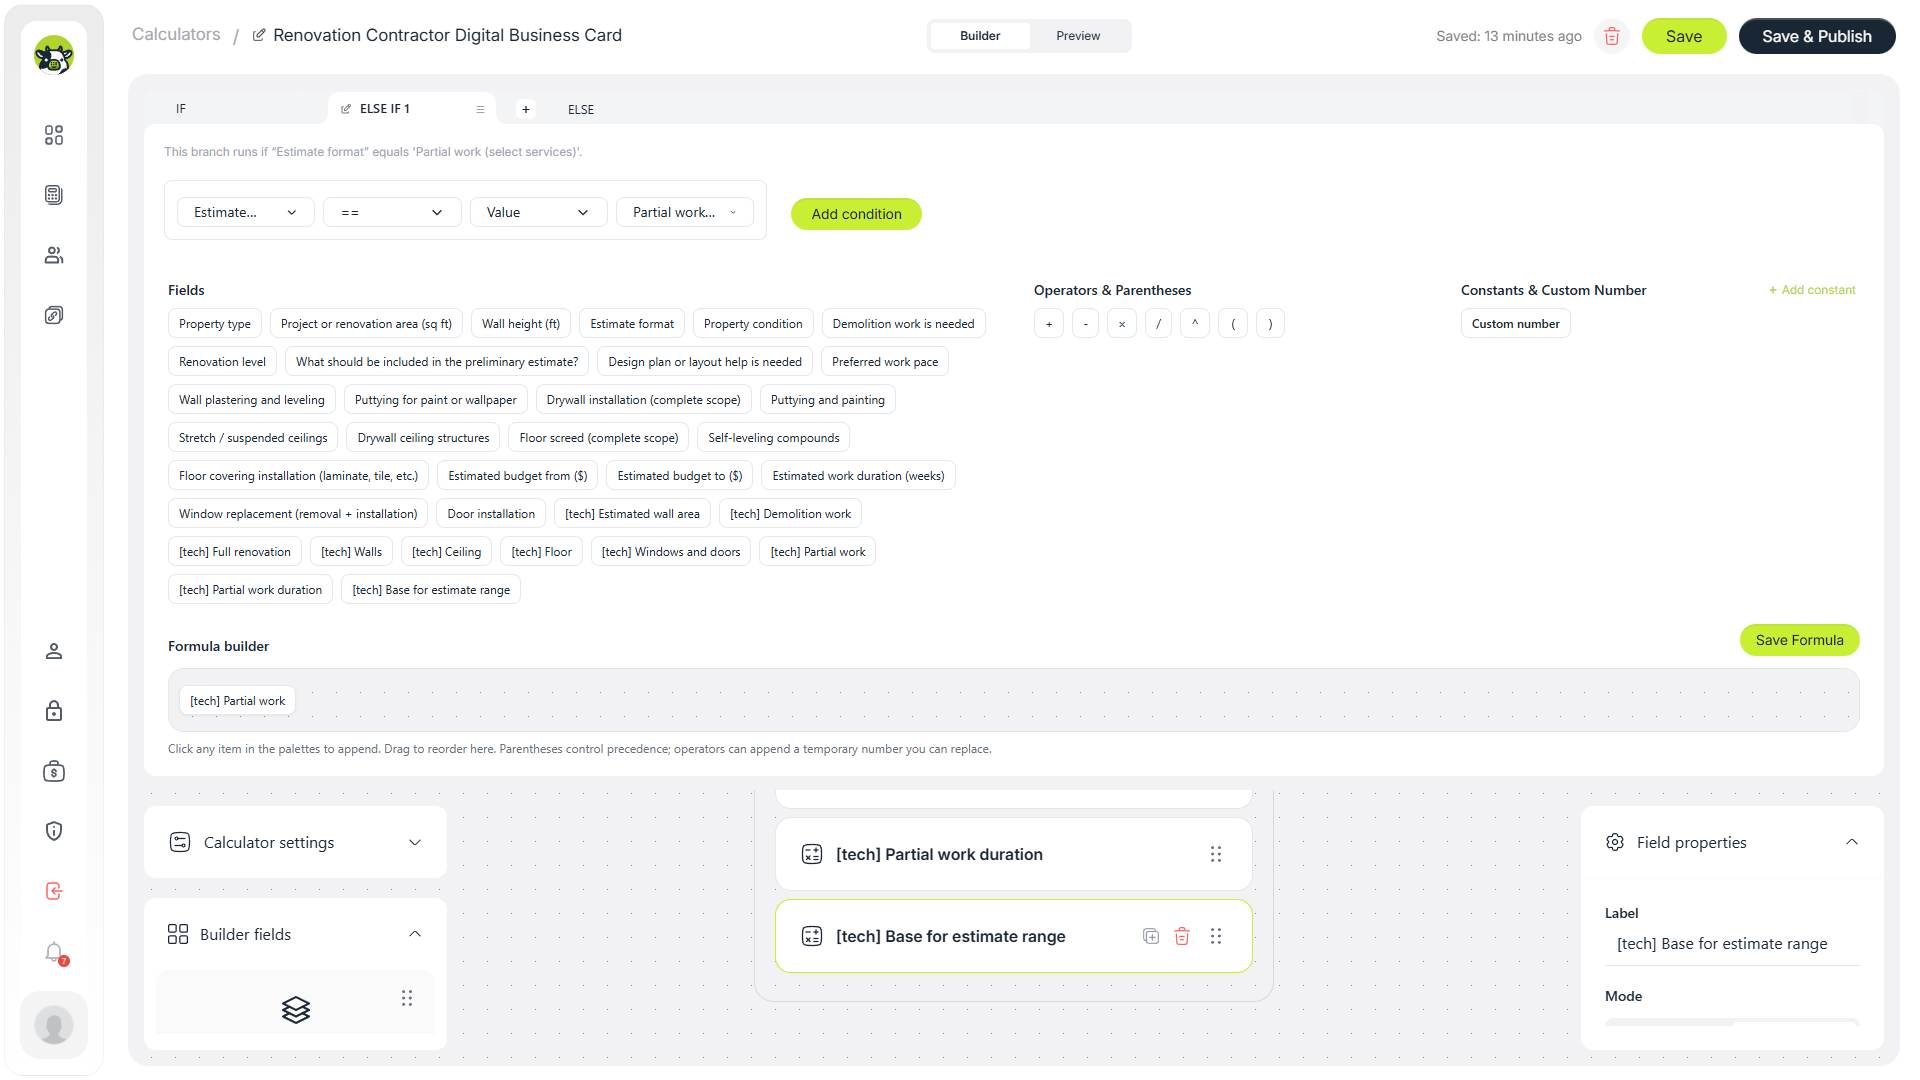
Conditional branch for the partial works scenario.
Budget range instead of one exact number
For renovation, it is better to show a range: “from” and “to.” This is more honest because, before a site visit, there are always unknowns related to hidden work, finish details, and actual property condition.
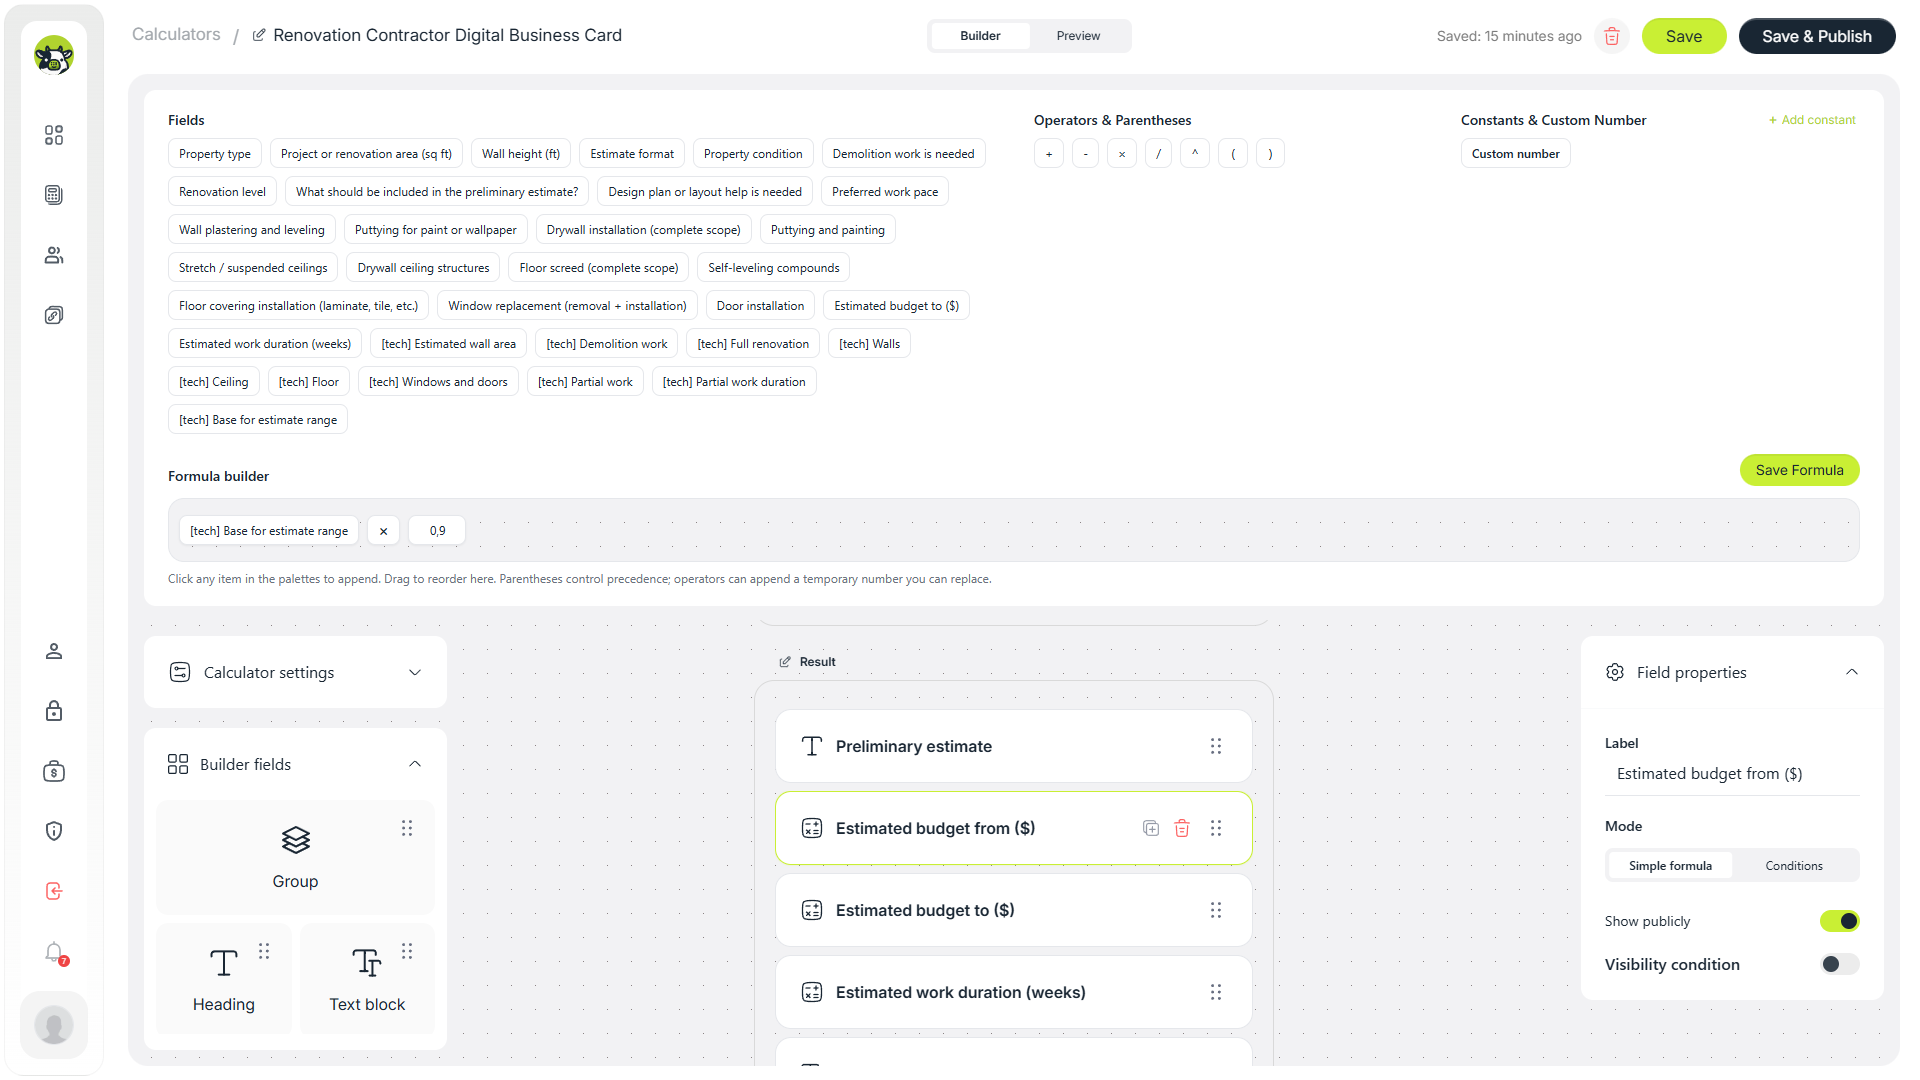
Formula for the lower boundary of the estimated budget.
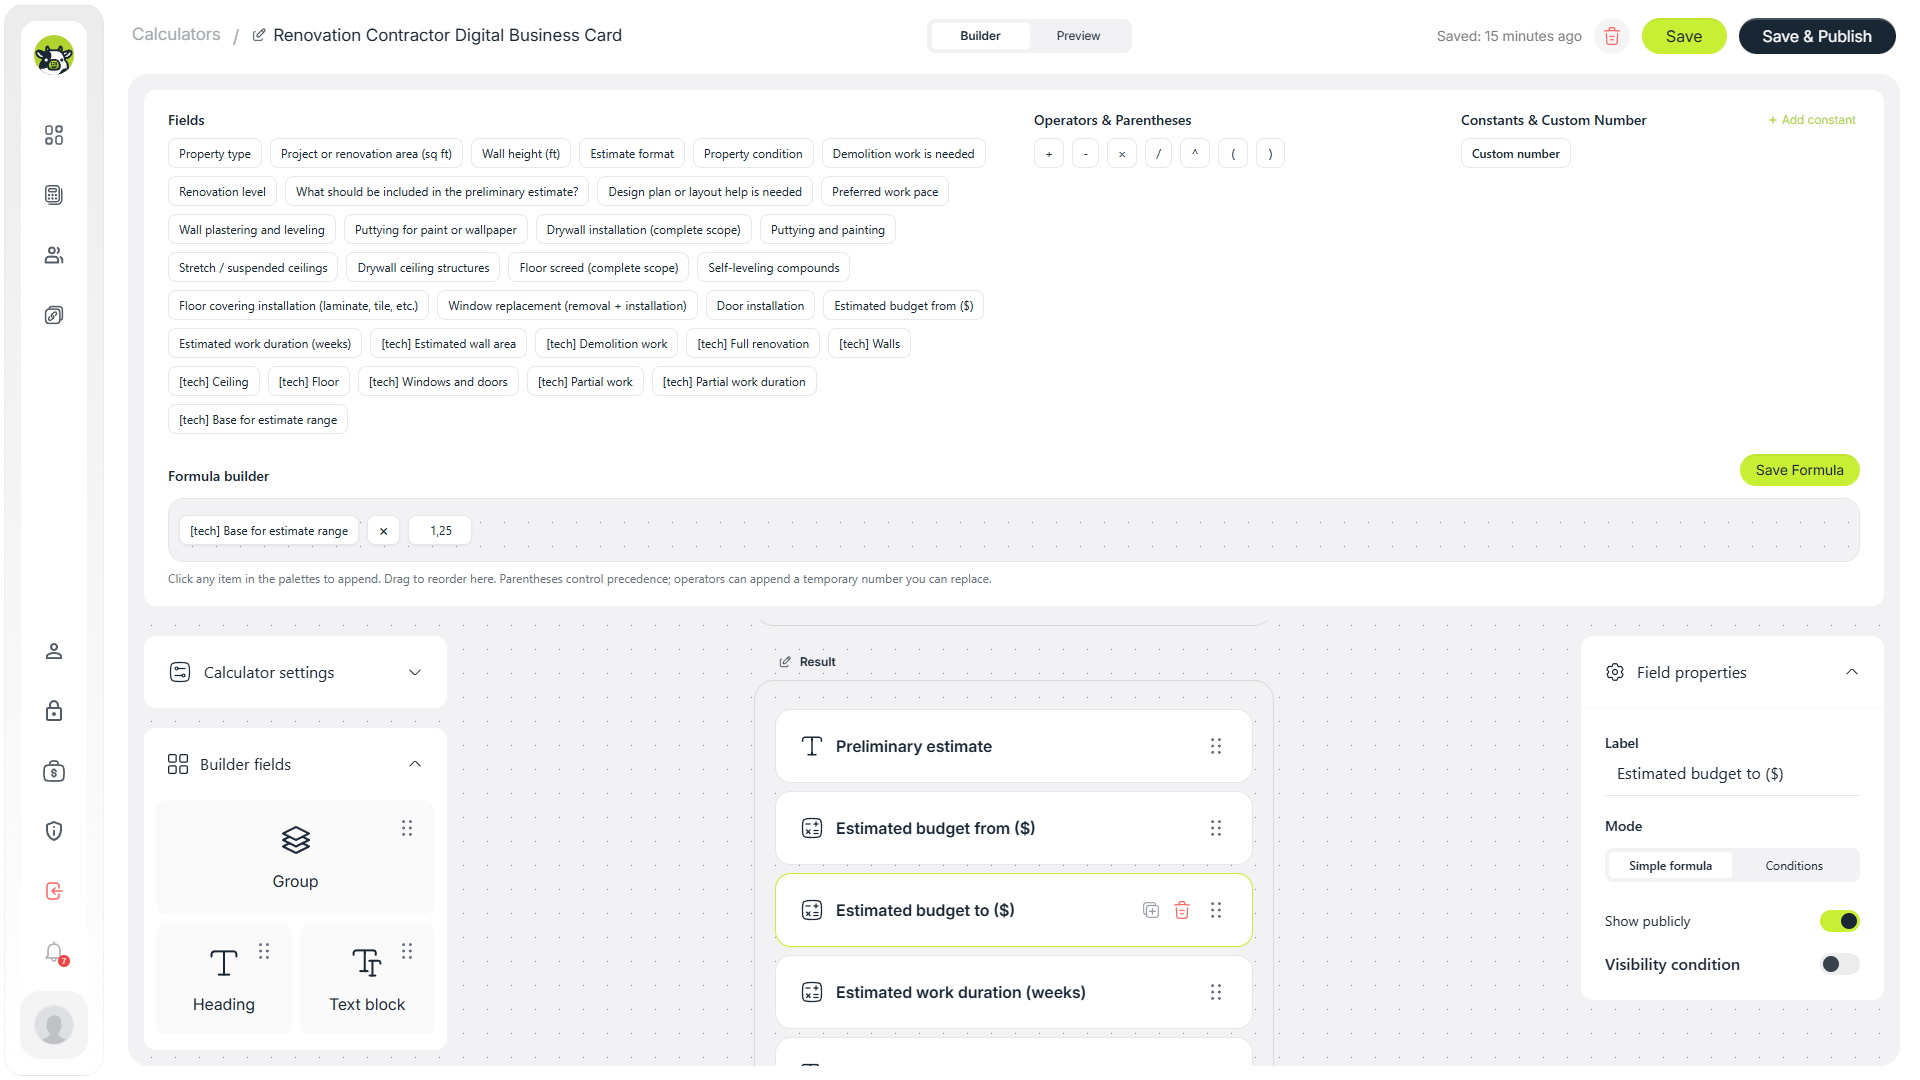
Formula for the upper boundary of the estimated budget.
Estimated timeline
The timeline can also be conditional. One branch can be used for full renovation, and another for partial works.
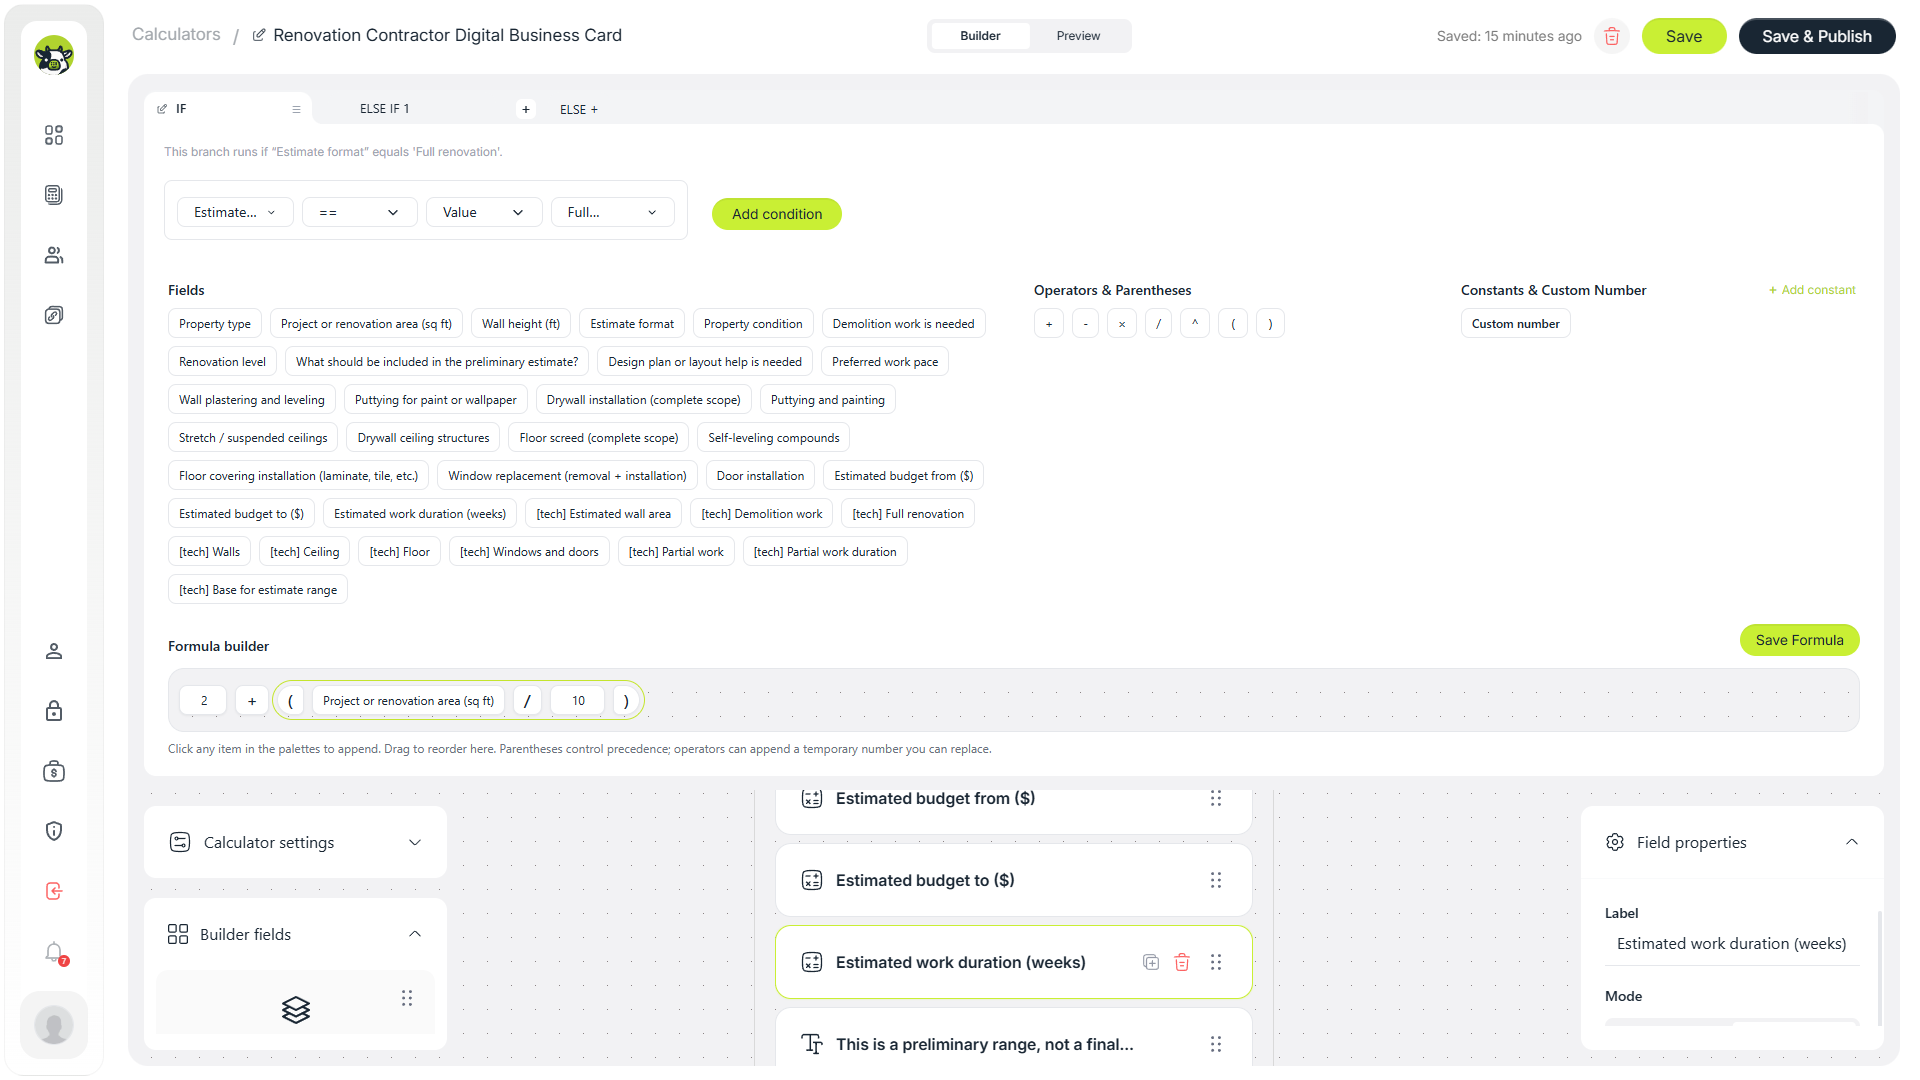
Conditional timeline branch for full renovation.
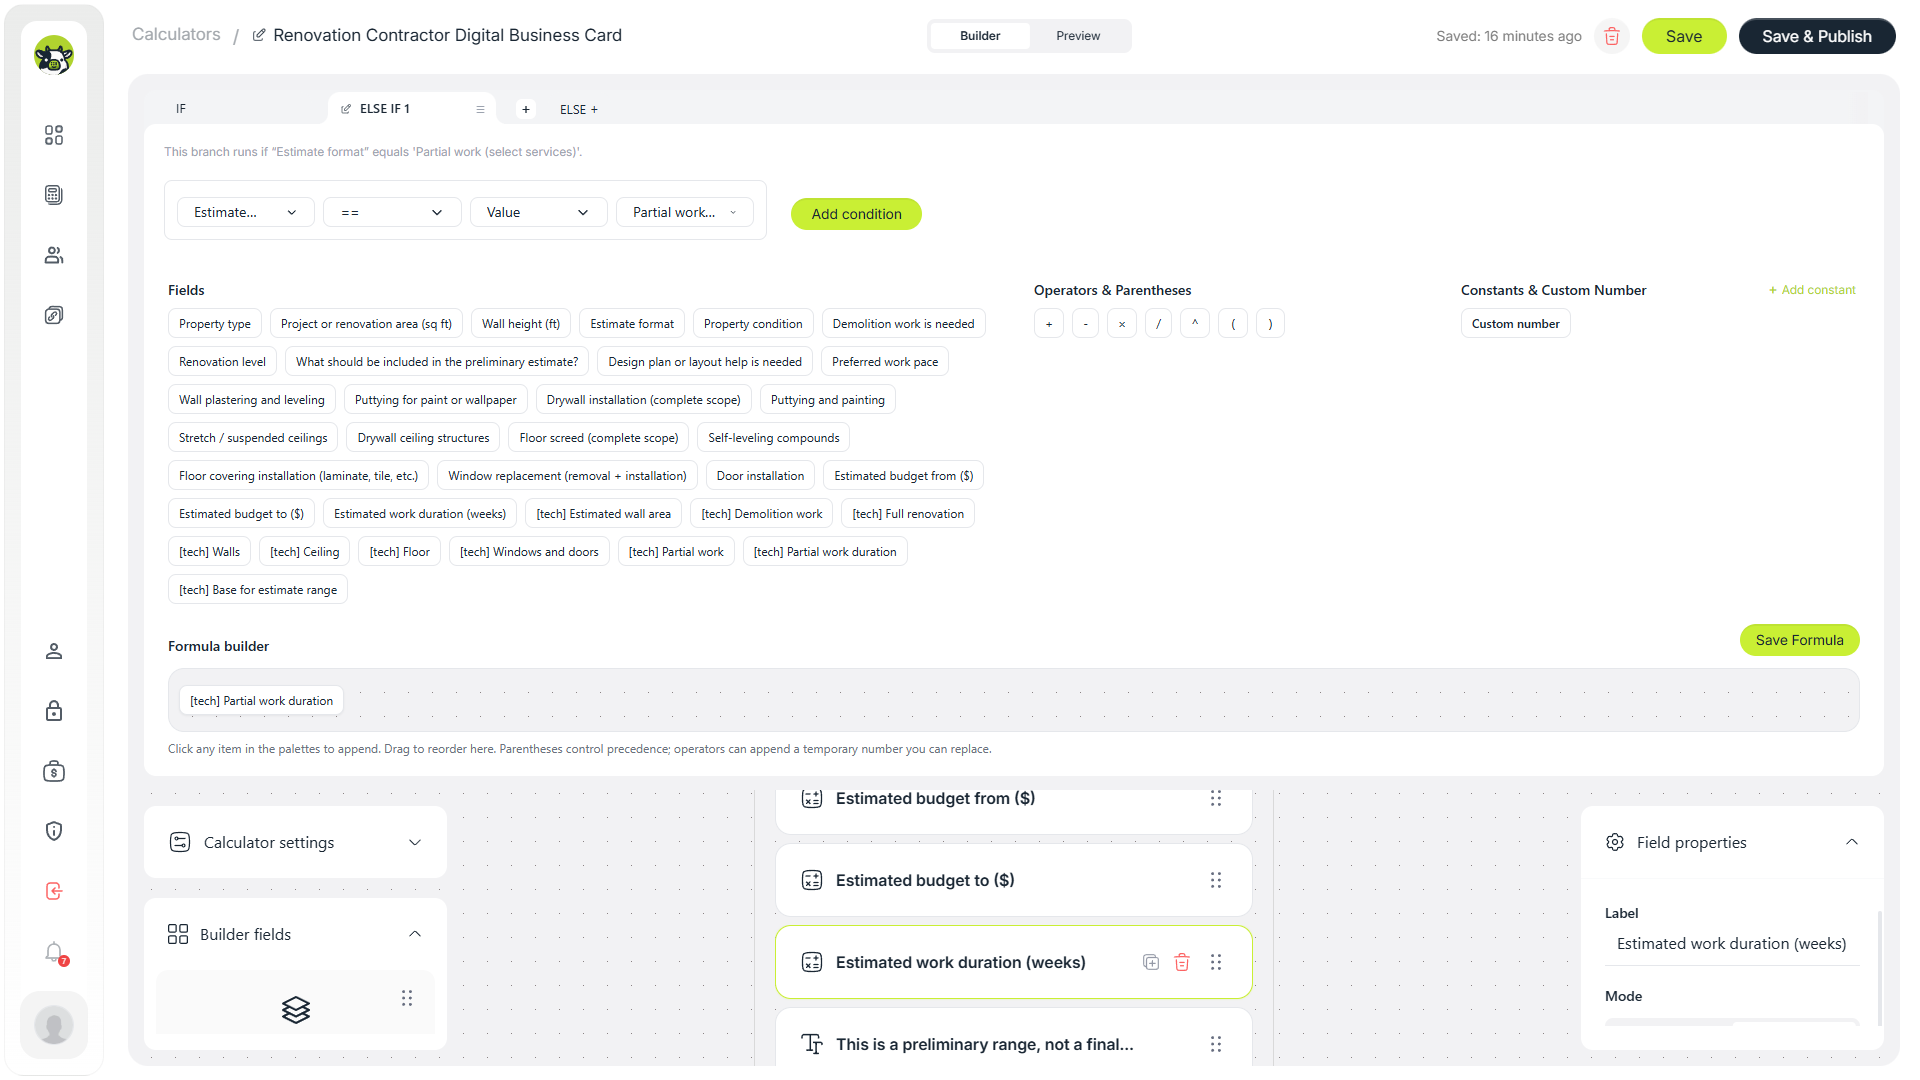
Conditional timeline branch for partial works.
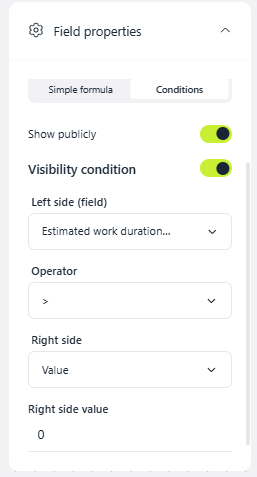
A visibility rule prevents the timeline field from showing before it has a value.
It is better to say “estimated budget” or “preliminary estimate” instead of “exact price.” That keeps expectations realistic before the property has been inspected.
8. Add the lead form, success message, and branding
After the result, the user needs a next step. In this template, that step is a contact form such as “Discuss your project.” It collects the customer’s name, phone, email, and a short project note.
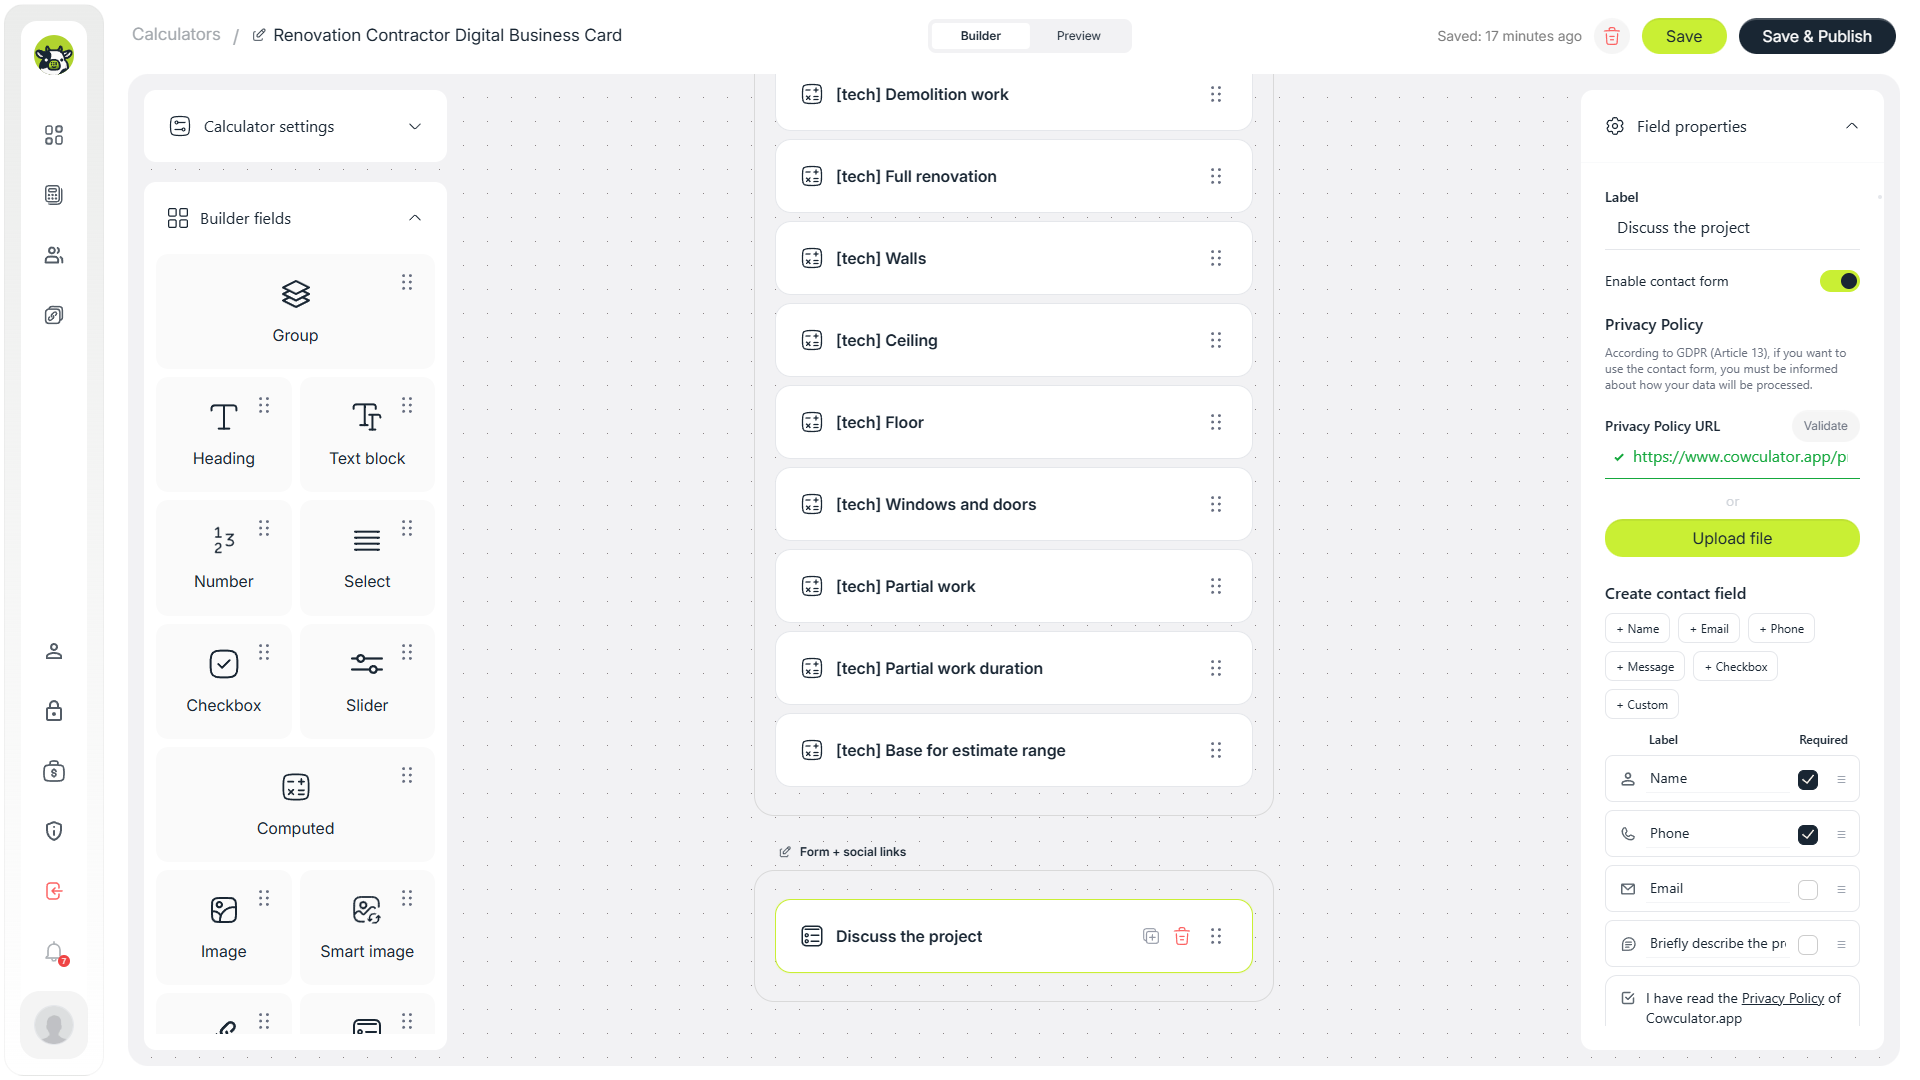
The contact form shown after the renovation estimate.
It is also worth configuring the success message. It should confirm that the request has been received and explain what happens next.
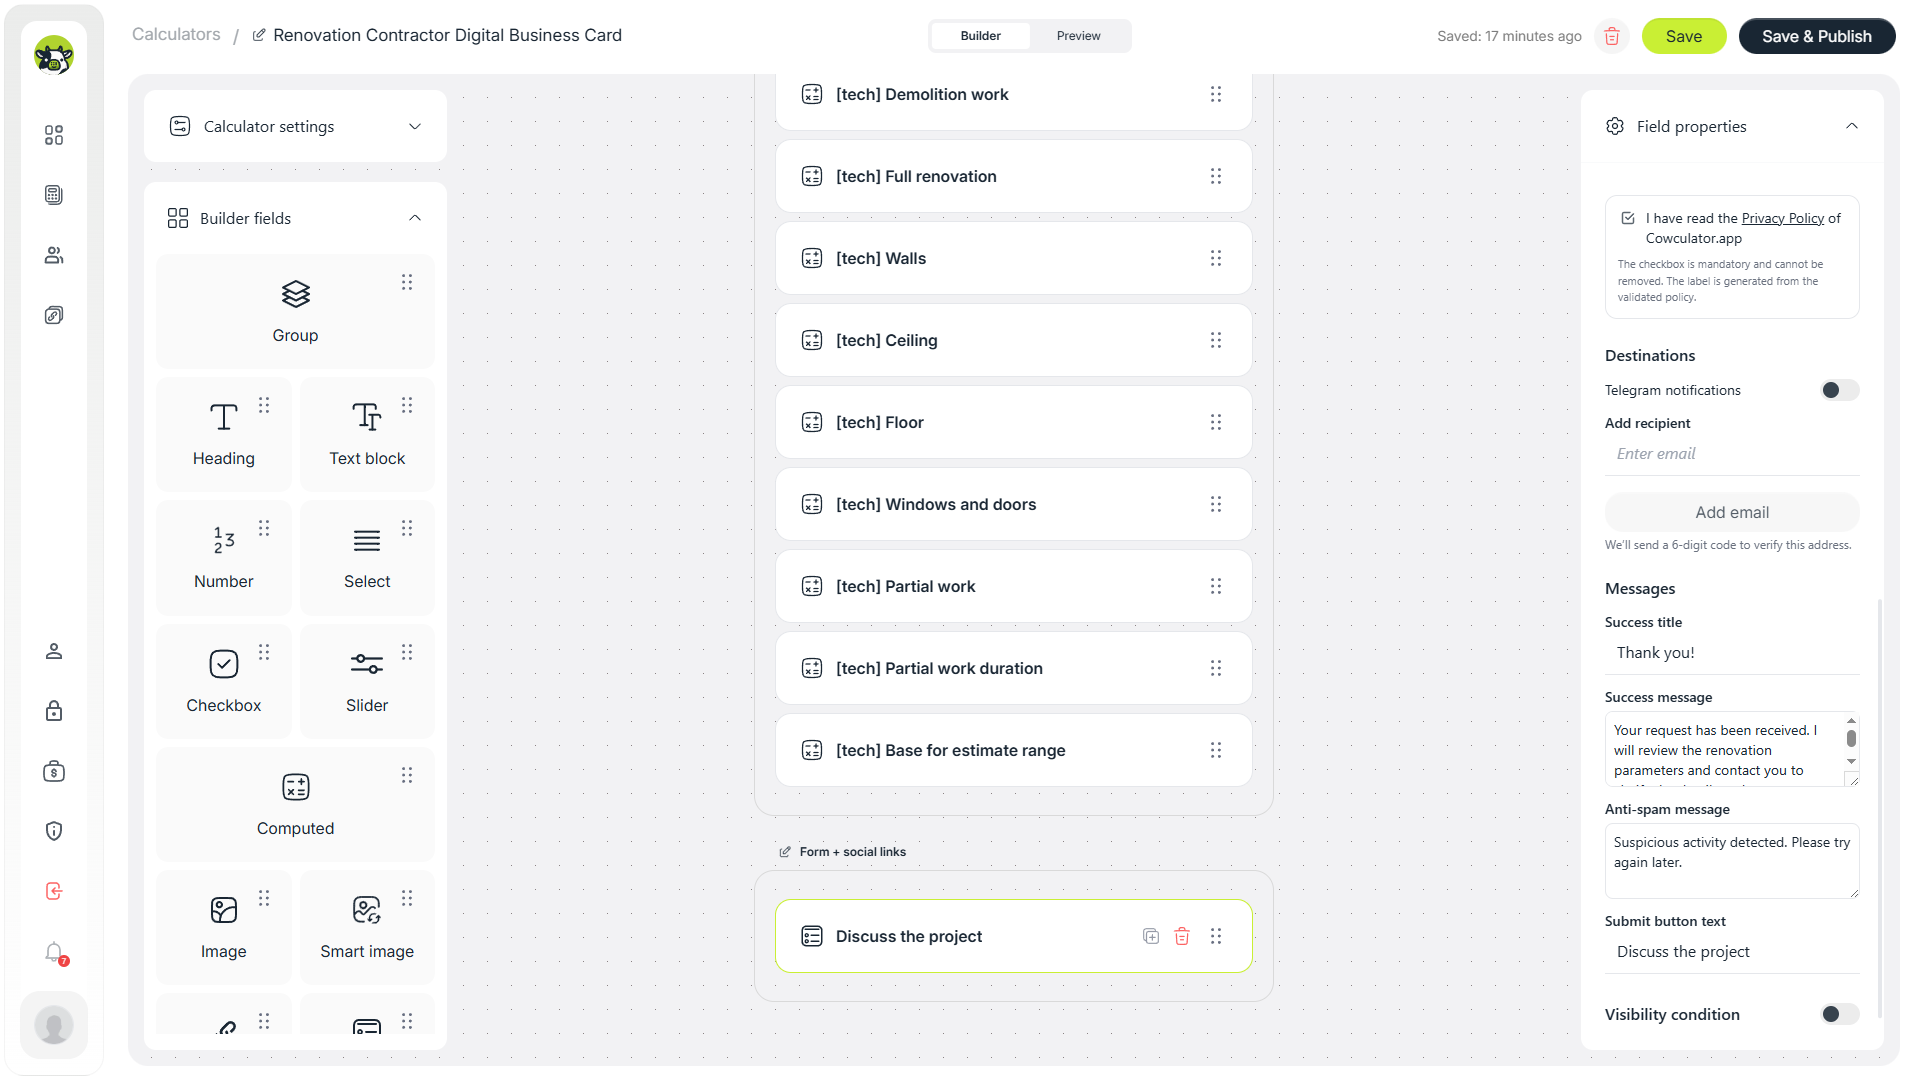
The success message shown after sending the form.
At the bottom of the page, you can repeat the social links. This is helpful when the user reaches the end of the page and wants a quick contact shortcut.
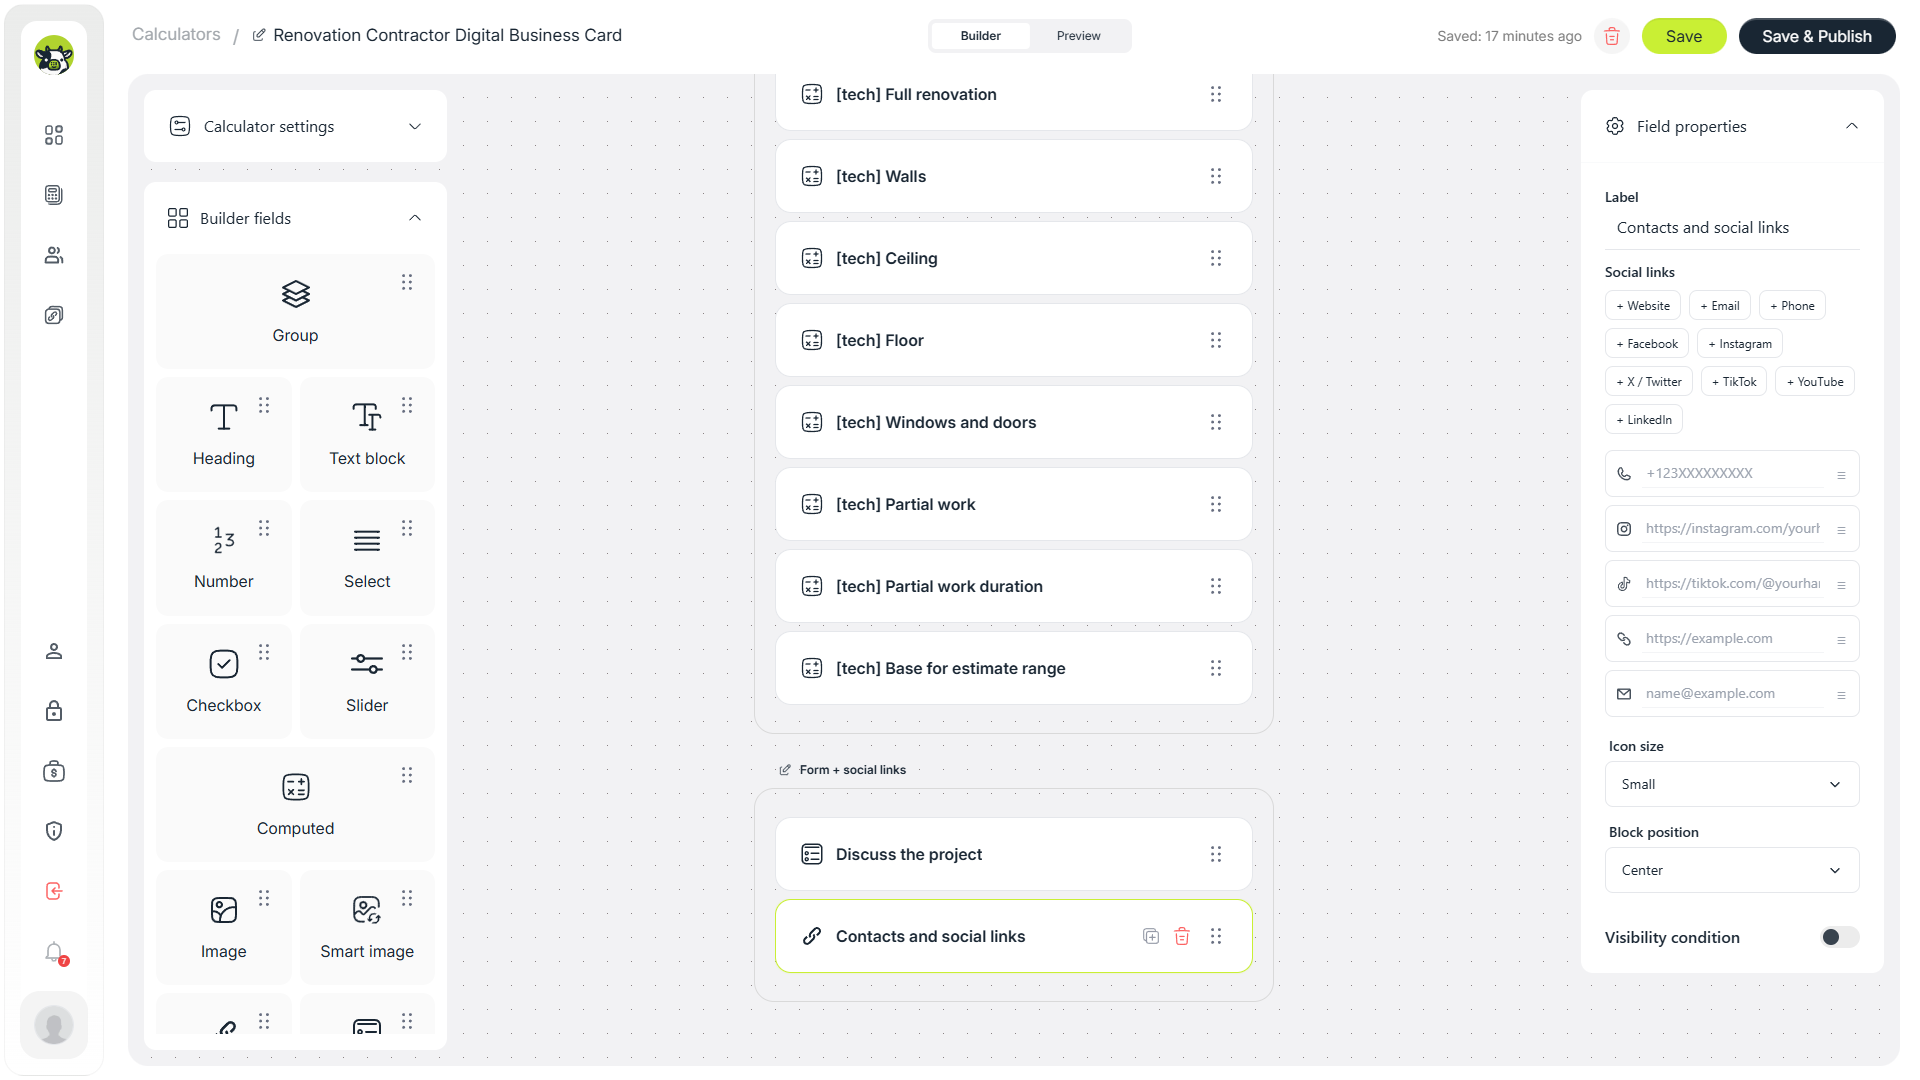
Bottom social links section in the public business card.
Once the logic and the form are ready, you can adjust the brand styling: colors, accent button tone, and the overall visual feel of the page.
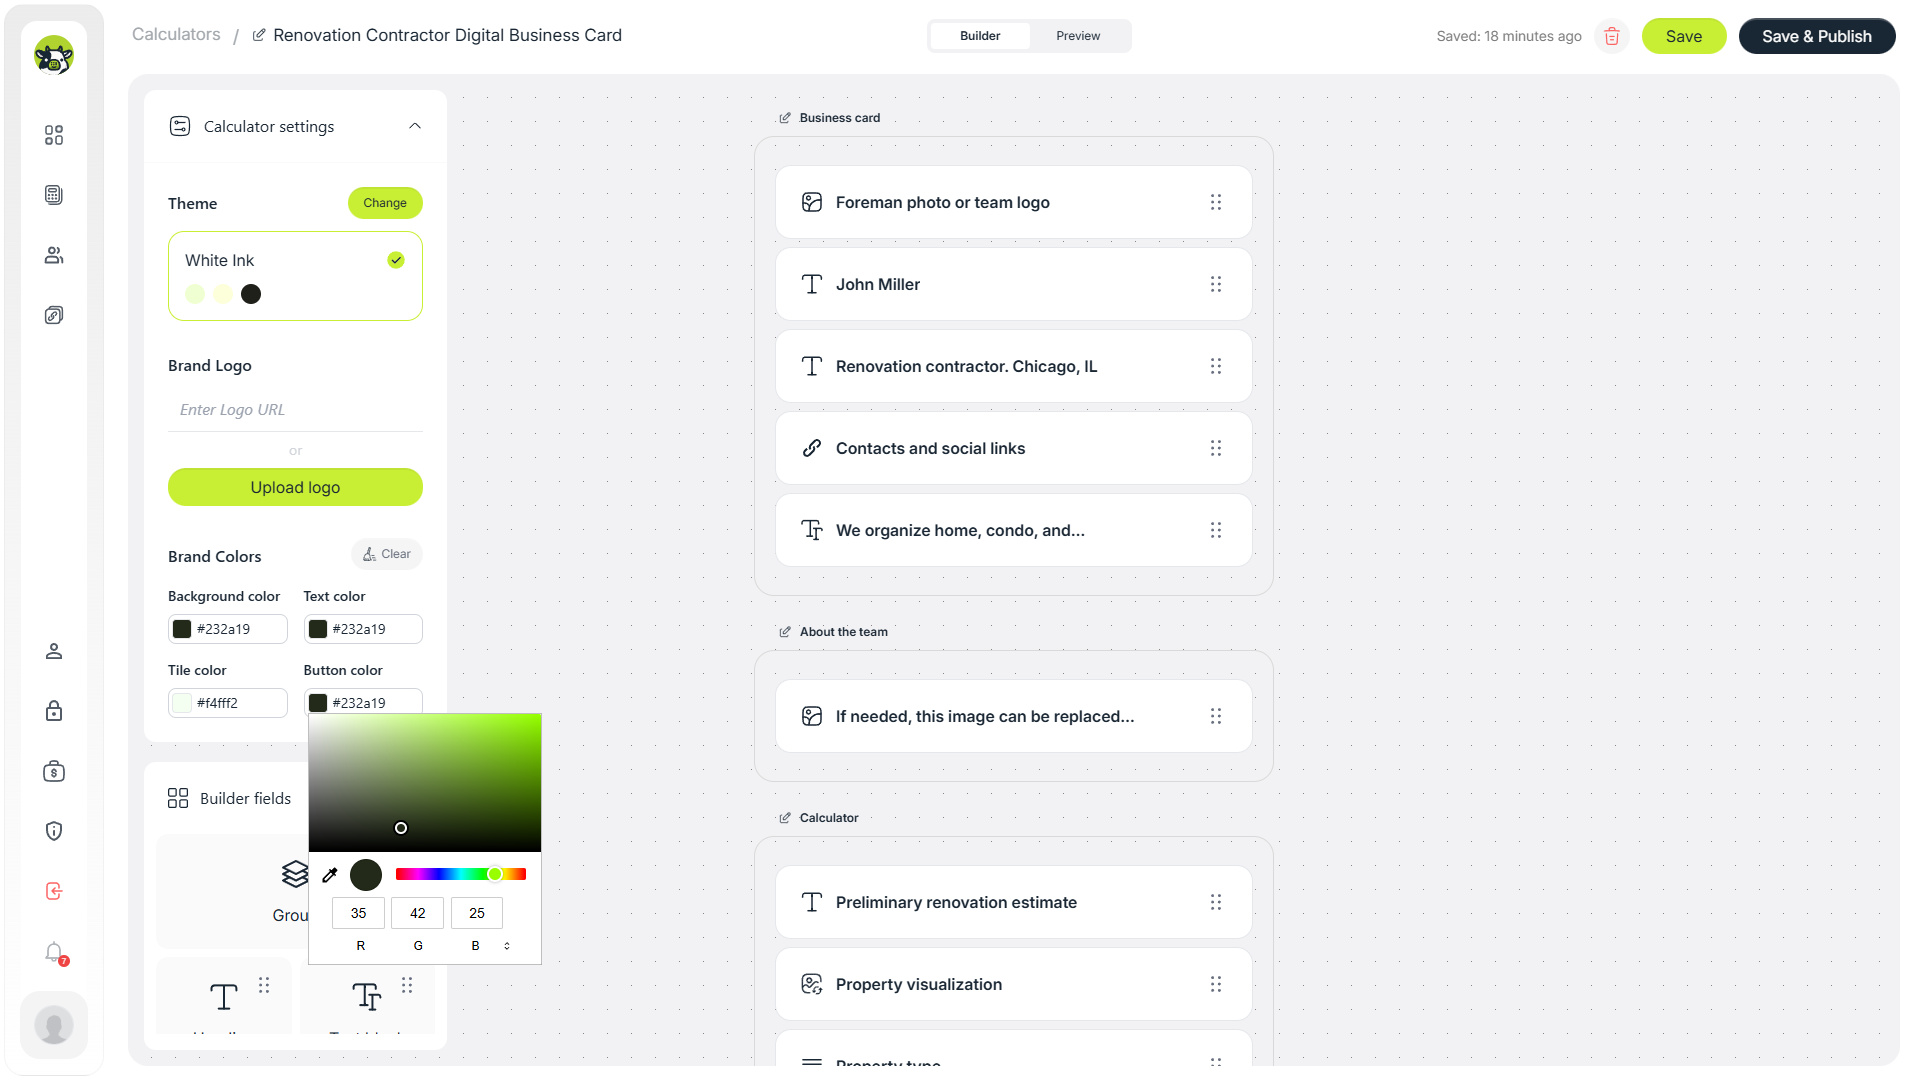
Brand color settings inside Cowculator.
9. Review the public preview
In preview mode, you can see the page exactly as the customer will see it. This is an important step: go through the page like a real user and check whether the number of fields feels reasonable, whether the result wording is clear, and whether the contact flow feels natural.
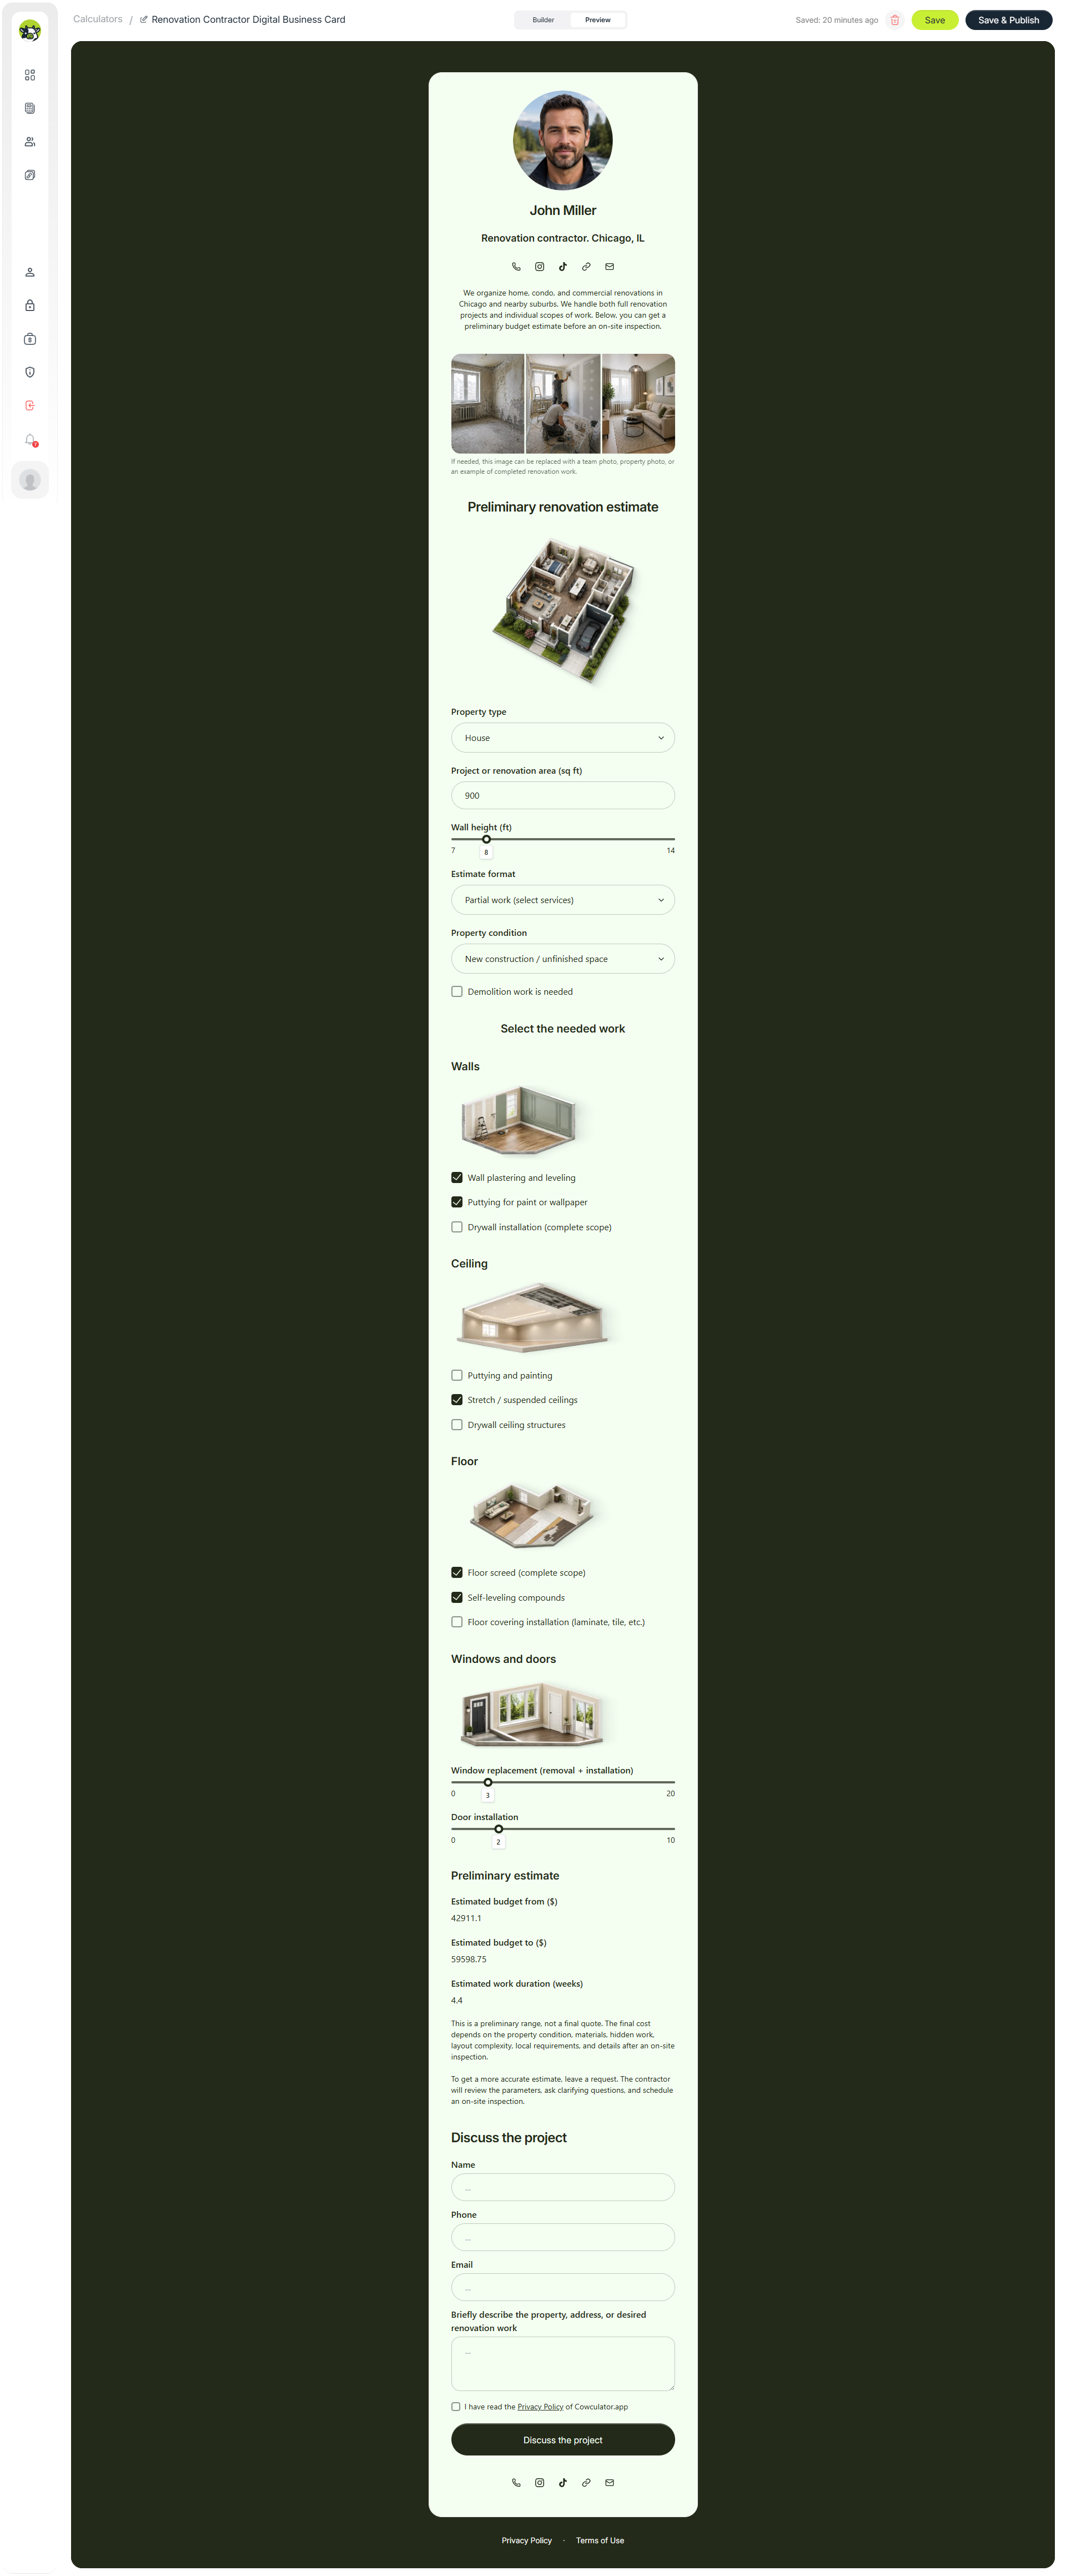
The public page combines the business card, calculator, and lead form.
- Does the full renovation branch work correctly?
- Does the partial works branch work correctly?
- Are the technical fields hidden from the public page?
- Does the result look like a preliminary estimate instead of a final quote?
- Do the social links and lead form work correctly?
10. Publish, create a QR code, and generate deep links
After publishing, Cowculator offers several ways to use the template: a normal shareable link, a QR code, a deep link, and an embed code.

After publishing, Cowculator offers sharing, embed, QR code, and deep link actions.
QR code
A QR code is useful for business cards, printed materials, brochures, project boards, office spaces, or offline campaigns. The customer scans it and lands directly on the public calculator page.
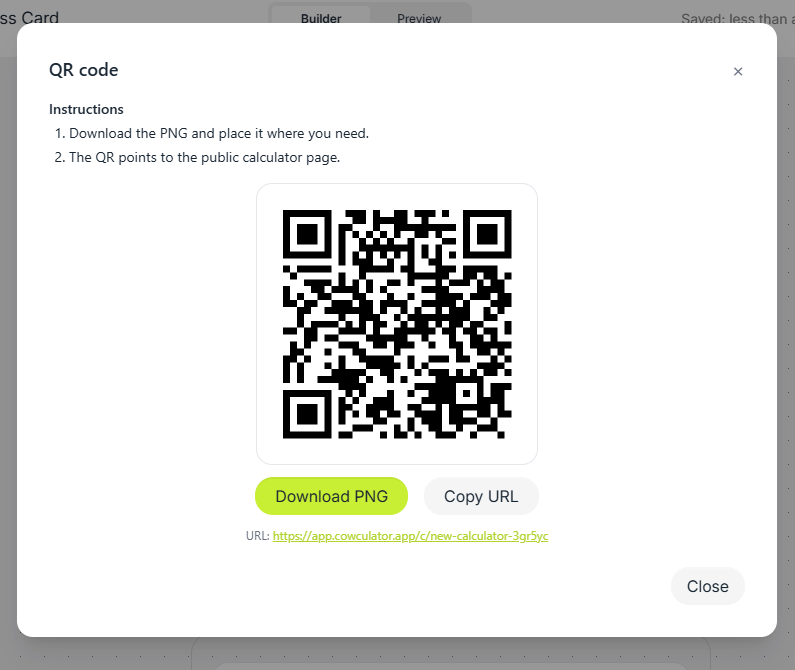
The QR code leads to the public calculator page.
Deep link
A deep link lets you create a URL with prefilled values. For example, you can make one link for apartments, another for houses, or one specifically for full renovation requests.
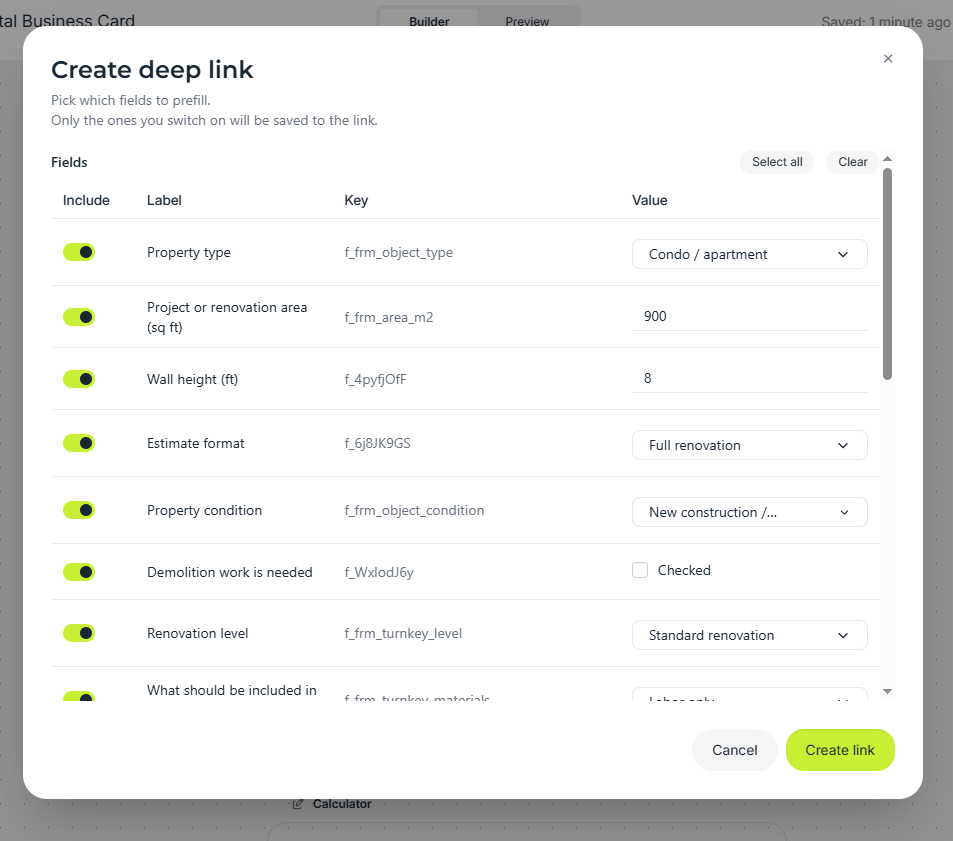
Selecting fields for a prefilled deep link.
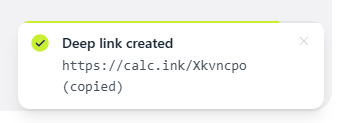
After the deep link is created, Cowculator provides a short shareable URL.
Where to use the link
- Instagram bio or stories
- Telegram, WhatsApp, or direct messages
- Google Ads or Meta Ads
- QR codes on printed materials
- a dedicated page on the renovation company website
How to use this template for SEO and lead generation
The calculator can work as a standalone page, but for SEO it is often better to place it inside a blog post or landing page. Around it, you can explain what affects renovation pricing, why the result is only preliminary, and how users can get a more accurate quote after an on-site visit.
For SEO
The article can target searches such as “renovation cost calculator,” “full renovation estimate,” or “digital business card for contractor.”
For paid traffic
Instead of sending users to a generic lead form, you can send them to a useful tool that gives them a preliminary estimate.
For direct outreach
The contractor can share the link instead of manually asking the same qualification questions in every conversation.
Do not position this type of calculator as a final quote tool without a site visit. The most accurate wording is “preliminary estimate,” “estimated budget,” or “budget range.”
Want a similar calculator for your own business?
You can use this renovation contractor template as a starting point or request free setup. Share your services, pricing logic, and workflow, and we can help adapt the calculator to your business scenario.
FAQ
Can I use this template without a website?
Yes. After publishing, you get a standalone page that you can send to customers, add to your Instagram bio, use in direct messages, in ads, or through a QR code.
Is this a precise renovation quote?
No. This is a preliminary estimate. It helps you show a budget range and collect the lead details before a full property inspection.
Why is a range better than one exact number?
In renovation, the final cost depends on property condition, materials, hidden work, access conditions, and many project details that are impossible to know upfront.
Can I change the formulas for my own pricing?
Yes. In Cowculator, you can edit the rates, multipliers, fields, logic, text, images, currency, and lead form.
Can I create separate links for different scenarios?
Yes. Deep links let you create URLs with prefilled values, for example one for full renovation or one for a specific property type.